Visible engine oil on the air cleaner stud, in the intake manifold, or on the top of the inside of the air cleaner assembly are signs that the CDR valve needs to be cleaned or replaced. Failure to service or replace the CDR valve as necessary increases the risk of a head gasket failure as the engine may be drawing motor oil into the cylinders and burning it. A plume of gray smoke on startup may indicate that an engine is burning oil as the result of a bad CDR valve. Always use a new gasket/grommet whether replacing or cleaning the CDR valve. Since it is difficult to tell whether a valve is good, bad, dirty, or clean, we highly recommend just replacing it as opposed to attempting to revive it.
6.9L & 7.3L IDI CDR Valve Parts List
Part Description |
Part Number(s) |
Remarks/Notes |
Crankcase depression regulator (CDR) valve |
Ford E3TZ-6A665-A |
[1] |
CDR valve gasket for naturally aspirated engine |
--- |
|
CDR valve gasket for factory turbocharged engine |
--- |
[1] Ford lists the CDR valve as an "adapter"; gaskets are sold separately.
6.9L & 7.3L IDI CDR Valve Replacement Procedures
Click any thumbnail image to view fullsize
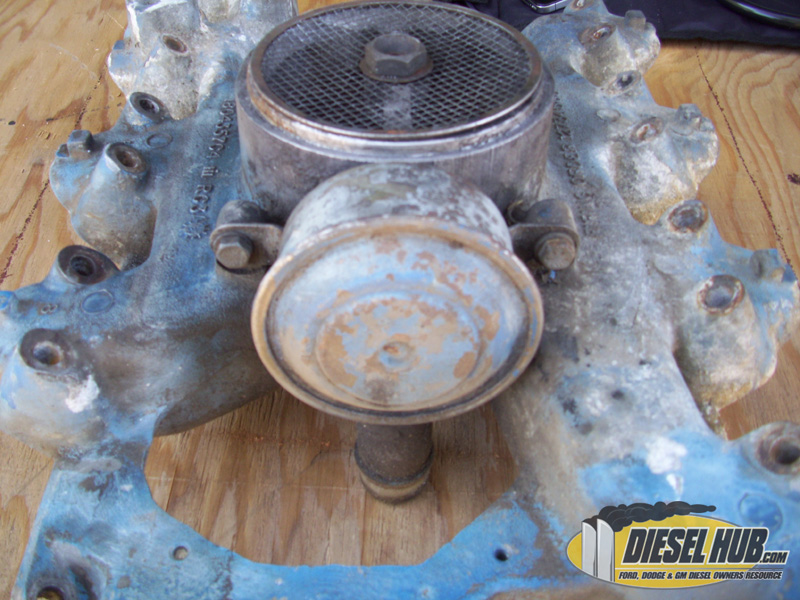
• Remove the air cleaner and you will see the CDR valve attached to the back of the intake manifold.
• The image at left shows what the CDR valve looks like and how it attaches to the manifold. We happened to have a spare laying around, you won't need to remove the entire intake to get to the CDR valve.
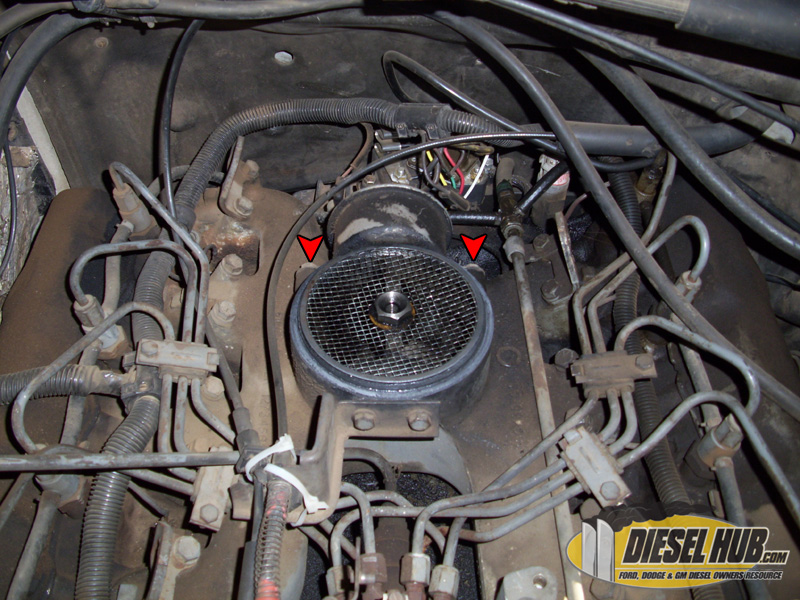
• Use a 1/2" socket to remove the two bolts that secure the CDR to the intake manifold (red arrows in photo). Be careful not to drop any tools or hardware into the engine valley, as fishing it out won't be fun.
• Pull the CDR valve slightly towards the firewall and then pull upwards as you wiggle it side-to-side. It should come out with little effort.

• There's no reason why you shouldn't be able to reuse the tube that connects the CDR to the crankcase. Remove it, clean it, and install a new o-ring onto the replacement CDR before attaching the tube.
• Install the seal that seats betweens the CDR valve and intake manifold, coating it with a light film of fresh motor oil.
• From here, replacement is reverse. Make sure that the CDR valve tube seats properly and that the CDR seal is aligned properly when reinstalling.
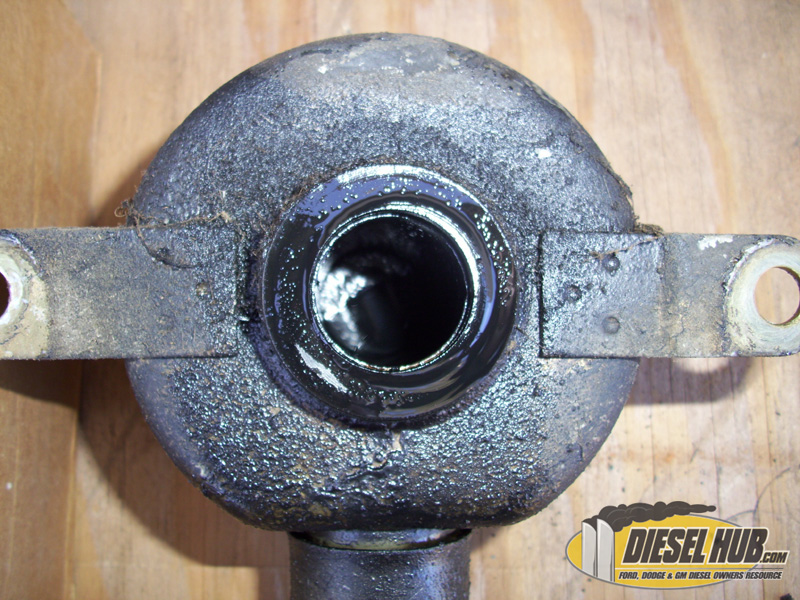
• In the photo to the left, you can see oil pooling up in the CDR valve after removal. This is a good sign that this valve has been allowing excessive engine oil from the crankcase to pass through the intake manifold.
• An alternative to replacing the CDR valve is to lightly clean it with a solvent. Do not allow any solvent to come in contact with the valves seal/o-ring, as it may damage it.