Applicable Models:
1994.5 - 1997 Ford F-250, F-350, F-Super Duty
1999 - 2003 Ford F-250, F-350, F-450, F-550 Super Duty
2000 - 2003 Ford Excursion
1995 - 1999 Ford Econoline E-350
2000 - 2003 Econoline E-350, E-450, E-550
Applicable Engine(s):
7.3 liter Power Stroke V-8 (7.3 DIT)
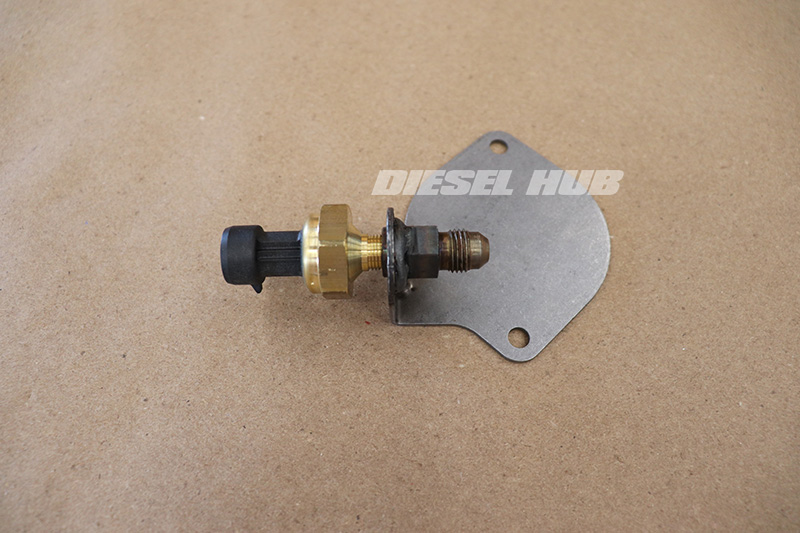
As the name suggests, the exhaust backpressure sensor (EBP sensor) measures pressure in the exhaust system by means of a small metal tube threaded into the passenger side exhaust manifold and the bottom of the sensor itself. Its purpose is to verify the operation of the exhaust backpressure valve (EBP valve), a simple butterfly-type valve mounted at the turbine outlet of the turbocharger. The EBP valve is actuated by a piston system integrated into the pedestal of the turbocharger. A PCM commanded regulator (EBP regulator) controls the flow of lube engine oil into the piston chamber, controlling the position of the valve. The EBP regulator is controlled via a pulse width modulated signal and operates similarly to the IPR valve.
The exhaust backpressure valve is closed when the intake air temperature (IAT) is below 50 °F, the engine oil temperature (EOT) is below 158 °F, and the accelerator pedal is not depressed. Depressing the accelerator pedal will result in the PCM commanding the valve open, but it will close once more so long as these three conditions are met. The EBP sensor uses a 5 volt input and produces a linear output signal. If the EBP signal is lost or found to be out-of-range, the PCM will assume a default value of 43.5 psi and backpressure valve operation will be disabled.
EBP Sensor Diagnostics
Problems with the exhaust backpressure system should be associated with a DTC, but not all DTCs will trigger the MIL/CEL. The following DTCs are associated with the EBP sensor and the related components of this system:
- P0470 - EBP sensor circuit malfunction detected during KOEO self-test
- P0471 - EBP sensor circuit performance out-of-range, measured value does not correspond with expected value under present conditions
- P0472 - EBP sensor low input detected
- P0473 - EBP sensor high input detected
- P0475 - Exhaust backpressure regulator malfunction
- P0476 - Exhaust backpressure control valve performance out-of-range
- P0478 - Excessive EBP measured during normal driving
Diagnostics should begin by obtaining any applicable DTCs. If P0476 and/or P0478 is present, verify that the exhaust backpressure valve moves freely by disconnecting the linkage and operating it by hand. The valve should move with little effort and reach the fully open and closed positions (there are approximately 90° of movement between the open and closed positions).
If P0470, P0471, P0472, and/or P0473 is present, remove the EBP sensor connector and verify there are no loose pins, corrosion, etc. With an electronic diagnostic tool (scantool), verify that the EBP PID is as expected KOEO. With the engine off EBP should read atmospheric pressure (equal to the BARO PID), or approximately 14.7 psi at sea level. If there is a significant difference between BARO and EBP, replace the EBP sensor.
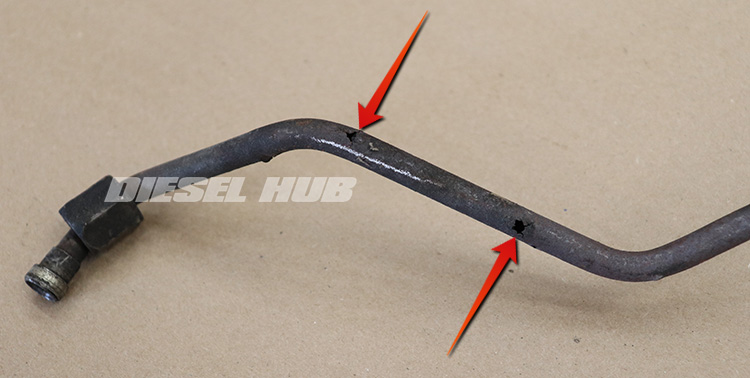
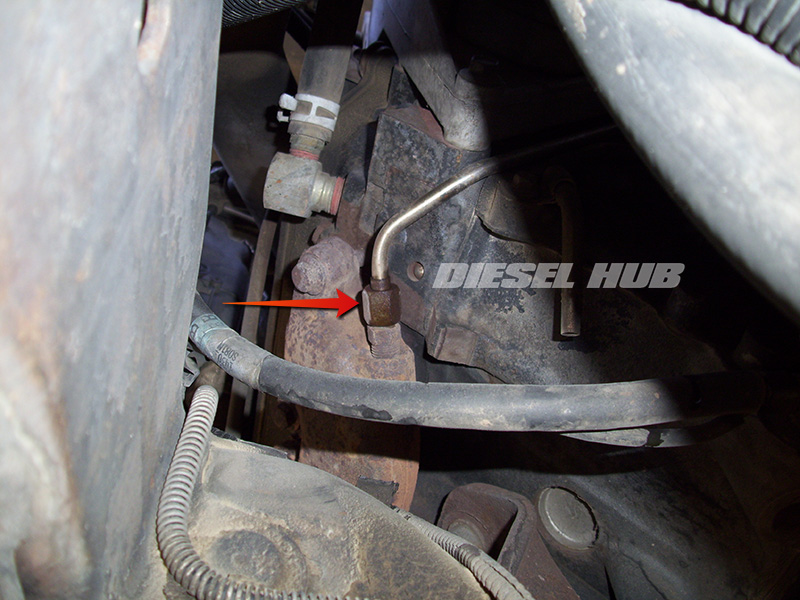
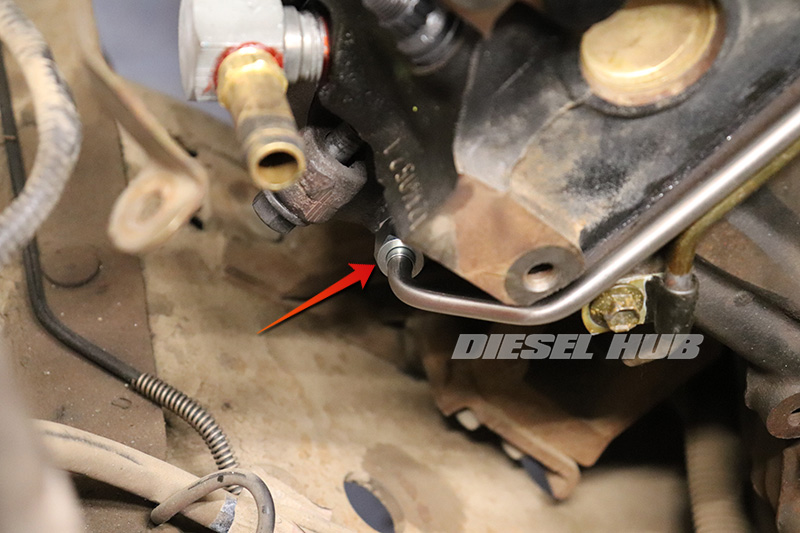
If EBP and BARO readings are reasonably equivalent, start the engine and verify that the EBP value increases. If EBP continues to read BARO with the engine running, verify that the EBP sensor tube is not clogged or damaged. The metal tubes are prone to corrosion and soot blockage. In fact, it is good practice to thoroughly clean or replace the tube when the sensor is replaced. Figure 1 below identifies a severely corroded tube, which is a more common occurrence than one might expect.
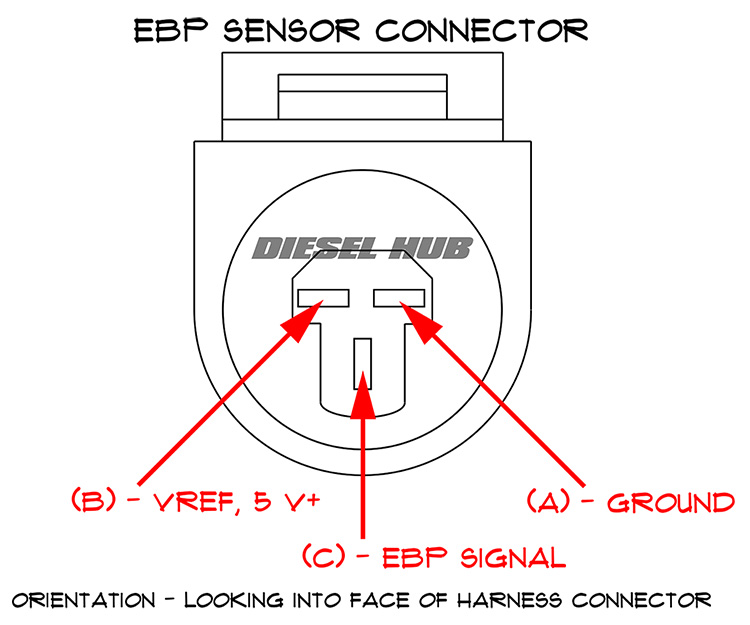
If P0472 is present, verify that there is not a short between signal return and ground or an open reference signal (VREF). Refer to figure 2 below for the connector pinout diagram. VREF (terminal B) should measure 5 volts+ to ground KOEO. The sensor signal (terminal C) is dependent on pressure and should read approximately 0.9 volts to ground at 14.7 psi (sea level) KOEO. Terminal A is the sensor ground and is typically referred to as the signal return.
EBP Sensor & Related Parts
| Component | Application(s) | Part Number(s) |
|---|---|---|
| Exhaust backpressure sensor | 1994 - 1996 E/F-Series [1] | Ford 1C3Z-9J460-A |
| 1997 - 2003 E/F-Series, Excursion | Motorcraft DPFE-3 Ford 4C3Z-9J460-B |
|
| Exhaust backpressure sensor bracket | 1999 - 2003 E/F-Series, Excursion | Ford F81Z-9J432-AA |
| EBP bracket RTV sealant [2] | 1999 - 2003 E/F-Series, Excursion | Motorcraft TA-31 |
| Exhaust backpressure sensor tube | 1994 - early 1997 E/F-Series [3] | Ford F4TZ-9D477-A |
| 1998 E-Series [4] | Ford F7TZ-9D477-AA | |
| 1999 - 2003 E/F-Series, Excursion | Ford 1C3Z-9D477-AA | |
| EBP tube manifold fitting | All | Ford 3C3Z-9F485-BA Dieselply DP-120501 |
| EBP sensor connector | All | Ford AU2Z-14S411-LB |
[1] - Engines built on or before 3/12/1996
[2] - Any oil safe RTV silicon sealant will suffice; Motorcraft sealant is far superior to popular alternatives common at auto part stores
[3] - Engines built on or before 5/12/1997
[4] - E-Series vans only, engines built after 5/12/1997
How to Replace the EBP Sensor on a 7.3 Power Stroke Engine
Click any thumbnail to view fullsize, detailed image
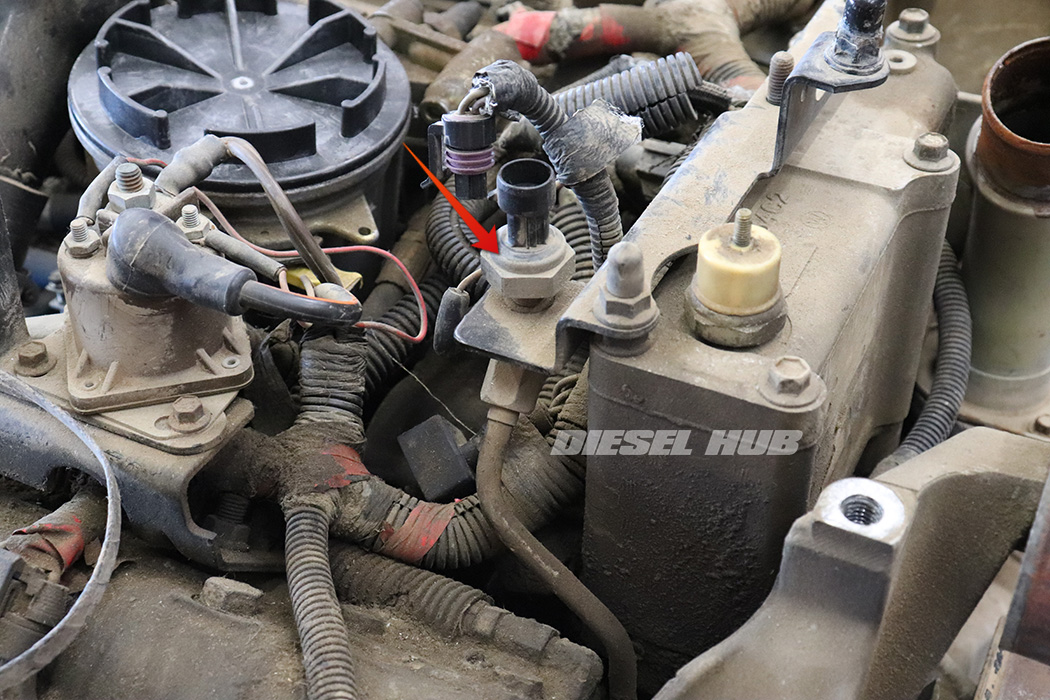
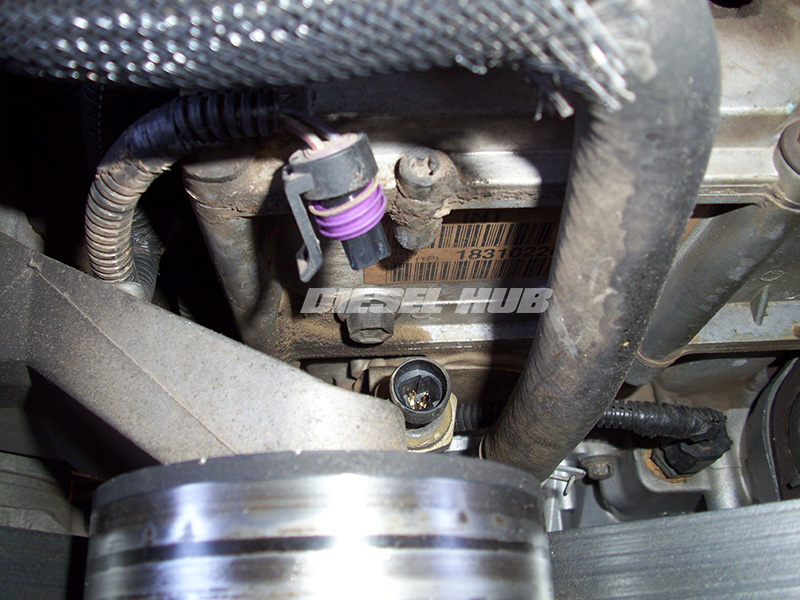
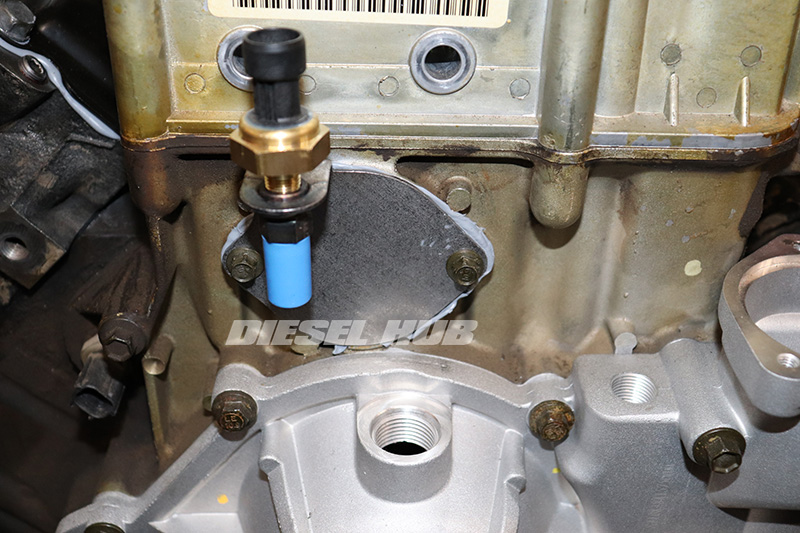
- On early 7.3 Power Stroke engines, the EBP sensor is located just behind the passenger side corner of the high pressure oil pump reservoir. The mounting bracket is mounted to the top of the high pressure oil pump reservoir.
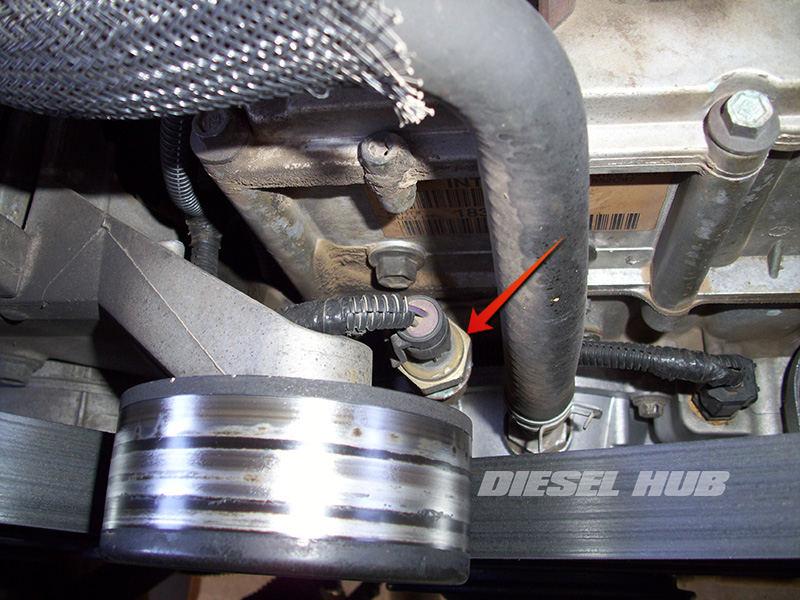
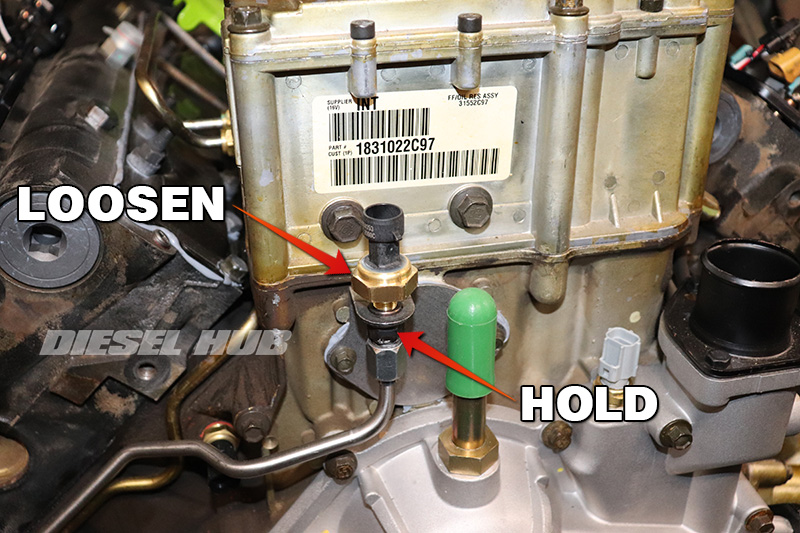
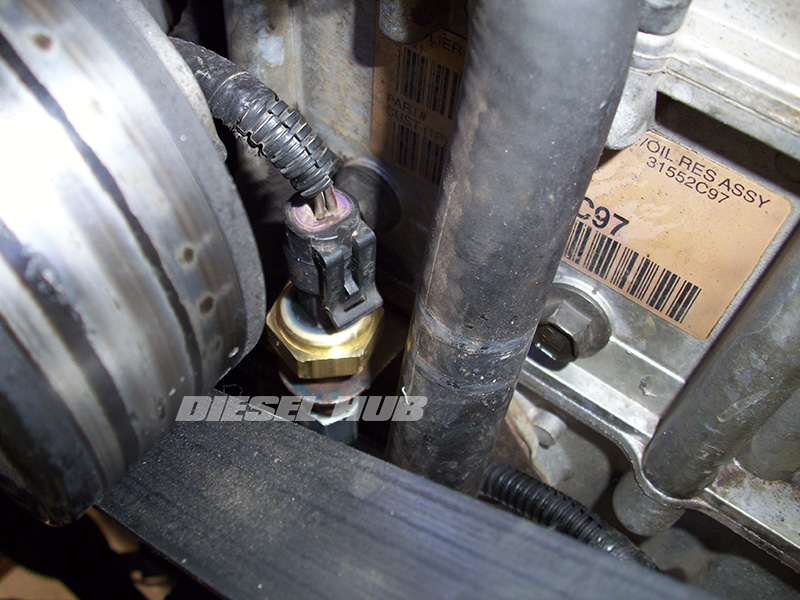
- On later 7.3 Power Stroke engines, the EBP sensor is located just in front of the high pressure oil pump reservoir, towards the passenger side. The mounting bracket is incorporated into the high pressure oil pump drive gear access cover (one assembly).
- Disconnect both negative battery cables.
- If applicable, remove the plastic engine cover.
- Remove the electrical connector from the EBP sensor by relieving the locking tab and pulling the connector body away from the sensor.
- Inspect the connector for damage; replace as necessary.
- Secure the connector away from the sensor so that it does not become pinched.
- For early engines, remove the EBP sensor with a 1 inch deep socket.
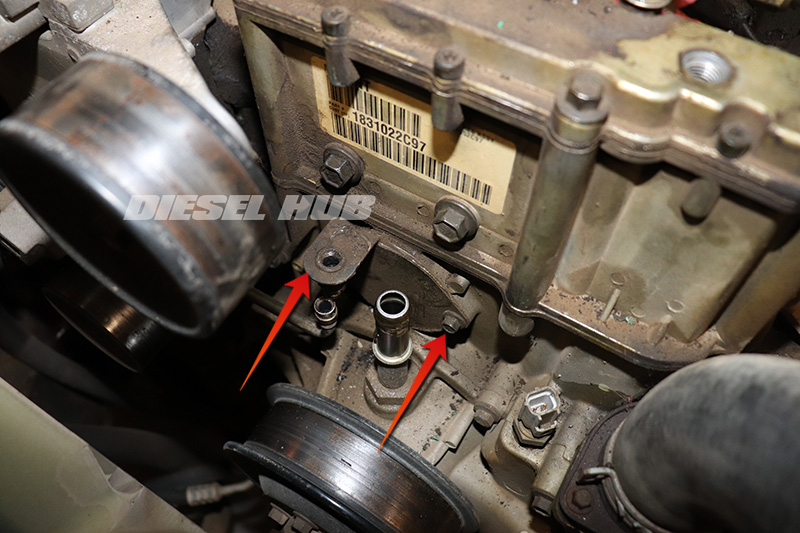
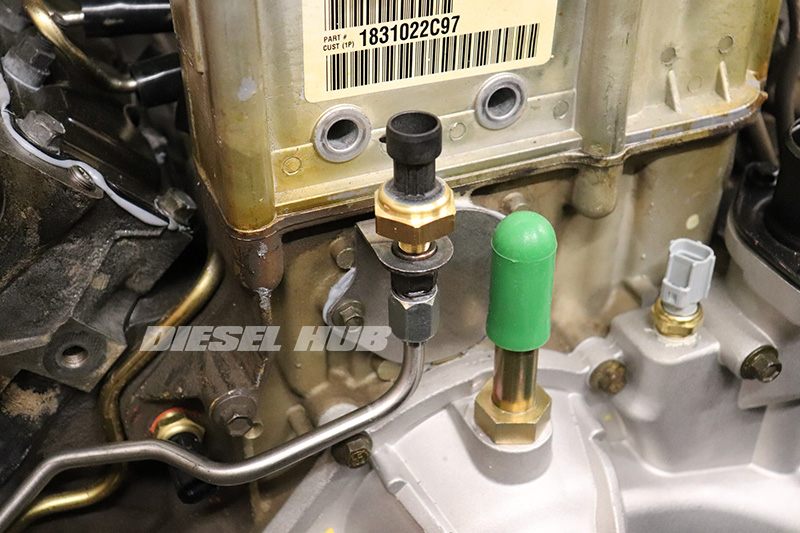
- For late engines (bracket in front of HPOP reservoir), firmly hold the nut beneath the EBP sensor threads that is an integral part of the bracket (does not rotate, refer to image) with a 9/16 inch wrench or crows foot, then remove the sensor with a 1 inch deep socket.
- Failure to secure the bracket via the 9/16 inch nut will result in bending and warping of the bracket, which is likely to cause oil to leak from the reservoir. If necessary, refer to bracket replacement information in the subsection below.

- Remove the EBP sensor tube fitting from the bracket.
- On early engines, loosen with a 5/8 inch wrench.
- On late engines, loosen with a 5/8 inch crows foot while once again securing the bracket with a 9/16 inch wrench.
- Trace the EBP sensor tube to the passenger side exhaust manifold.
- Loosen the EBP sensor tube at the exhaust manifold with a 5/8 wrench/flare nut wrench, then completely unthread to remove.
- Inspect the EBP sensor tube and exhaust manifold fittings for corrosion/heat damage; replace components as necessary.
- Thoroughly clean the inside the EBP sensor tube using compressed air and/or a solvent (i.e. brake cleaner, carb & choke cleaner, etc) as necessary.
- Reinstall the sensor and tube in reverse order. If the EBPS bracket on late engines is bent or needs to be resealed, refer to the additional procedures below for replacement guidance.
Bracket Replacement (Reseal)

- Drain the radiator completely. The drain valve is located on the lower corner of the radiator.
- Engine coolant that is collected in clean containers can be reused if it is in good condition.
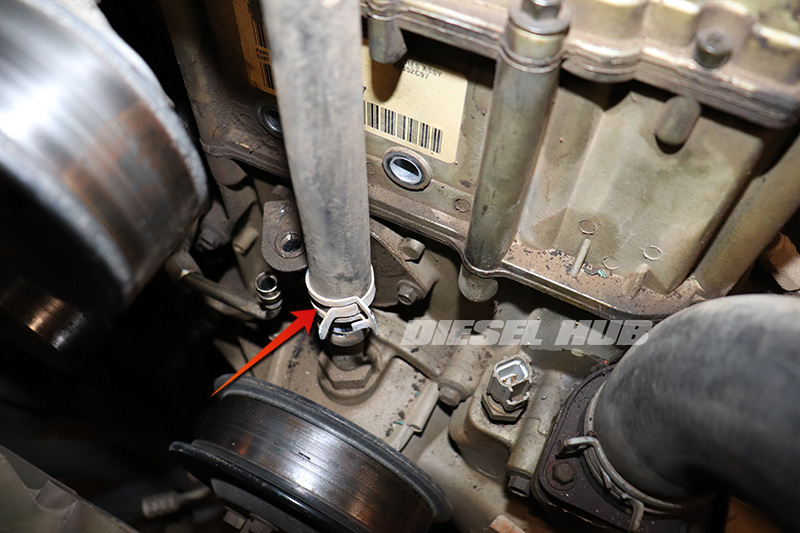
- Disconnect the heater hose from the fitting at the top of the water pump (pictured).
- Optional - remove the hose fitting pointing straight up out of the water pump (1 inch crowfoot wrench). It is significantly easier to clean the sealing surface of the HPOP reservoir with this fitting removed.
- Remove the (2) EBP sensor bracket mounting bolts with a 10 mm socket.
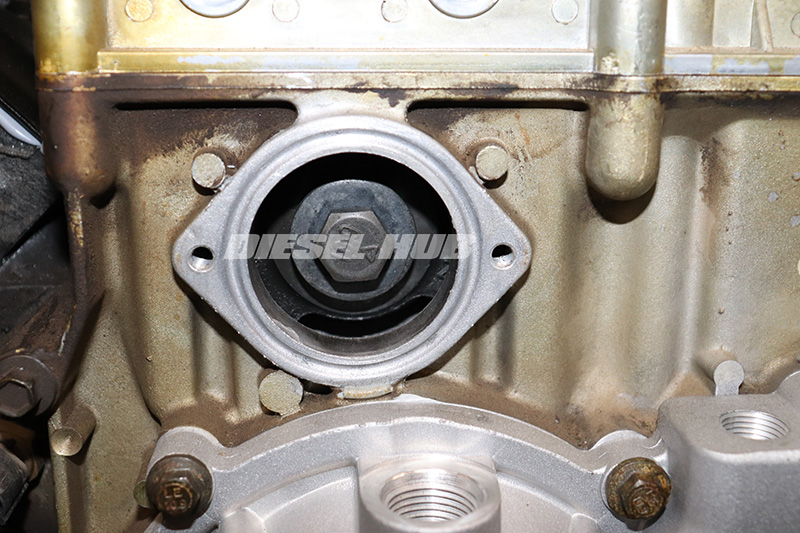
- Thoroughly clean the access cover mounting surface, removing all remnants of the old silicon sealant without allowing debris to infiltrate the crankcase.
- Degrease the sealing surface after all the old sealant has been removed.
- If reusing, thoroughly clean the sealing surface of the old bracket.
- Install the EBP sensor into the threaded bracket fitting; it is easier to do now than with the bracket installed and the opportunity to bend the bracket will be avoided.
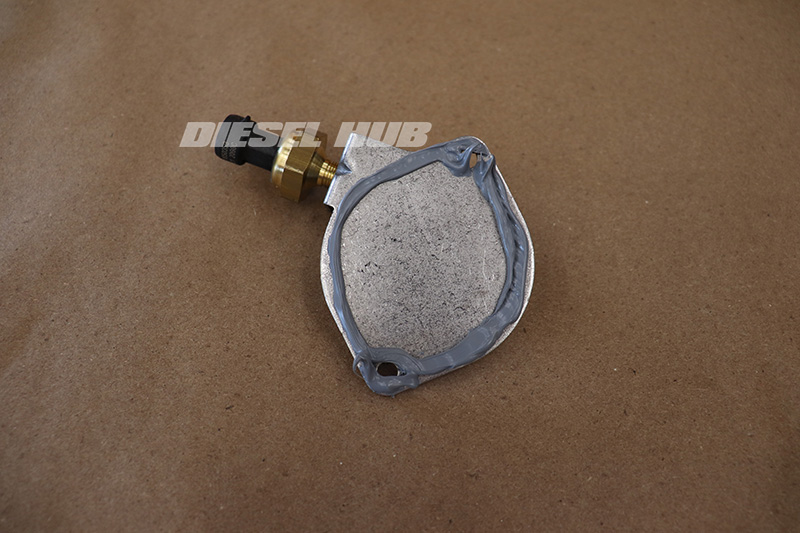
- Apply a thin bead of silicon sealant to the mating surface of the access cover/bracket. Recommend Motorcraft TA-31 RTV silicon, Ford's long lasting sealant that is used throughout the 7.3 Power Stroke engine.
- Install the access cover/EBP sensor bracket. Snug the mounting bolts in an alternating fashion, then torque to 20 ft-lbs.
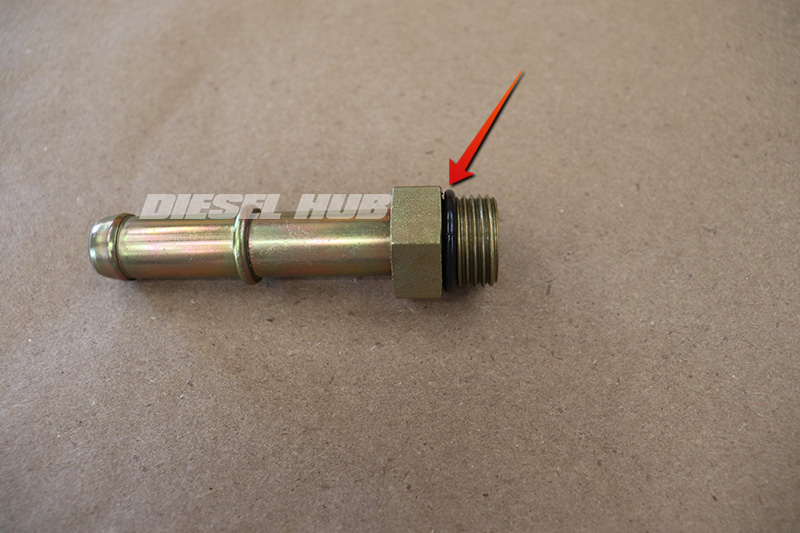
- If removed, replace the o-ring on the water pump fitting (-116, 3/32 inch thickness). Lightly lubricate the o-ring with silicon grease (i.e. dielectric).
- Install the EBP tube finger tight at the passenger side cylinder head.
- Install the EBP tube finger tight at the EBP sensor.
- Allow the sealant to cure for at least 24 hours.
- Snug down the EBP tube fittings at both ends; do not forget to firmly hold the bracket with a 9/16 inch wrench.
- Reinstall the water pump fitting, ensuring the o-ring is seated snug.
- Reinstall any remaining components in reverse order and refill the cooling system.
