Ford 4R100 Transmission Service Parts List
Part Description |
Part Number(s) |
Remarks/Notes |
Automatic transmission fluid |
[1] |
|
Automotive transmission filter |
Ford YC3Z-7A098-BA |
--- |
Transmission pan drain plug |
--- |
|
Transmission pan gasket |
--- |
|
Transmission fluid dipstick |
--- |
[1] MERCON V replaces original, now defunct MERCON ATF specification.
Ford 4R100 Transmission Service Procedures (1999 - 2003 Ford Super Duty)
Click any thumbnail to view fullsize, detailed image
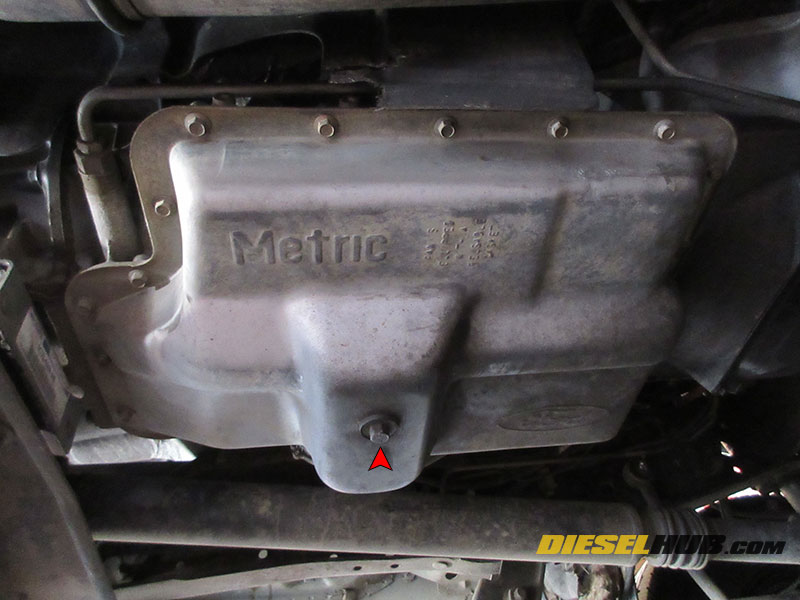
• Place a suitable container beneath the transmission pan (note - though the transmission fluid capacity is ~17 quarts, only about half of the ATF fluid capacity will be drained after removing the pan).
• Remove the transmission pan drain plug with a 13 mm socket and allow the pan to drain completely.
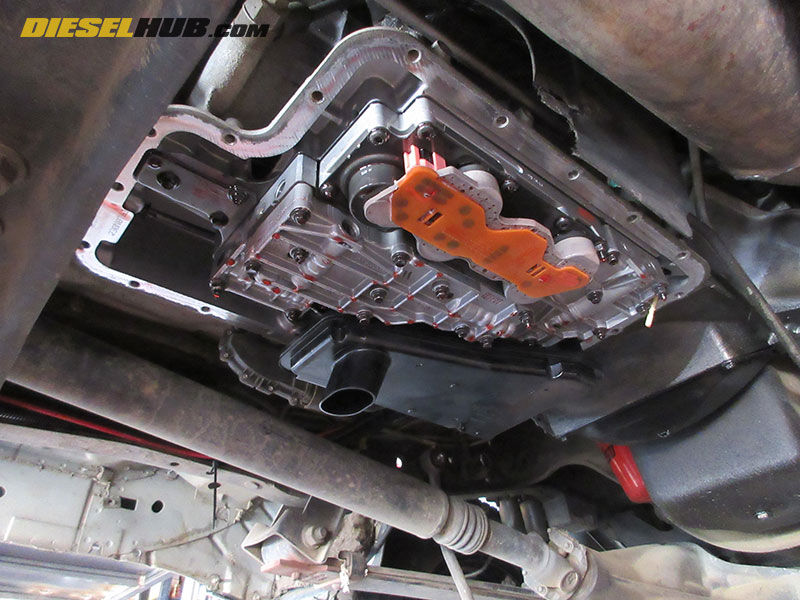
• Remove the (20) transmission pan mounting bolts with a 10 mm socket, then lower the transmission pan and set aside.

• Remove the transmission filter by pulling straight down on the filter neck while rotating it side-to-side slightly.
Note - transmission fluid will continue to drip after the pan is removed and a significant amount may flow out of the filter when it is removed. It may be beneficial to allow the transmission to drip-drain for 30 minutes before removing the transmission fluid filter.
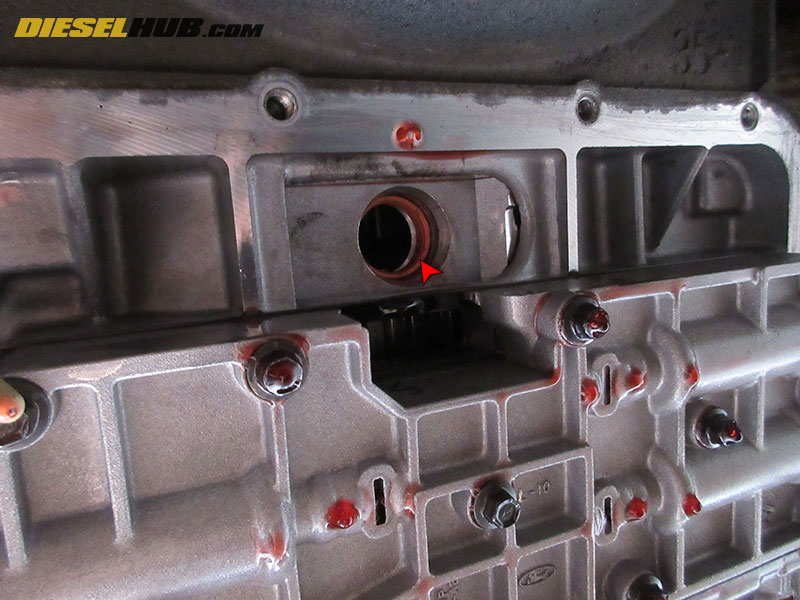
• Verify that the transmission o-ring/gasket was removed with the filter and that the mounting hole/surface is clean of debris or remnants. It is very common for the o-ring to stick in the mounting hole.
• Lubricate the new transmission filter o-ring seal with clean automatic transmission fluid, then install in reverse order. Ensure that the filter seats properly and completely.
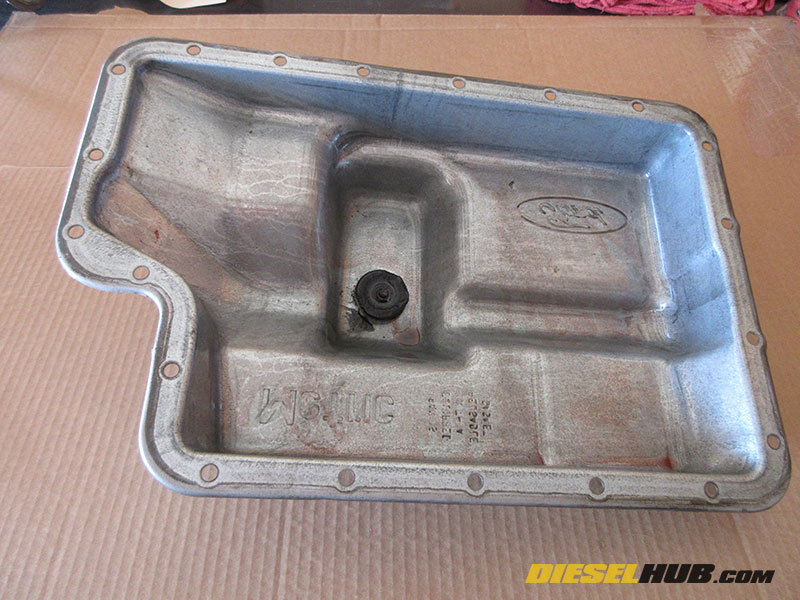
• Thoroughly clean the transmission fluid pan, removing any and all debris. A mild solvent (brake cleaner, for example), should be used to clean the gasket flange. If pieces of the gasket stuck to the transmission pan mounting flange, replace the gasket as it is likely compromised.
• If the transmission pan gasket is being reused, wipe it clean with a lint free cloth; do not clean with solvent.

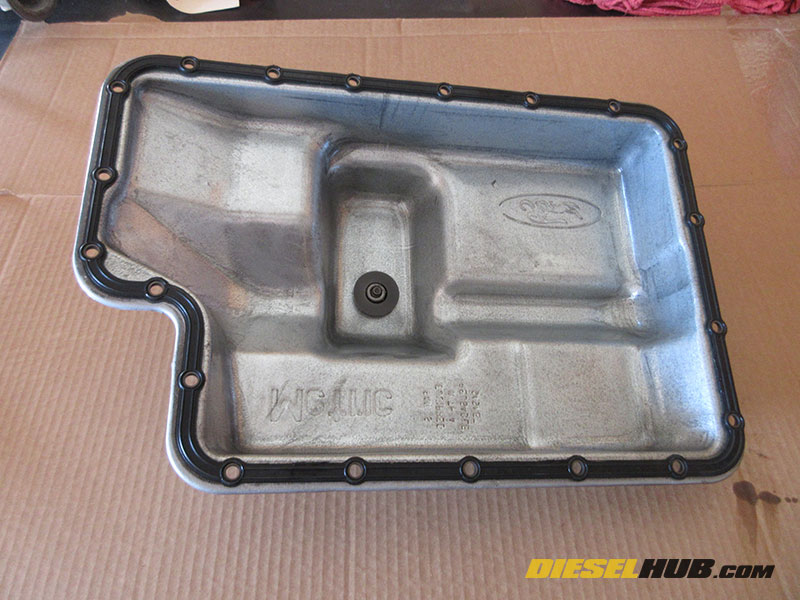
• Thoroughly clean all clutch material/metallic debris from the magnet in the sump of the transmission pan. The magnet is removable and only held in place by magnetic force.
• Thoroughly clean the drain plug, then reinstall but do not torque down.
• Set the gasket onto the transmission oil pan mounting flange in the correct orientation, then reinstall the transmission pan.
• Install all transmission pan bolts snug, then torque to 10 to 12 ft-lbs in a criss-cross or alternating fashion.
• Tighten the transmission pan drain plug snug; do not overtighten.

• Add new ATF through the transmission dipstick tube. Check the fluid level frequently and stop once it reaches the appropriate dipstick indicator marks.
• Start engine and cycle the transmission through all positions. Drive truck forward and backwards several times, then re-check transmission fluid level.
• Test drive vehicle and allow transmission to reach operating temperature. Re-check fluid level and adjust as necessary. Check for leaks around the transmission pan.