Applicable Models:
2003 - 2010 Ford F-250, F-350, F-450, F-550 Super Duty
Applicable Engine(s):
6.0L Power Stroke diesel, 6.4L Power Stroke diesel
Applicable Transmission(s):
Ford Motor Company 5R110W TorqShift five speed automatic
Transmission Service Intervals:
Replace transmission fluid and filters every 30,000 miles
The 5R110W TorqShift automatic transmission was introduced alongside the 6.0L Power Stroke for the 2003 model year. In order to maximize transmission longevity, Ford recommends a full service every 30,000 miles. This includes replacing the fluid and both the pan and external transmission filters. MERCON SP is the only acceptable ATF to be used in this transmission, and use of any of any other fluid spec is ill-advised.
Associated Parts List
| Part Description | Part Number(s) | Remarks/Notes | |
| Internal transmission filter | 6.0L Power Stroke | Motorcraft FT-144 | [1] |
| 6.4L Power Stroke | Motorcraft FT-180 | ||
| External transmission filter | Motorcraft FT-145 Ford 3C3Z-7B155-BA |
[2] | |
| Transmission pan gasket | Ford F6TZ-7A191-A | [3] | |
| Automatic transmission fluid (ATF) | Ford MERCON SP ATF | [4] | |
| Transmission pan bolts | N/A, see footnote | [5] | |
[1] Internal filter requires transmission pan removal to access.
[2] External/auxiliary filter located near ATF cooler on passenger side frame rail.
[3] Gasket is reusable; replace if dry, cracked, or damaged.
[4] Use only MERCON SP only; do not substitute with "universal" ATF or any alternative MERCON fluid.
[5] M8 x 1.25 x 14mm long flange bolt, class 9.8, replace as required.
Super Duty 5R110W Transmission Service Procedures
There are many different procedures for servicing an automatic transmission, including the popular (and sometimes controversial) power flush method. The method described herein is favorable for the DIYer and requires no special equipment. For all intents and purposes, these service procedures are sufficient in maximizing the performance and longevity of the 5R110W TorqShift transmission. Ford specifies that the transmission be serviced every 30,000 miles regardless of the type of driving. Failure to follow the manufacturer's recommendations may decrease transmission life significantly.
Click any thumbnail image to view fullsize
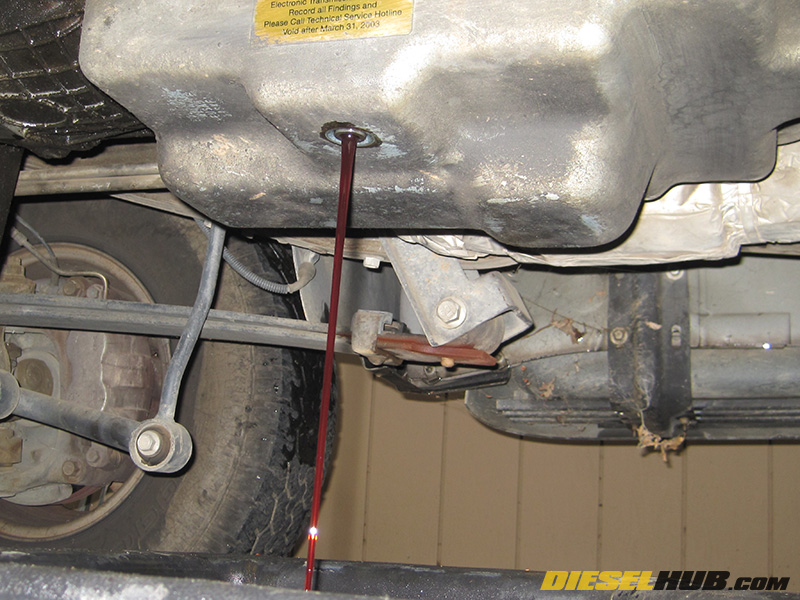
• Place an oil drain container beneath the fluid pan of the transmission.
• Remove the transmission pan fluid drain plug using a 13mm socket and allow the fluid to drain completely, then replace the plug.
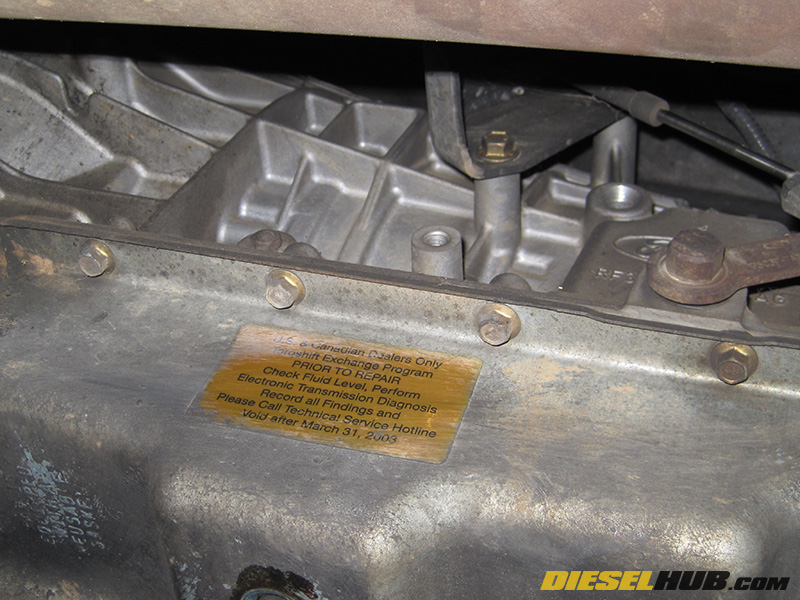
• The transmission fluid pan is secured in place with 20 fasteners. The bolts are all identical and require a 10mm socket.
• Remove 18 of the 20 transmission pan bolts, leaving a bolt on both the driver and passenger side of the transmission (opposing sides). You'll need various extensions and a swivel joint attachment in order to access the rear pan bolts.
• While holding the pan against the transmission, remove the last 2 bolts and carefully lower the pan. The pan will retain a small amount of ATF, which should be emptied into catch container.

• Remove the large pan filter assembly by pulling downwards with a slight side-to-side rocking motion.

• The transmission pan filter gasket tends to stick inside the filter orifice. Check to ensure that the gasket/o-ring was removed with the filter. If it is stuck in the orifice, carefully remove it with a small pick or screwdriver.
• Install a new transmission pan filter in the reverse manner it was removed. Lightly coat the gasket with fresh ATF to ensure a smooth installation and proper seal.
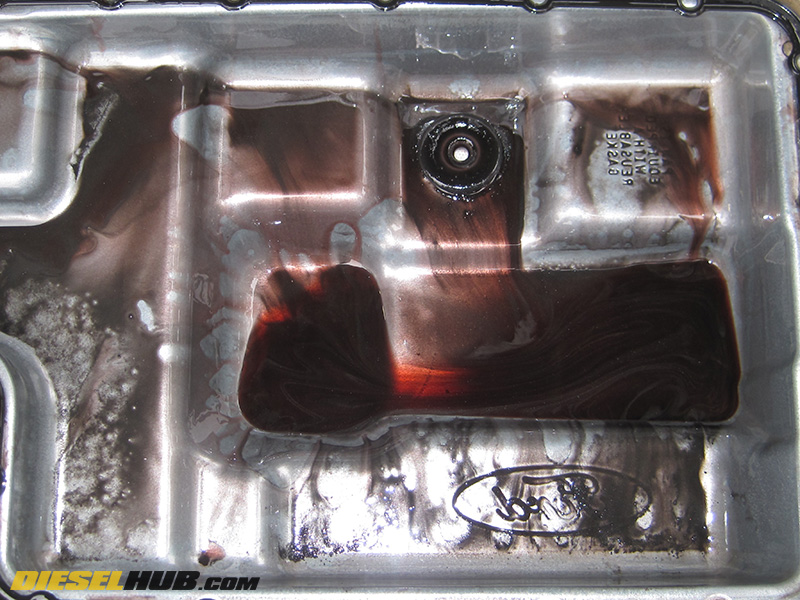
• Remove and completely clean the internal magnet sitting above the transmission pan drain plug. Excessive clutch material and/or shiny material in the transmission pan indicates that it has not been serviced properly and/or the transmission may have a problem. Large metal filings or chunks of metal debris is indicative of serious part failures - have the transmission tested and inspected by a professional.
• Completely clean the inside of the transmission drain pan, removing all remnants of the old fluid. Reinstall the magnet, clean the gasket mounting surface on the pan, then reinstall the pan on the transmission. The pan gasket can be cleaned and reused so long as it has not cracks or signs of deterioration. Torque the 20 pan bolts to 11 ft-lbs.
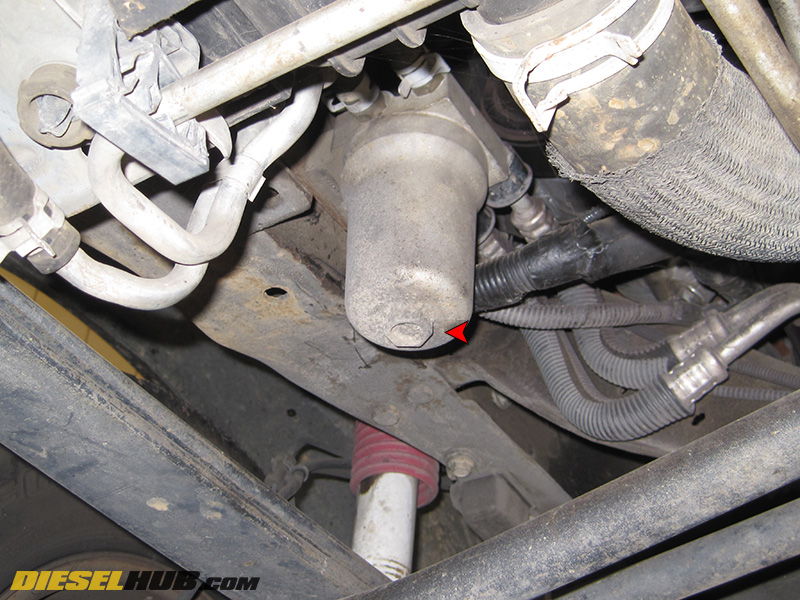
• The external transmission filter is located inside the frame rails on the passenger side of the truck (crawl under front passenger side of truck and look above leaf springs/behind the radiator).
• Place an oil drain pan below the filter housing, then remove the external transmission filter using a 22mm socket.
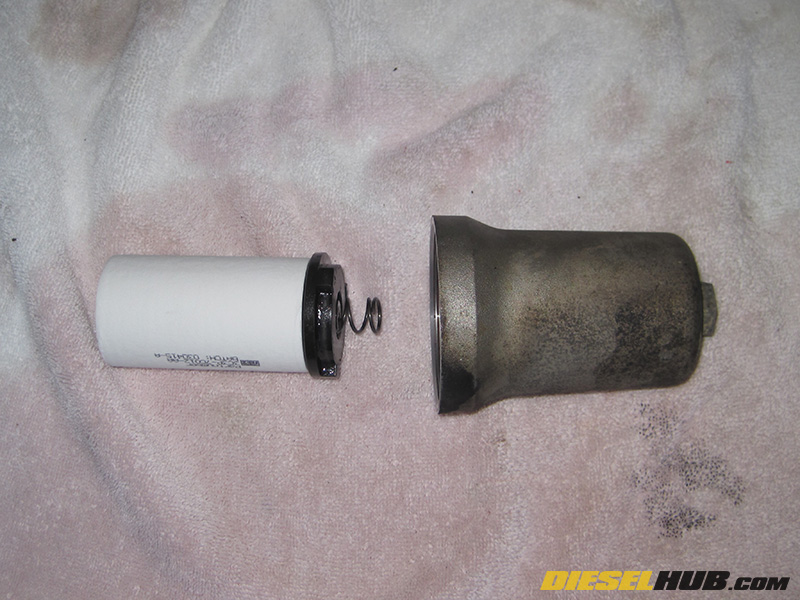
• Remove and discard the external transmission filter housing o-ring/gasket.
• Separate the old transmission filter and the spring loaded magnetic base. Discard the used filter; it should be treated as an oil filter and appropriately recycled.
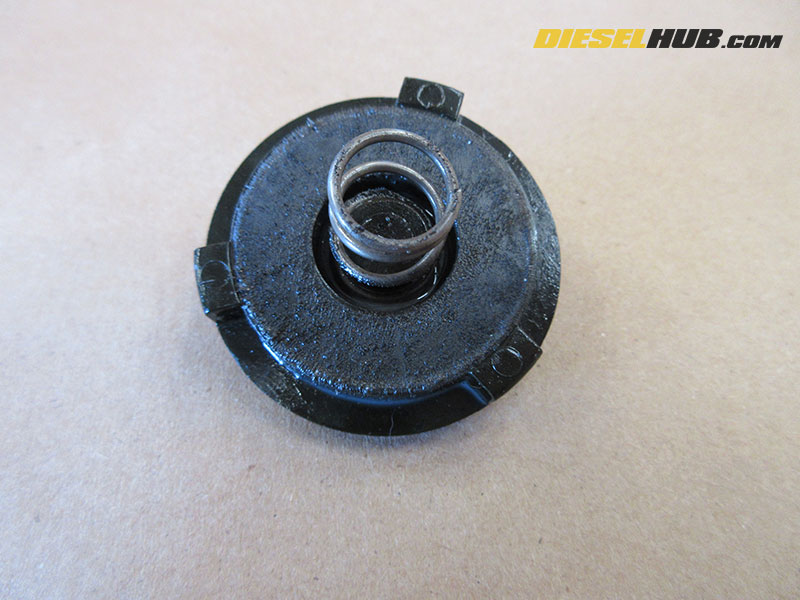
• Thoroughly clean both sides of the magnet, removing all metallic debris that it has collected. The magnet is encased in a plastic housing, so do not use harsh solvents to clean it (i.e. brake cleaner, carb cleaner) as it will damage the plastic.
• Apply a light coating of ATF to the new filter o-ring/gasket, then install it in place.
• Attach the magnetic filter base to the new transmission filter. The nipple on the base inserts into the filter element (top and bottom of the filter element are identical) and then the assembly installs into the housing with the spring seating into the indentation on the bottom of the housing.
• Reinstall the external filter assembly.
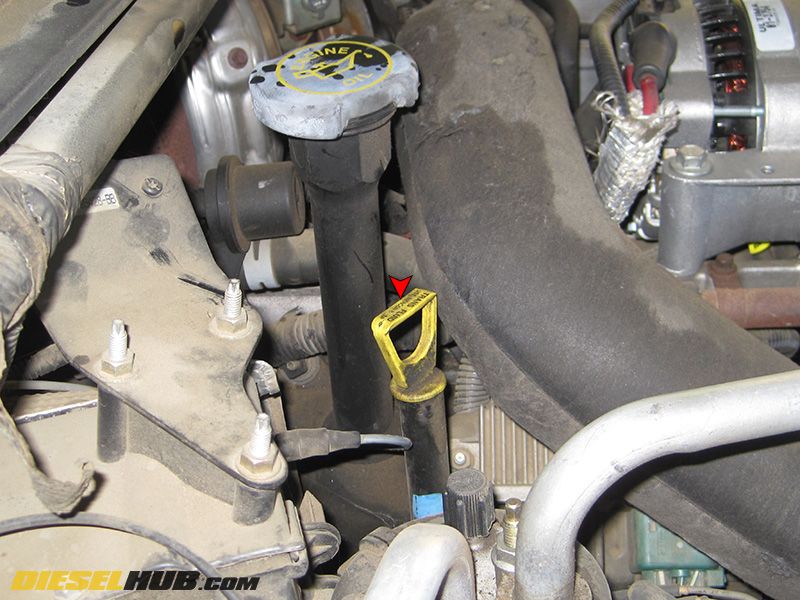
• Remove the transmission dipstick and add MERCON SP ATF until the fluid level reaches the cold fill indication zone on the transmission dipstick. If possible, you can remove much of the guesswork out of refilling the transmission by measuring the amount of fluid removed.
• Once the transmission fluid level reads full, start and allow the truck to run for 2-3 minutes. Check transmission fluid level and add as necessary. Check for leaks around the transmission pan and external filter housing.
• Drive the truck and allow both the engine and transmission to reach full operating temperature, then check fluid once more and add as necessary.
• If the transmission has not been properly serviced in the past, we recommend draining the fluid (without removing the transmission pan) and refilling it once more after a few drive cycles. It is impossible to drain 100% of the transmission fluid with this technique, but repeating the drain and fill process replenishes the fluid supply with fresh ATF.
