7.3L IDI Glow Plug Controller/Module Parts List
| Part Description | Part Number(s) | Remarks/Notes |
| Glow plug relay | Motorcraft DY861 | [1] |
| Glow plug controller (module) | Ford E7TZ-12B533-A | [2] |
| Glow plug | Motorcraft ZD9 Ford F2TZ-12A342-A |
[3] |
[1] Relay only. mounts to top of glow plug controller/module.
[2] Includes glow plug relay.
[3] Recommend using factory Motorcraft replacement glow plugs; aftermarket glow plugs known to swell.
The glow plug relay is the less expensive item, so it's not a bad idea to replace it alone and see if it fixes the problem. If the glow plug system continues to malfunction, replace the entire controller. Also check for loose wires, shorts, and make sure the system has a good ground before replacing the controller, which is a relatively expensive item. After replacing the controller, it is recommended that the glow plugs be replaced as well.
7.3L IDI Glow Plug Controller Replacement Procedures
Click any thumbnail image to view fullsize
• Disconnect the negative battery cables from both batteries.
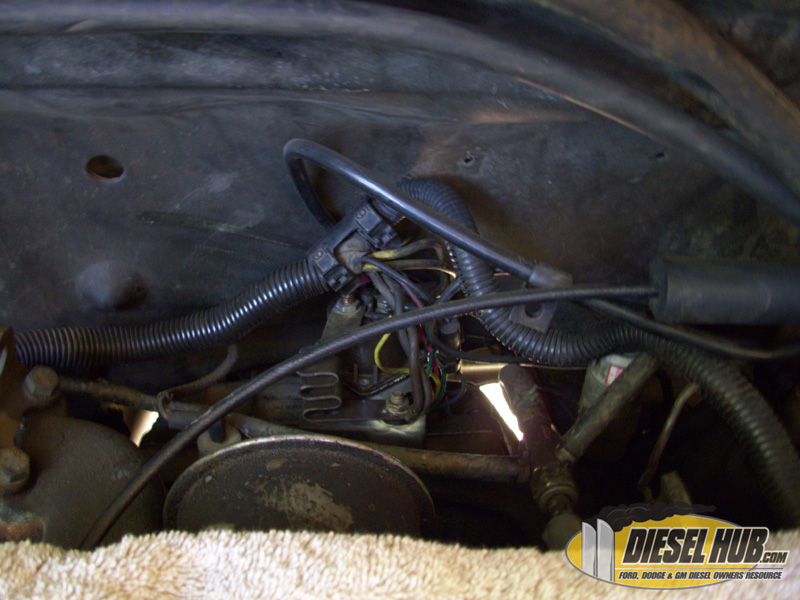
• On naturally aspirated engines, the glow plug controller is mounted to the rear of the intake manifold directly behind the CDR valve. On turbocharged IDI engines, the controller is mounted to the passenger side valve cover. Remove the air cleaner and place a clean rag over the intake.
• Disconnect the connector for the wait-to-start light (blue wire) and remove the bolt that grounds the controller to the engine block.
• Remove the nuts from the terminals on the glow plug relay for the two large yellow wires and small red wire that connect to the electrical harness.
• Remove the nut from the stud at the tip of the busbar and then the two brown wires that lead to the glow plug harness.
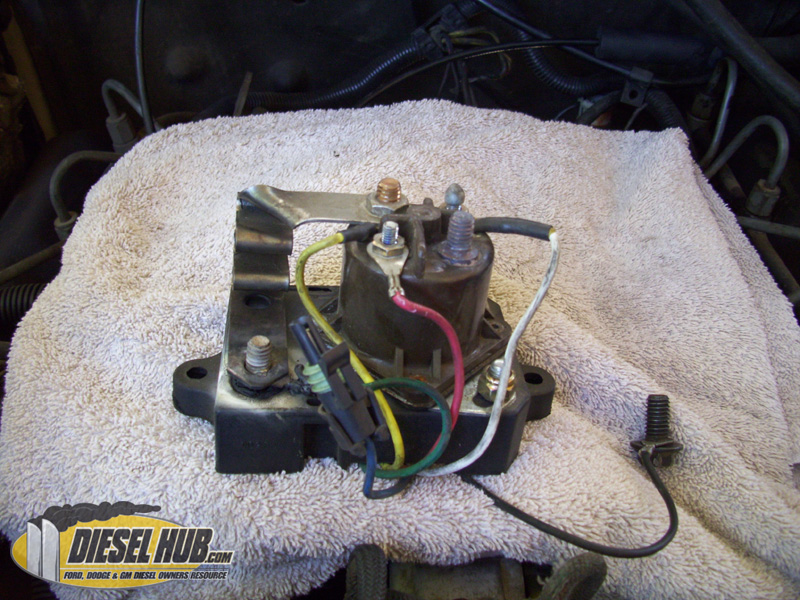
• At this stage, all wires that lead to the electrical/glow plug harness should be disconnected from the glow plug relay/controller, but there should be several wires that still connect the glow plug relay to the controller itself - these don't need to be removed.
• Extract the glow plug controller by removing the two bolts that attach it to the intake manifold.
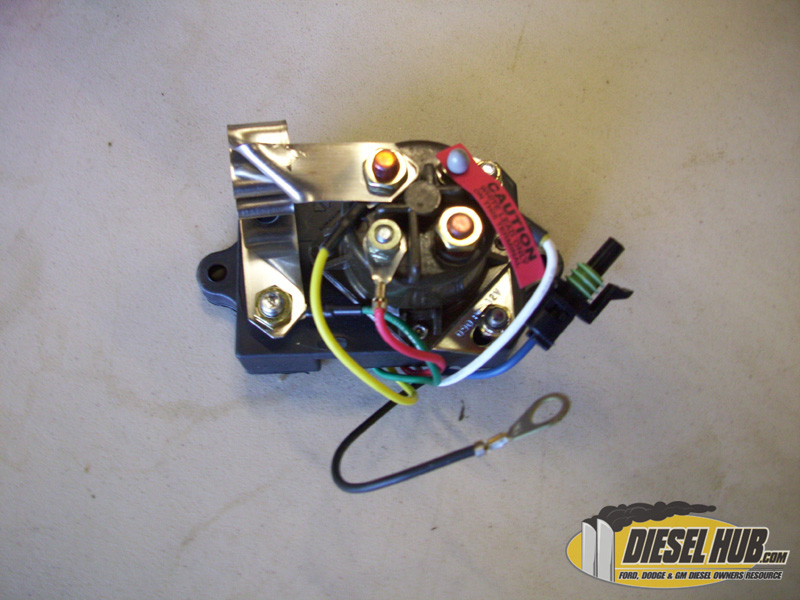
• If you are just replacing the relay, remove the remaining wires after you have written down or marked the terminals in which they belong, then replace the old relay with your new one, double checking that all wires are hooked up properly (see diagram below if in doubt).
• If you are replacing the entire controller, install it in the reverse manner that the old was removed.
7.3L IDI Glow Plug Controller/Relay Diagram
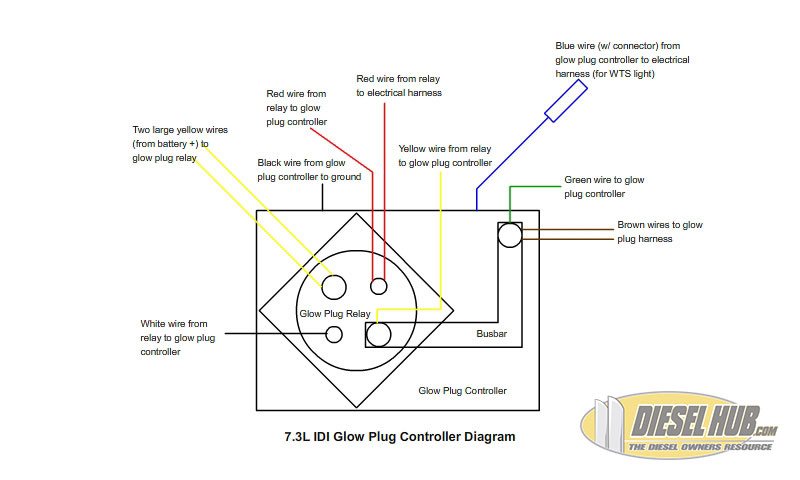
• The image at left is a diagram for the glow plug controller and relay. Check, double check, and triple check that your wires are installed correctly, as you may damage the controller if anything is not installed correctly.
• Do not rely on this diagram alone - in the event that the truck has been worked on previously, some wires may have been replaced with different colored ones. Make your own diagram, and use this one as a reference to that.
