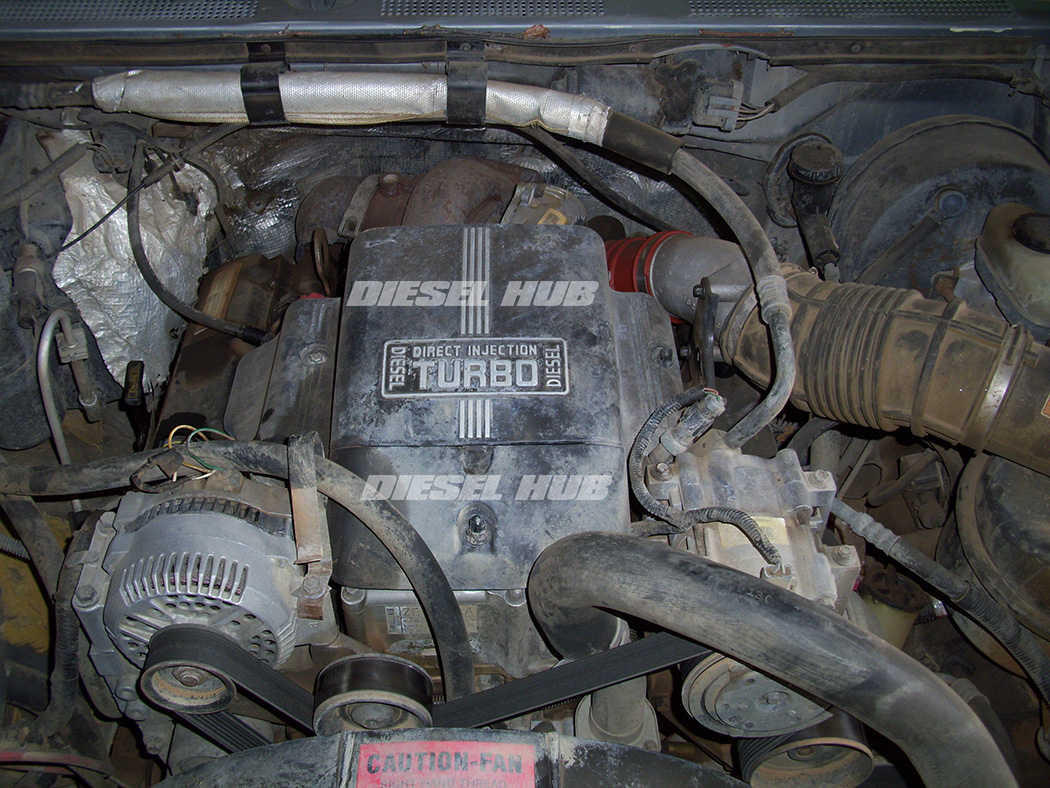
Between 1994 and 1997 the 7.3 liter Power Stroke utilized a non-wastegate, non-intercooled turbocharger. The system is quite simple but the up-pipe collector flange fasteners are oriented in a difficult to reach position, specifically the front-most nut on the driver side. As these bolts gall and corrode at an accelerated rate due to heat exposure, it can be quite difficult to break them loose. Turbocharger removal is necessary for many repairs unrelated to the turbo itself. It gains access to the rear of the fuel pump in the engine valley and the fuel lines/fittings attached to the rear of each cylinder head. Furthermore, it is necessary to remove the turbocharger to service the up-pipe collector gaskets, which are a common source of low boost.
Turbocharger Parts
| Component | Part Number(s) | Remarks |
|---|---|---|
| Turbocharger reinstall kit | Dieselply DP-1207K Garrett 468481-0001 |
[1] |
| Turbine adapter gasket | International 1822120C1 Ford F4TZ-6N640-B |
[2] |
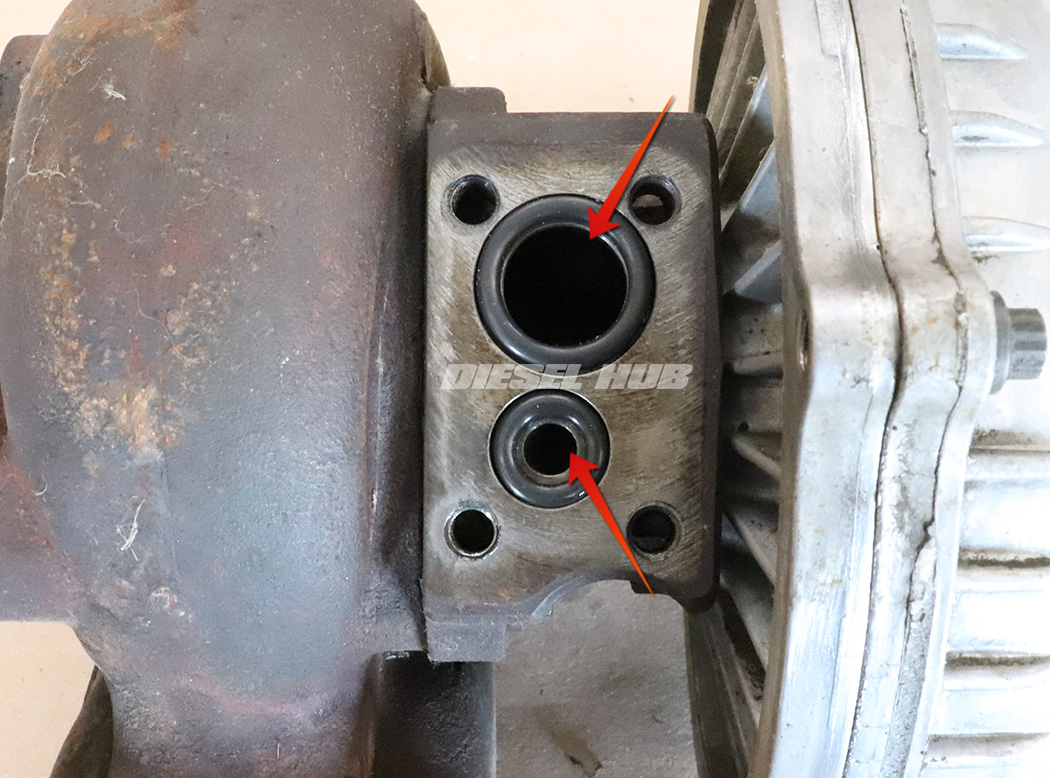
| Pedestal o-rings | Ford F4TZ-6N653-A Ford F4TZ-6N653-B |
[2] |
| Downpipe Marman clamp | Ford F5TZ-5A281-A | [3] |
| Intake "Y" to compressor o-ring | Ford F4TZ-9E436-A | [2] |
| Intake "Y" adapter Marman clamp | Ford F4TZ-8287-B | [3] |
| High temp anti-seize compound | Motorcraft XL-2 | [4] |
[1] - Basic kit containing assortment of parts that should not be reused when installing a turbocharger
[2] - Included in the turbocharger install kit, separate purchase not necessary
[3] - Acceptable to reuse if not damaged
[4] - Recommended on exhaust backpressure valve mounting bolts, will prevent galling
Turbocharger Removal & Installation
Click any thumbnail to view fullsize, detailed image
- Disconnect both negative battery cables.
- Remove the plastic engine cover.
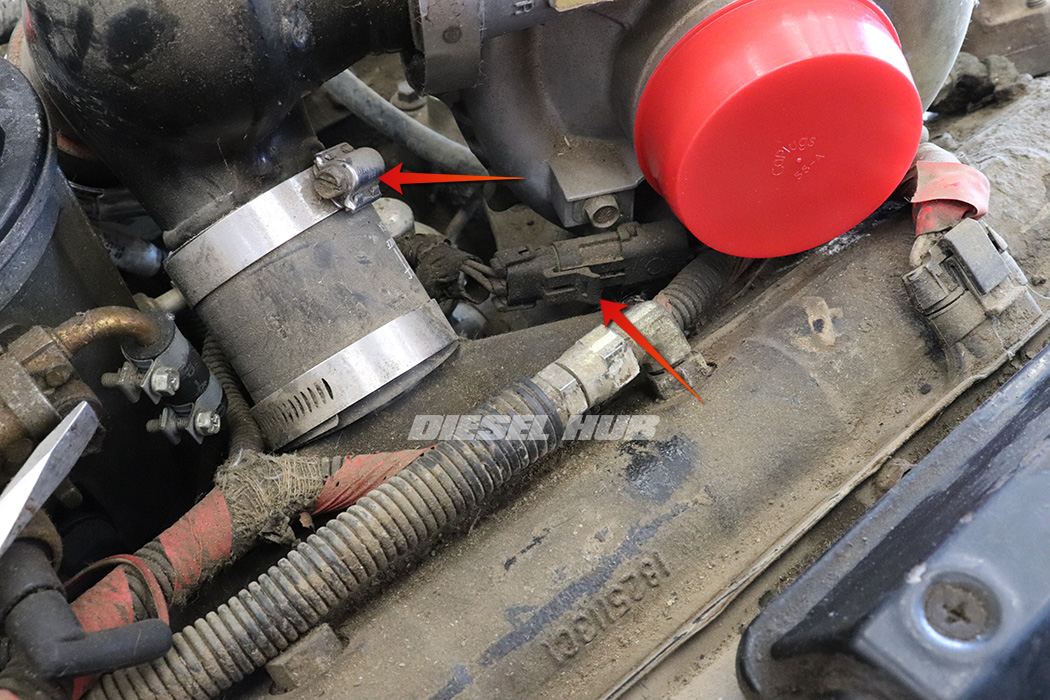
- Remove the flexible intake tube between the turbocharger compressor and CCV adapter (red/orange tube).
- Generously loosen the downpipe Marman clamp with an 11 mm deep socket.
- Separate the downpipe from the turbocharger turbine outlet.
- Position the downpipe downwards and away from the turbocharger.
- Generously loosen the Marman clamp that connects the intake "Y" plenum to the turbocharger compressor inlet.
- Generally loosen the hose clamps for the boots that connect the intake "Y" to the cylinder head plenums.
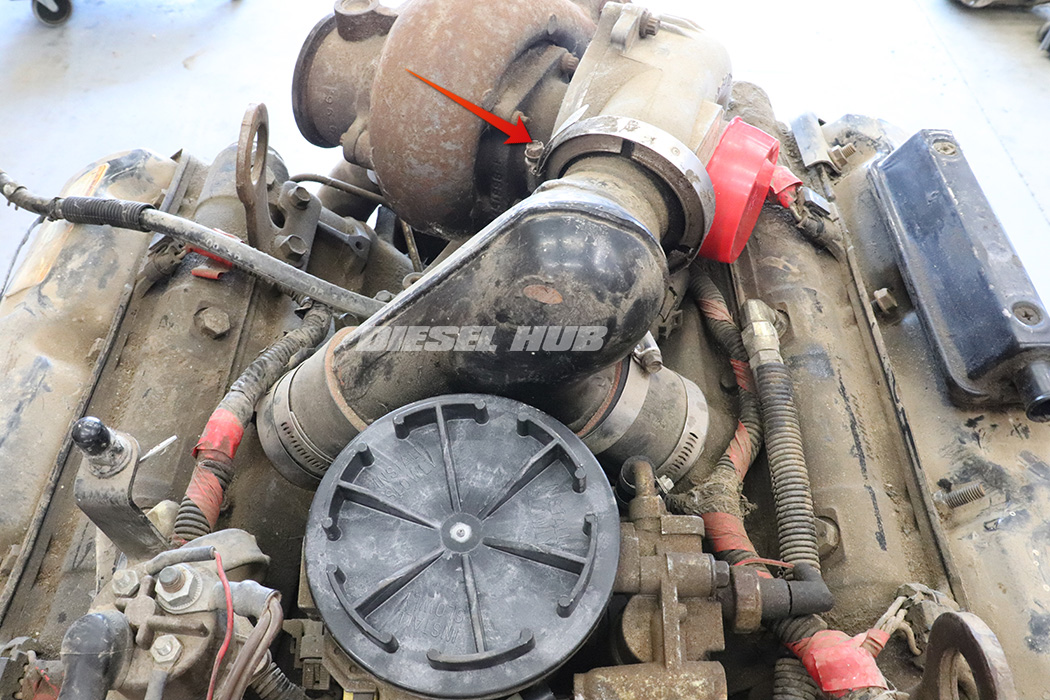
- Unplug the exhaust backpressure valve solenoid connector at the lower front of the turbocharger compressor housing.
- Remove the intake "Y" and cover the openings in the cylinder heads to prevent debris infiltration.
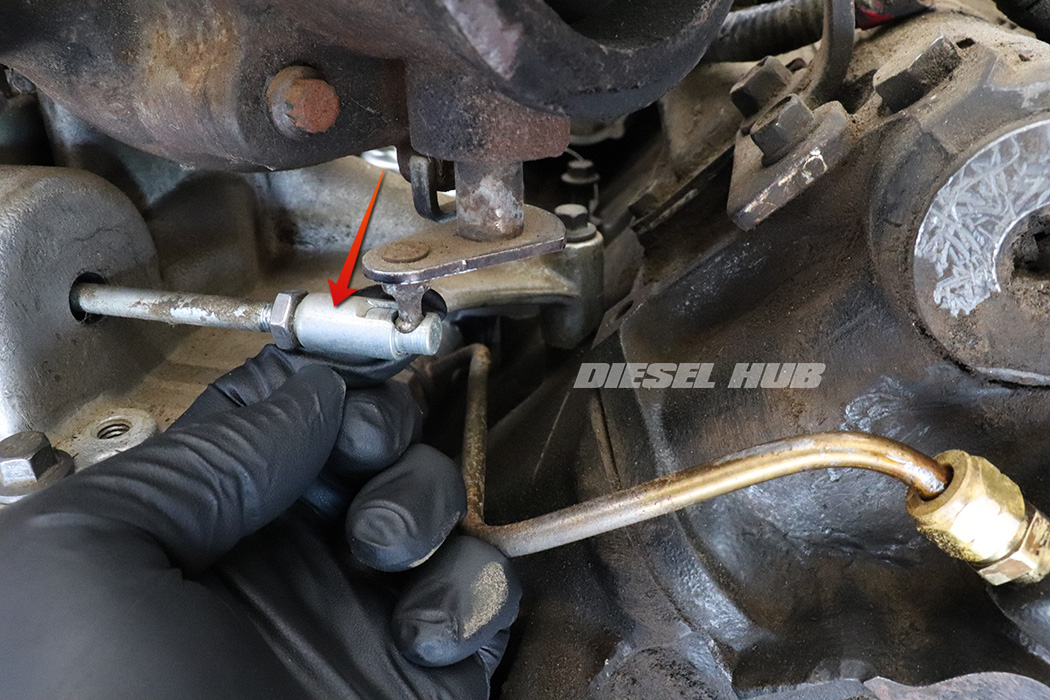
- Reach beneath the exhaust backpressure valve and pull the latch on the EBPV actuator rod towards the driver side, then downwards to release it from the EBP valve linkage.
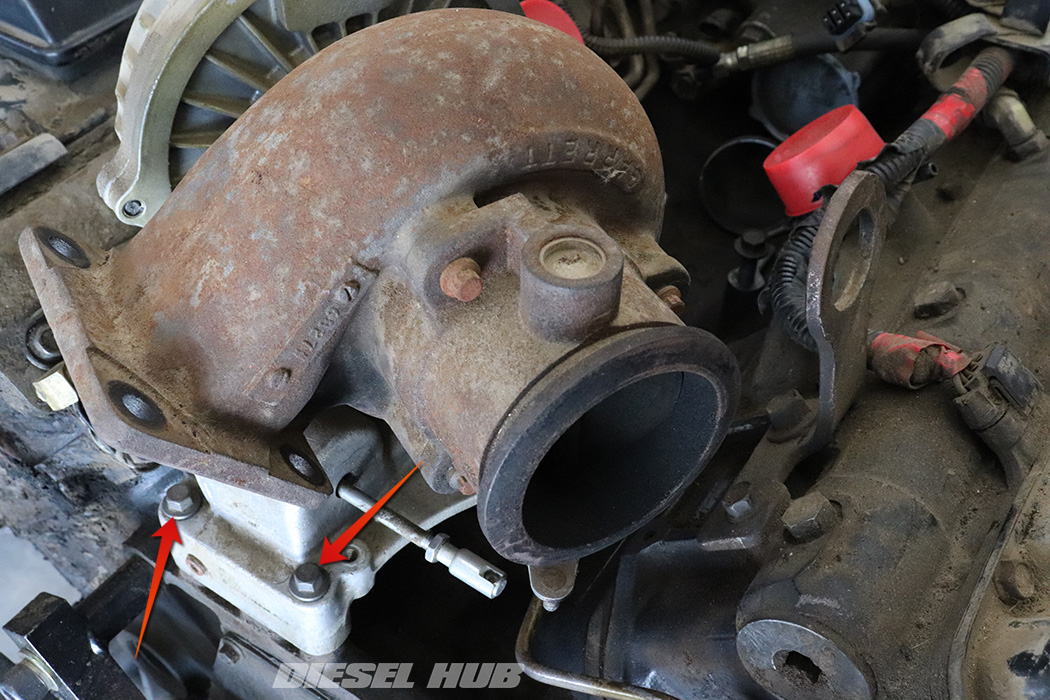
- Remove the (3) exhaust backpressure valve housing bolts with a 12 point, 8 mm socket.
- Separate the EBPV housing from the turbine housing and set aside.
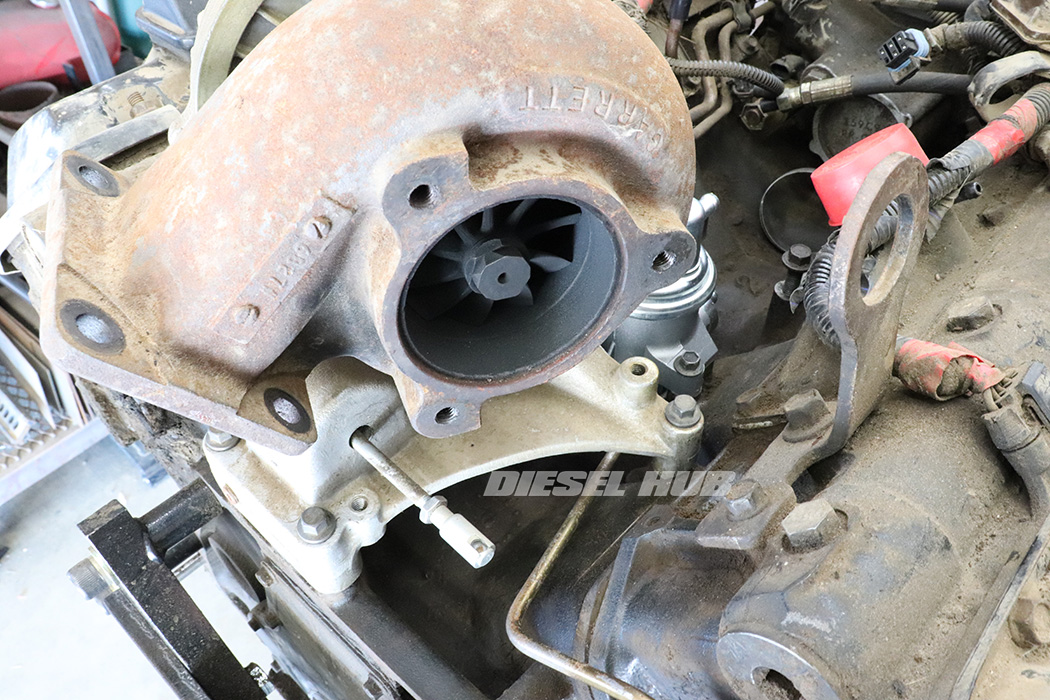
- Removing the EBPV housing makes the rear of the turbocharger more accessible, reduces the weight, and makes it dimensionally smaller. The passenger side up-pipe flange bolt/nut and rear pedestal bolts will be much easier to reach.

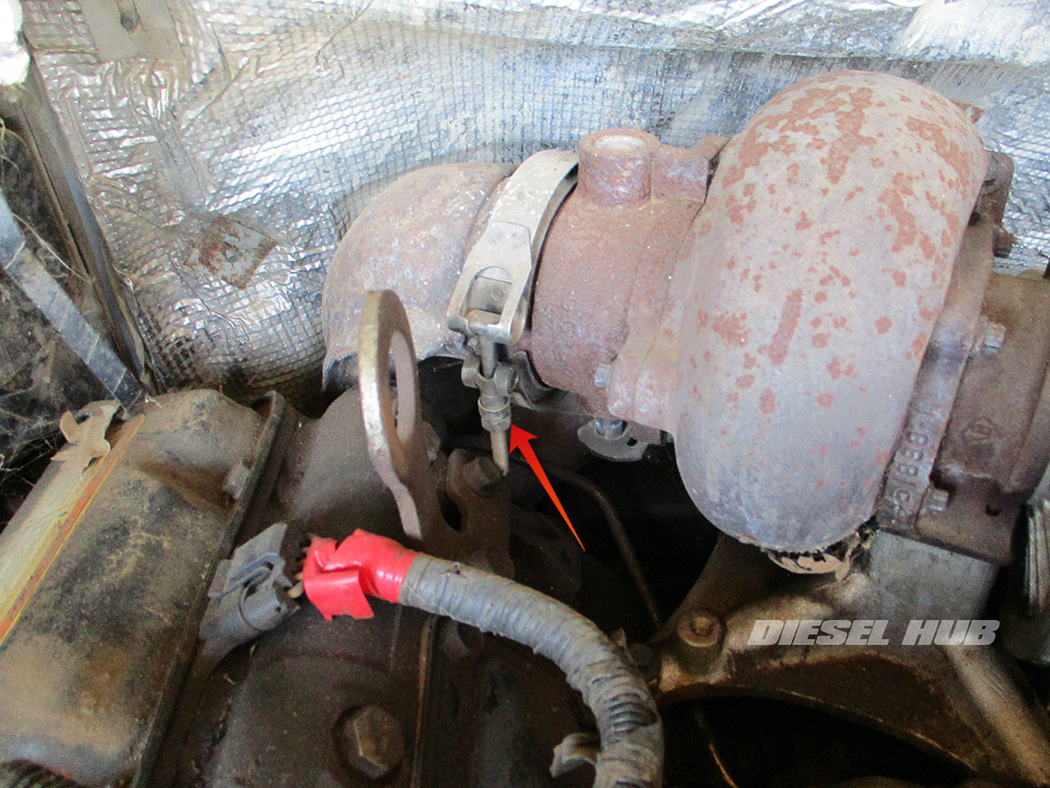
- Remove the up-pipe collector flange fasteners. The rear-most fasteners are bolts that require a 15 mm socket or wrench.
- If the fasteners are bound tight and difficult to break loose, apply penetrating lubricant and let soak for several hours. Repeat for extra stubborn bolts/nuts.
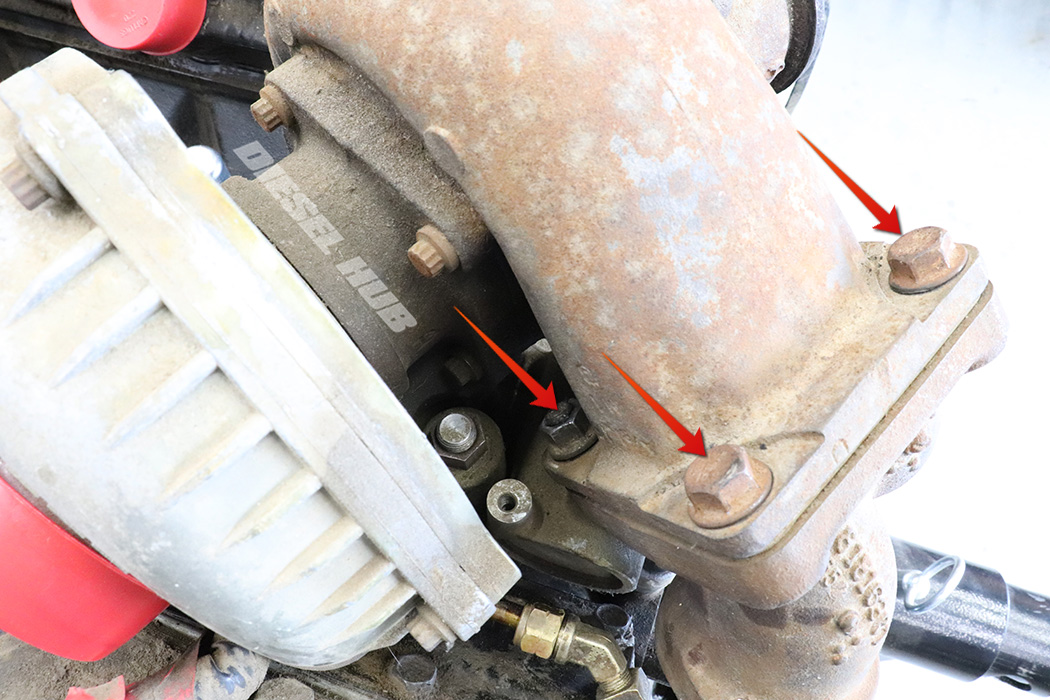
- The front-most fasteners are nuts (on studs) that require a 14 mm socket or wrench.
- The driver side, front flange nut is the most difficult to reach due to spacial restraints. A wrench can be used if the angle the nut is resting at is correct, but a swivel socket and extensions is the best way to break it loose. A swivel and shallow socket may also work if the socket is not bulky (i.e., reach for the 1/4 inch drive).
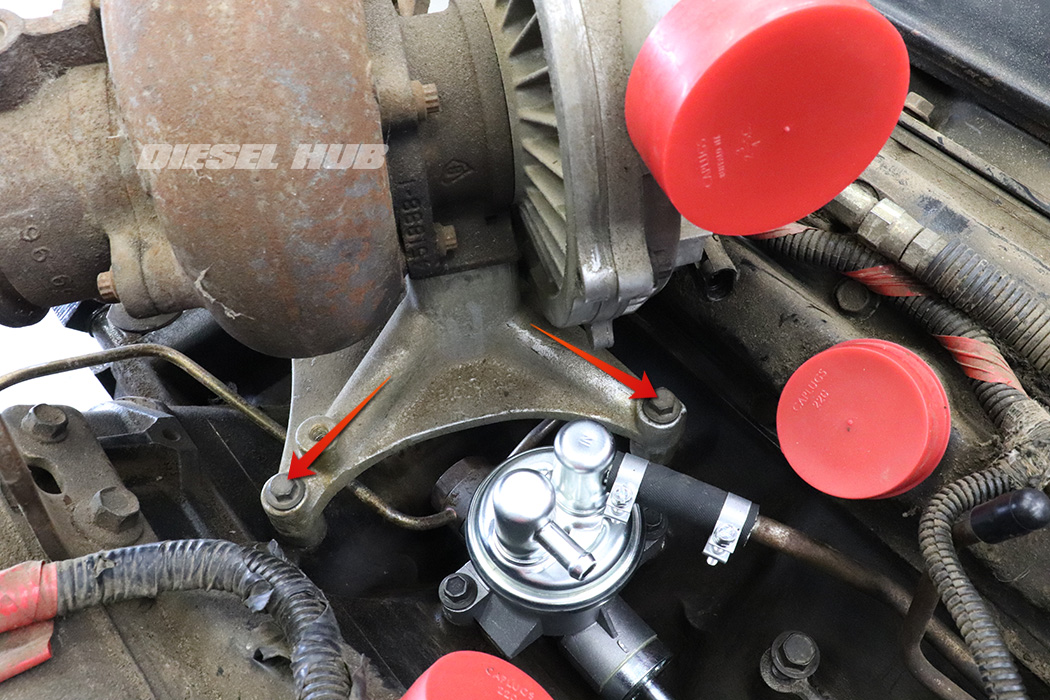
- Remove the front (2) turbocharger pedestal bolts with a 10 mm socket.

- Remove the rear (2) turbocharger pedestal bolts with a 10 mm socket or wrench.
- Pull the turbocharger straight upwards and maneuver out of the engine compartment once the pedestal is off the engine block pad that it rests on.
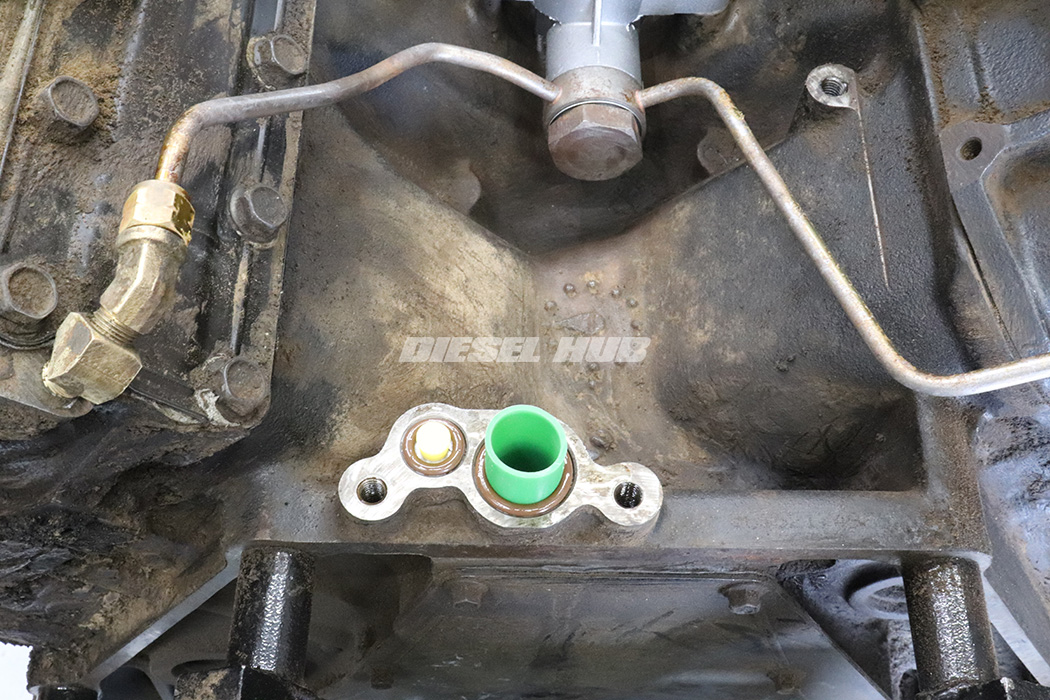
- Plug the oil supply and drain port openings to prevent debris infiltration.
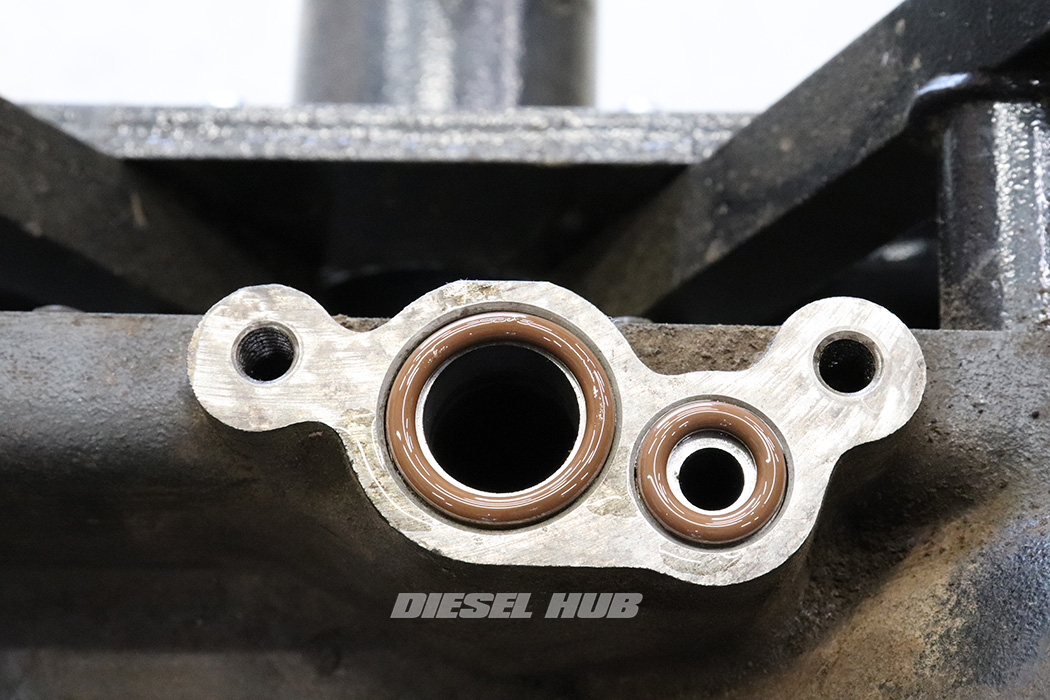
- Before installing the turbocharger, remove the plugs in the supply and drain openings and install new o-rings.
- The turbo is to be reinstalled in reverse order. A new o-ring seal should be installed between the turbocharger compressor outlet and intake "Y" plenum.
- A new gasket should be installed between the up-pipe collector and the turbine inlet flanges.
- Tip - coat the up-pipe collector fasteners with high temperature anti-seize to prevent galling and simplify future removal.
- If the turbocharger has been disassembled, repaired, sitting off the vehicle for an extended period of time, or a new unit is being installed it should be pre-lubed prior to assembly.
- To pre-lube a turbocharger, carefully pour clean motor oil or assembly lubricant into the supply and drain openings in the bottom of the center section with the turbocharger positioned upside down.
- Rotate the turbine wheel by hand to disperse the motor oil inside the center section.
- Tip the turbocharger right-side-up and allow it to drain. Repeat another 1 to 2 times, allow turbocharger to drain before installing.

