Applicable Models:
1994 - 2002 Dodge Ram 2500, Ram 3500
Applicable Engine(s):
5.9L Cummins 6BT (12v), 5.9L Cummins ISB (24v)
Engine Coolant Spec:
50/50 mix ethylene-glycol based engine coolant and distilled water
Engine Cooling System Capacity:
~ 6 gallons for most applications, some exceptions may apply
Removing the radiator on a 2nd Gen Dodge Cummins is more intimidating than difficult. In fact, removing the radiator on these model years is relatively simple and straight forward. Removing the radiator helps improve access to the front engine cover and increases the workspace area on a number of related repairs. The cooling system capacity on most 1994 to 2002 Cummins equipped Dodge Ram's is listed as 6 gallons, however it may vary for vehicles with special equipment thus we always recommend verifying your truck's coolant capacity in the owners manual. All engines require a 50/50 mix of ethylene-glycol anti-freeze concentrate and distilled water.
Click any thumbnail to view fullsize, detailed image

• Disconnect both negative battery cables so that the engine cannot be started.
• Locate the radiator drain valve/petcock on the driver side, bottom corner of the radiator.
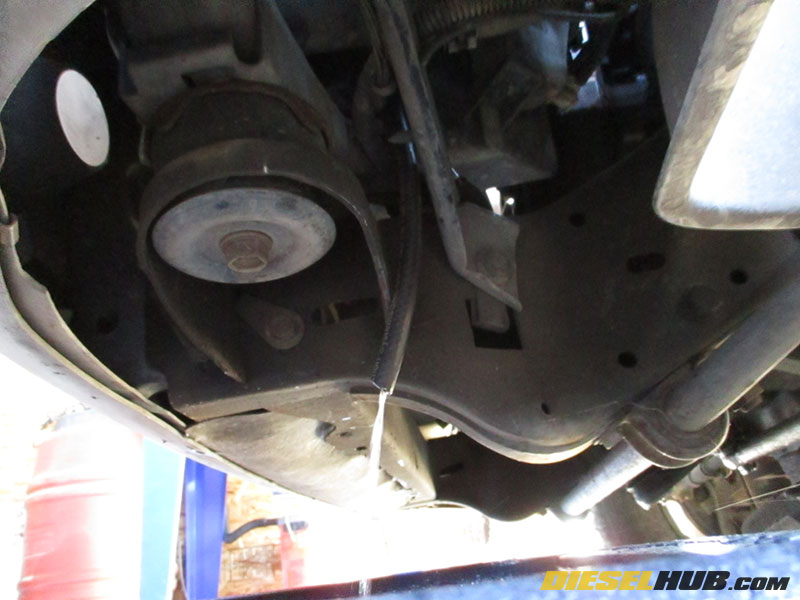
• If applicable, attach a section of 5/16" hose (fuel line or heater hose) to the radiator drain valve. Some radiators have a nipple at the bottom of the valve (as pictured) while others drain out of the valve stem itself.
• Drain the radiator into a suitable container with a minimum 4 gallon capacity. Use a clean container if you wish to reuse the engine coolant (new engine coolant is recommended if replacing the radiator). Remove the radiator cap to vent the system and speed up the drain process.
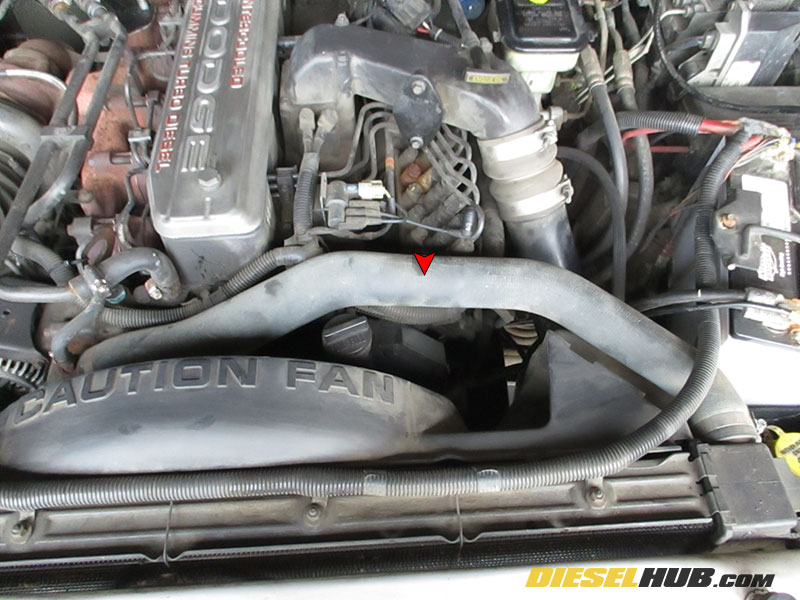
• Remove the upper radiator hose (connects upper driver side of radiator to thermostat housing on engine block).
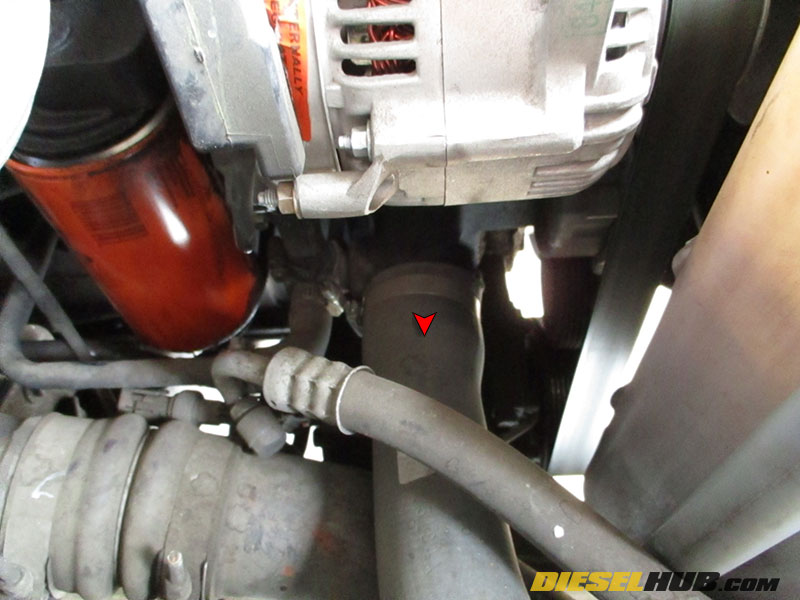
• Remove the lower radiator hose (connects passenger side engine block below the alternator to lower portion of radiator). Note that a significant amount of coolant will drain from the engine when the hose is removed; position a drain pan accordingly.
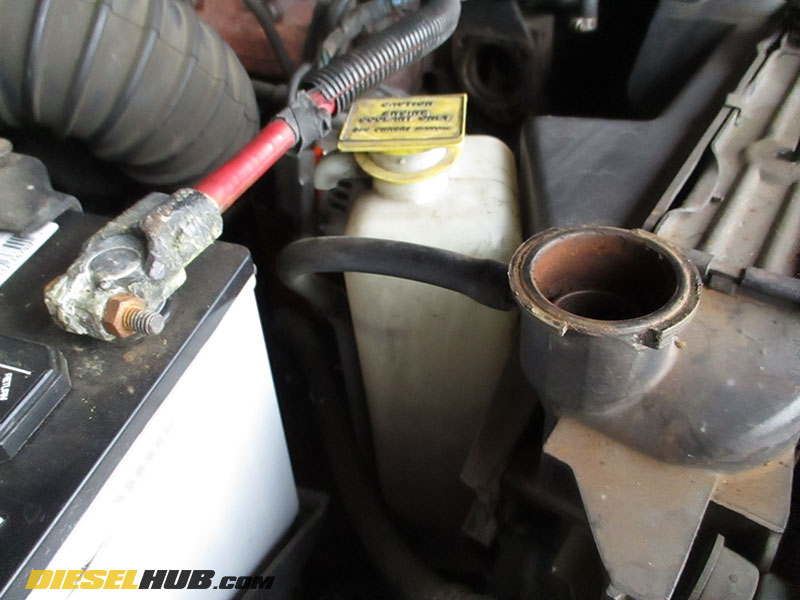
• Remove the small heater hose connecting the radiator to the overflow tank.
• Remove the cooling system overflow tank from the passenger side of the fan shroud. Tabs on the tank slide into slots on the fan shroud while a small, hemispherical retainer keeps it in place. Push the retainer away from the fan shroud with a small screwdriver while pulling straight upwards to release and remove the overflow tank.
• The positive battery cable connecting the left and right batteries is secured to the radiator by a series of clamps. Remove the clamps from the radiator studs with a 10 mm socket, then lay the battery cable forward over the engine so that it is out of the way.
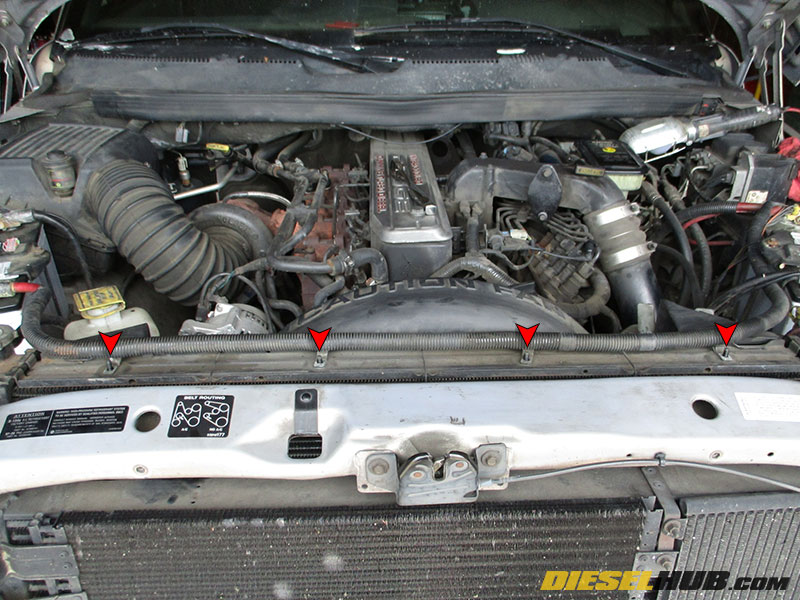
• Remove the small metal clips connecting the top of the fan shroud to the radiator using a small screwdriver.

• Remove the windshield wiper fluid reservoir. There are two small electrical connectors and a single hose at the bottom of the tank that must be removed first. The reservoir is secured to the fan shroud in a similar fashion as the overflow tank. Pry the reservoir away from the fan shroud slightly while pulling upwards to remove.
• Remove the (4) bolts securing the fan shroud to the radiator with a 10 mm socket (2 bolts on the driver side and 2 bolts on the passenger side). Position the fan shroud away from the radiator and towards the engine so that it is out of the way.
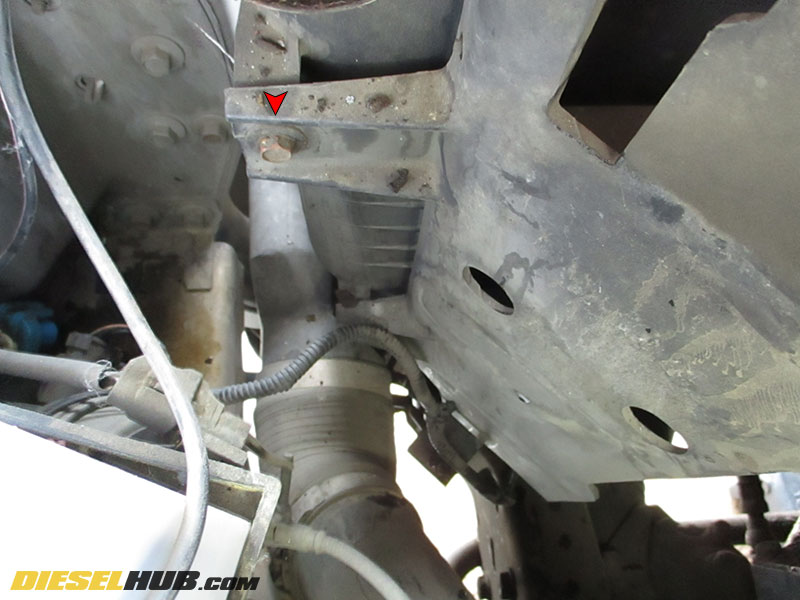
• Remove the (2) bolts securing the radiator to the core support using a 10 mm socket. There is (1) bolt on the driver side and (1) bolt on the passenger side, both of which are near the top of the radiator. Passenger side radiator mounting bolt shown at left.
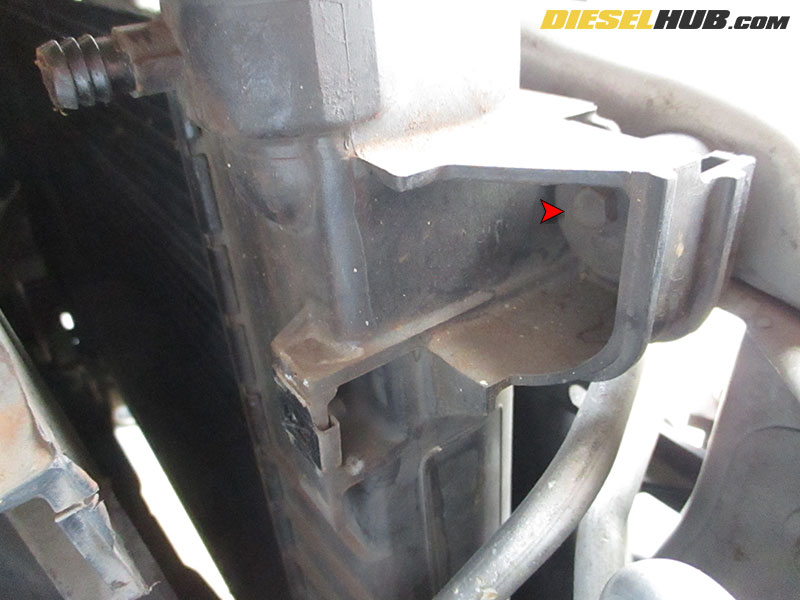
• Driver side radiator mounting bolt shown at left.

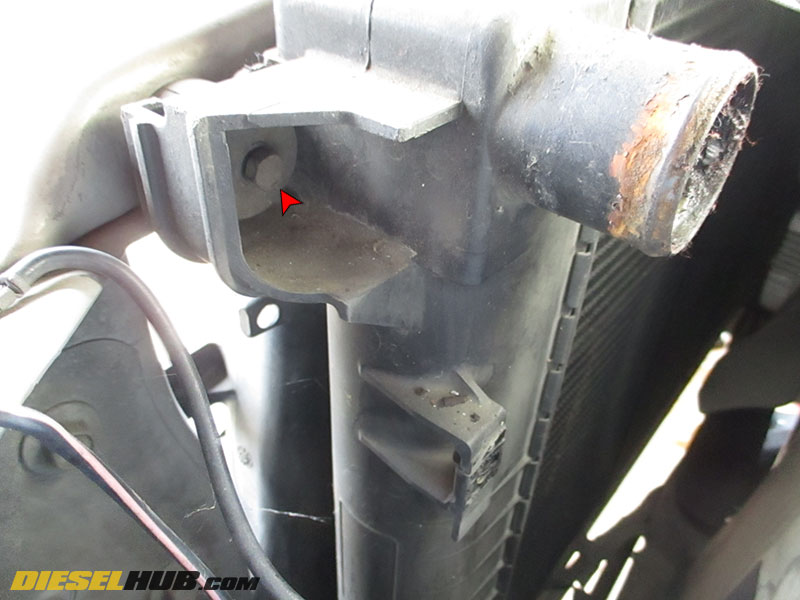
• Slide the radiator straight upwards to remove from vehicle. The radiator may be holding residual engine coolant, so do not tilt it until it is removed from the vehicle and positioned over a drain pan.
• Reinstallation of the radiator is opposite of removal. If the radiator is being replaced, you may need the rubber bushings that slide into the radiator mounting tabs (not included with many replacements).
