Applicable Models:
1994 - 2002 Dodge Ram 2500, Ram 3500 (and select 2003 models)
Applicable Engine(s):
5.9L Cummins 6BT (12v), 5.9L Cummins ISB (24v)
Applicable Transmission(s):
Chrysler 47RH, Chrysler 47RE four speed automatics
The 47RH and later 47RE four speed automatic transmissions are found in 1994 to 2002 (and select 2003) model year Ram 2500/3500 trucks equipped with the 5.9L Cummins turbodiesel. Transmission service is required at 24,000 miles (12v Cummins engines) or 30,000 miles (24v Cummins engines), at which time the front and rear transmissions bands should be adjusted in addition to a typical transmission service/filter replacement. Failure to adjust the transmission bands accordingly may result in premature transmission wear.
Parts List
| Part Description | Part Number(s) | Remarks/Notes |
| Transmission filter, 1994 - 1997 models | MOPAR 3515996 WIX 58707 |
--- |
| Transmission filter, 1998 - 2002 models | MOPAR 52118789 WIX 58613 |
--- |
| Transmission pan gasket | Mahle W39003TC | --- |
| Automatic transmission fluid | MOPAR ATF+4 | [1] |
[1] Factory spec is MOPAR ATF+4. To drain and refill the transmission requires approximately 4 quarts of automatic transmission fluid, but quantity drained may vary.
Band Adjustment Specifications
Transmission "bands" literally refers to a series of hydraulically actuated bands that lock a respective component of a planetary gearset. Recall that the selected gear ratio in an automatic transmission is determined by the input and output positions of one or more planetary gearsets. When shifts occur, the transmission of power through the gearsets is manipulated to achieve a particular gear ratio. The bands, like various clutch packs, play a vital role in this operation. Transmission bands can stretch, wear, and loosen with time and use. Thus, adjusting the bands is an important service procedure that correlates to transmission shift quality, performance, and even longevity.
When the transmission band adjustments are out of spec abnormal shift behavior may be exhibited, including harsh engagements, slipping, delayed shifts, and overall poor shift quality. If you're transmission is acting up and you've never had the bands adjusted, this is a good place to start. However, do not expect this procedure to be a cure-all for automatic transmission woes.
Note that there are some discrepancies in the proper adjustment between factory service manuals and aftermarket manuals (Haynes, etc). The following figures were sourced from the appropriate factory repair ("workshop") manual. Refer to these specifications when adjusting the bands.
| Model Year | Front Band Adjustment | Rear Band Adjustment |
| 1994 | Torque to 72 in-lbs, then back off 2-1/2 turns | Torque to 72 in-lbs, then back off 2 turns |
| 1995 - 1996 | Torque to 72 in-lbs, then back off 2-7/8 turns | Torque to 72 in-lbs, then back off 2 turns |
| 1997 - 2002 | Torque to 72 in-lbs, then back off 1-7/8 turns | Torque to 72 in-lbs, then back off 3 turns |
How to Adjust the Bands on a 47RH/47RE Transmission
Click any thumbnail to view fullsize, detailed image
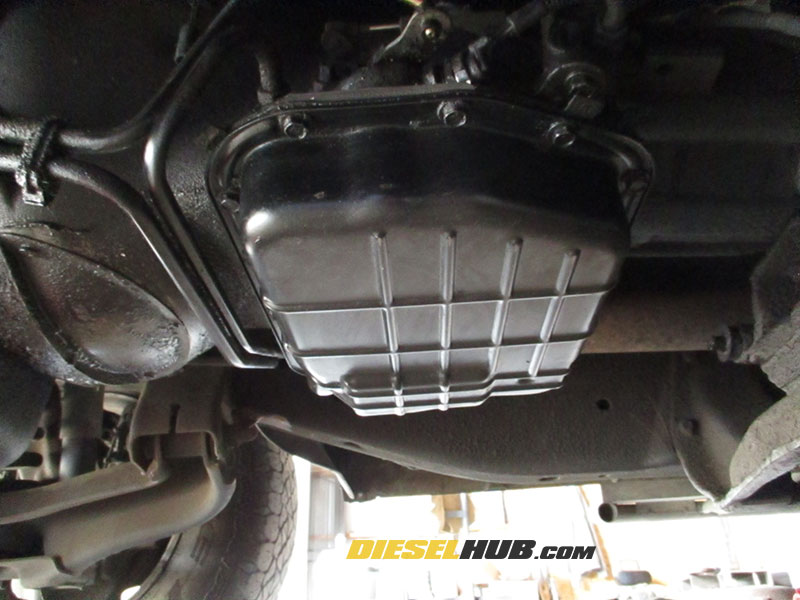
• Place a suitable oil drain container below the transmission.
• Remove all but (2) of the transmission pan bolts using a 13 mm socket; leave (2) bolts near the center of the pan on opposing sides.
• While holding the transmission pan firmly against the transmission, loosen the remaining transmission pan bolts 1/2 to 3/4 out. Carefully lower one corner of the transmission pan so the fluid can drain. Once it has had a minute to drain, completely remove the transmission pan and discard the transmission pan gasket.
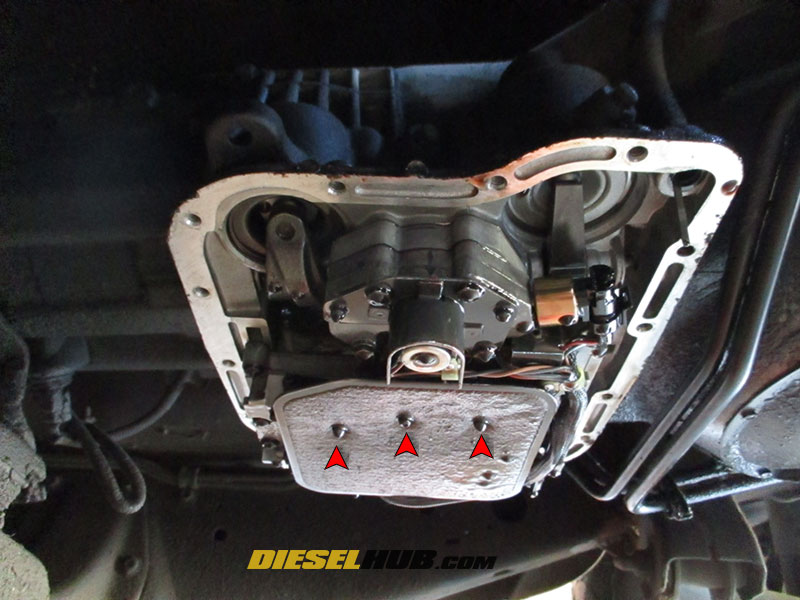
• Remove and discard the transmission filter. It is secured to the valvebody by (3) T25 Torx bolts. Note that a significant amount of fluid will drain once the filter is removed, so position your oil drain container accordingly.
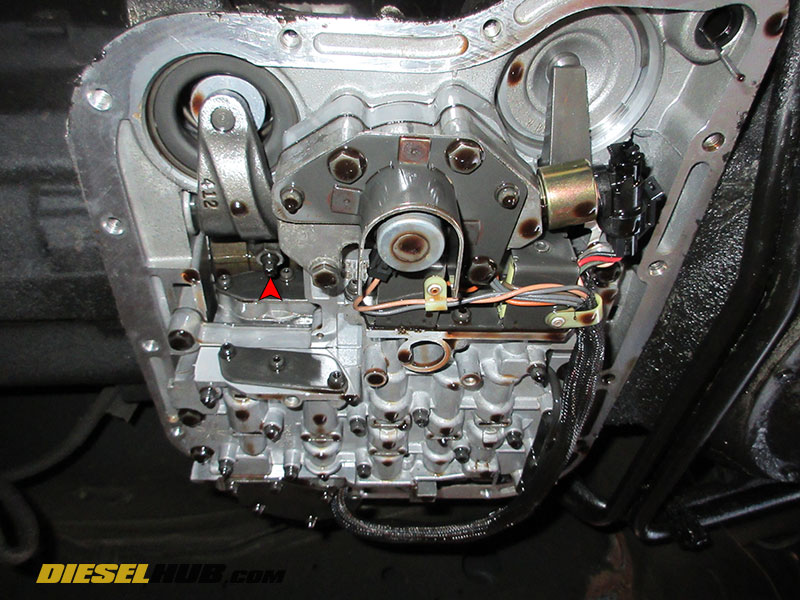
• The rear transmission band is located towards the rear, passenger side of the transmission at the tip of the armature that controls the band.

• Loosen the adjustment screw locknut with a 9/16" socket and back off 3 to 5 turns.
• Tighten the adjustment screw by rotating it clockwise with a 1/4" socket. Torque to 72 in-lbs (inch lbs, not foot lbs), then back the adjustment screw out (counter-clockwise) per the chart above.
• While holding the adjustment screw in place, torque the locknut to 25 ft-lbs. A crows foot or bent wrench works well for accessing the locknut while preventing the adjustment screw from rotating with a 1/4" socket.
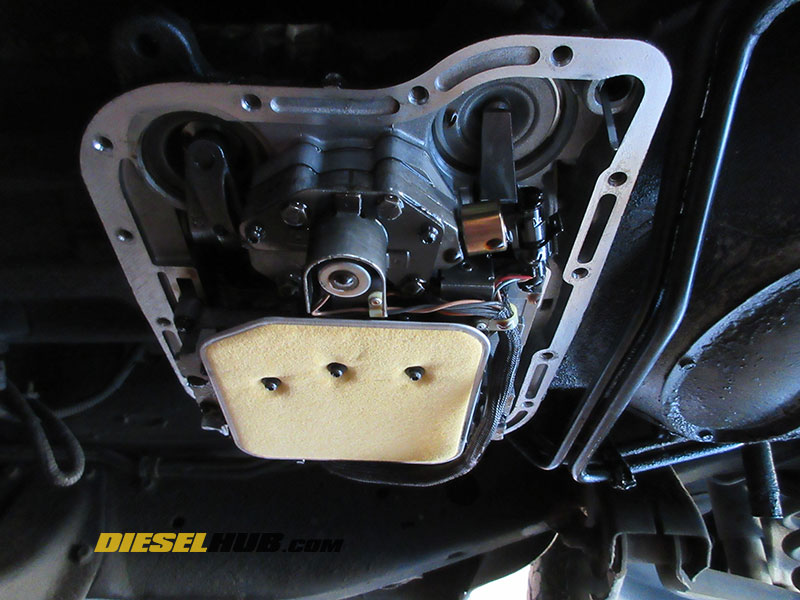
• Install a new transmission filter and torque the (3) bolts to 35 in-lbs.
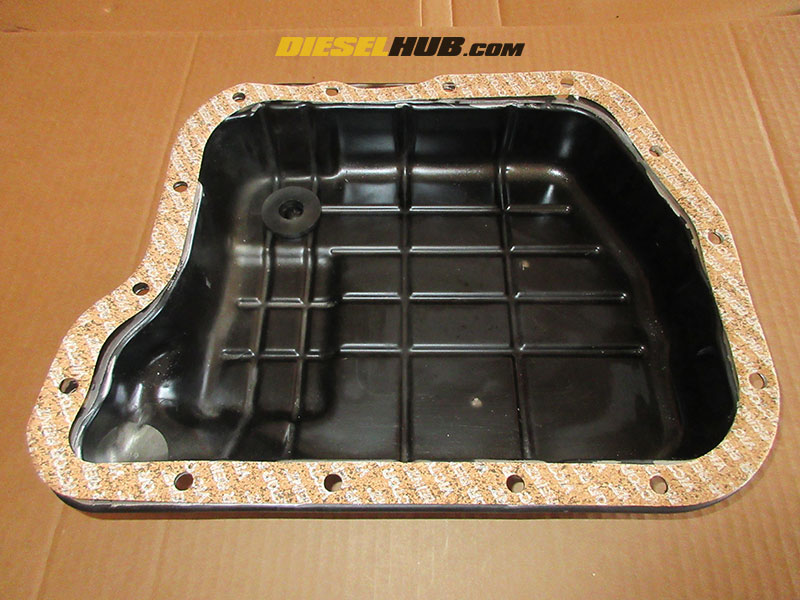
• Thoroughly clean the transmission pan and install a new gasket. The magnet is removable so that any clutch material can be easily removed.
• Clean the transmission pan gasket mounting surface of the transmission itself.
• Reinstall the transmission pan. Tighten bolts snug, then torque to 13 ft-lbs (156 in-lbs) in a star/cross pattern.
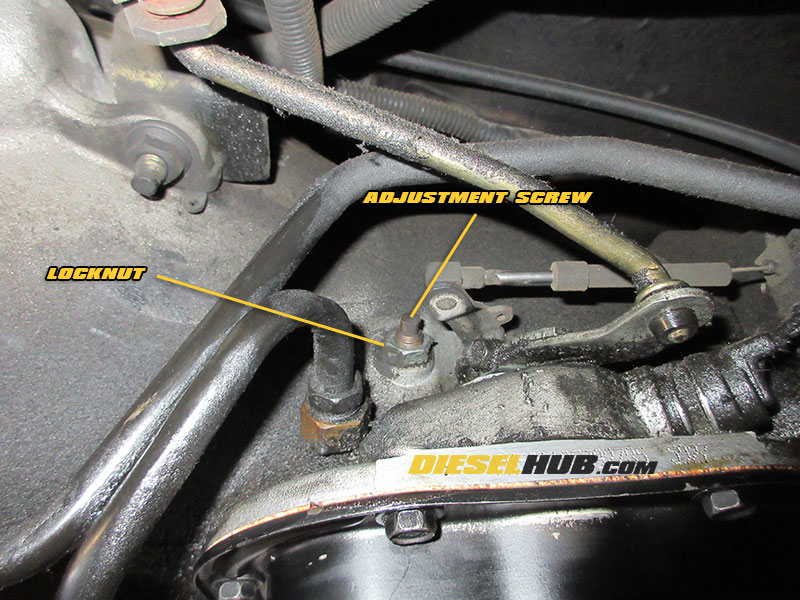
• Locate the front band adjustment screw on the driver side of the transmission just forward of the transmission range selector linkage.
• Loosen the locknut using a 3/4" socket and back off 3 to 5 turns.
• Tighten the adjustment screw by rotating it clockwise with a 5/16" square drive socket. Torque to 72 in-lbs (inch lbs, not foot lbs), then back the adjustment screw out (counter-clockwise) per the chart above.
• While holding the adjustment screw in place, torque the locknut to 25 ft-lbs. A crows foot works well for accessing the locknut while preventing the adjustment screw from rotating with a 5/16" square socket.
• Refill the transmission with ATF through the transmission dipstick tube until the fluid level reaches the appropriate indicating mark on the dipstick.
• Start the engine and allow it to run for several minutes, then recheck the transmission fluid level; add fluid as necessary. Drive the vehicle and test for proper transmission operation, then check and adjust the fluid level once more. A typical refill requires 4 to 5 quarts of ATF.
