If your interior lights do not turn off and/or the "door ajar" indicator stays illuminated in the dash after all the doors are closed, you likely have a faulty door ajar switch. The quickest and easiest way to isolate a faulty door ajar switch is with a scantool, which will allow you to view the state of each switch. By doing so with all the vehicle's doors closed, you can quickly isolate the problematic door(s). Before replacing the switch, which is a somewhat tedious task, you may wish to spray the door latch/actuators with a aerosol lubricant in case a switch is not malfunctioning but simply stuck; dirt tends to accumulate in the latch and hinder the movement of the switch.
Associated Parts List
| Part Description | Part Number(s) | Remarks/Notes |
| Door ajar switch | Motorcraft SW-5429-B Ford XF2Z-14018-AA |
[1] |
| Door handle rod retainer | Ford 5L3Z-1621952-A | [2] |
| Door lock hardware kit | Dorman 75473 | [3] |
[1] Fits any door, front and rear.
[2] Hinged plastic retainer that connects the exterior door handle rod to the door latch assembly; most common and easiest to break during disassembly.
[3 ]Kit contains 3 common retainer clips including a Dorman replacement for the door handle rod retainer clip listed above.
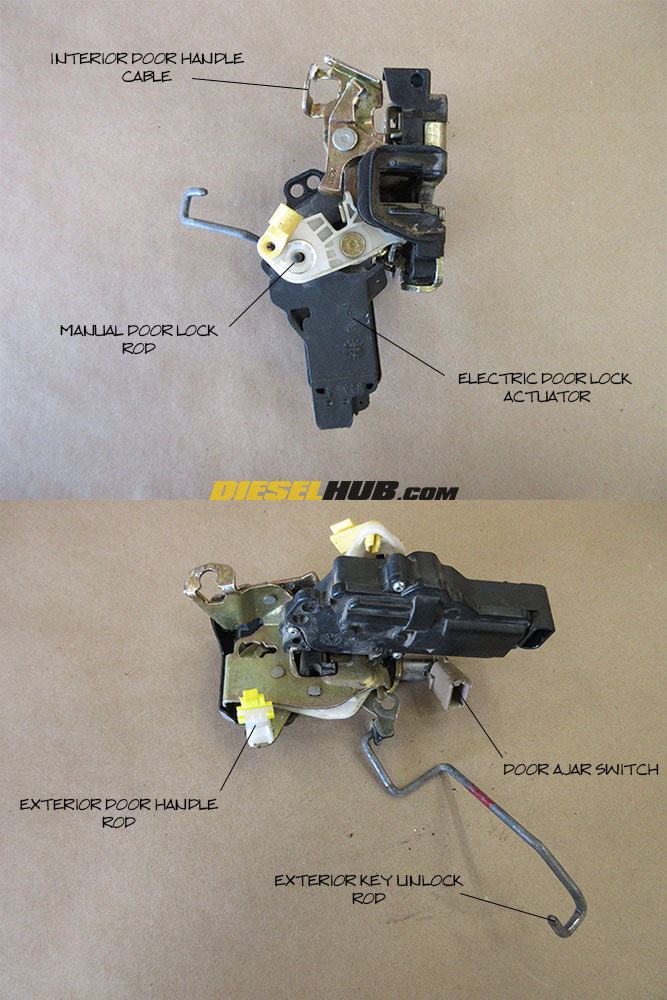
Refer to figure for clarification when navigating procedures below
How to Replace the Door Ajar Switch
Note that the following procedures depict replacing the door ajar switch on a front door. The process is identical for the rear doors of a Crew Cab model, however the door latch assembly is somewhat more difficult to access.
Click any thumbnail to view fullsize, detailed image

• Remove the door panel (see: 1999 - 2007 Super Duty door panel removal) and set aside.
• Carefully peel back the protective sound barrier/insulation and tape it out of the way to gain access to the openings in the door frame (note - it is extremely sticky, but robust).
• Locate the door latch mechanism. The mechanism for doors with automatic locks is slightly larger and more complicated than those with manual locks, but the removal and reinstallation process is similar for both applications.
• Locate the manual door lock lever at the bottom of the actuator (identified in fullsize image). Lift the yellow retaining clip upwards to unlock (it will rotate/pivot clockwise), then pull the rod towards the interior of the door to remove from its slot.
• Locate the interior door lever cable (identified in fullsize image). Remove the rubber dust boot from the cable linkage assembly. Press the actuating link/lever at the bottom of the apparatus to allow the cable itself to slack. Remove the cable by prying the rubber portion out of its socket, then maneuvering the ball end out of the linkage.

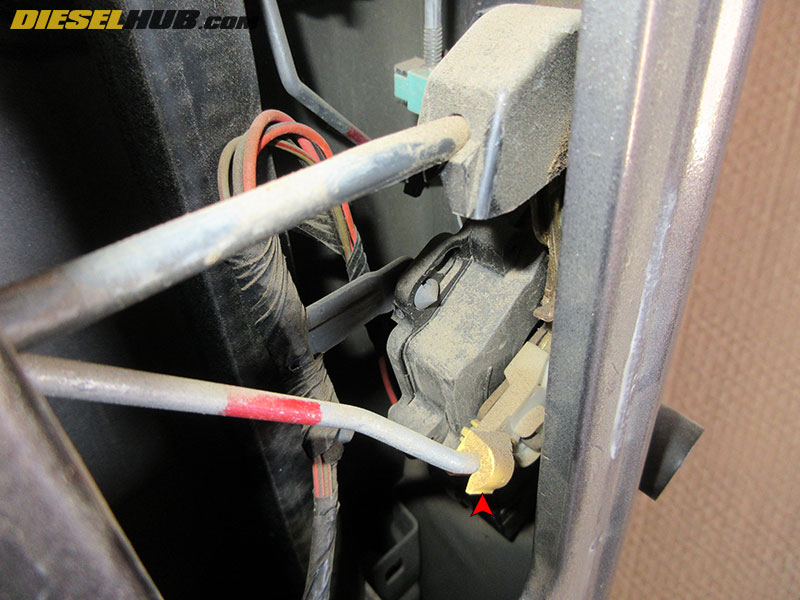
• Locate the exterior key lock mechanism (identified in fullsize image). Using a pair of screwdrivers or similar tool, relieve the fingers of the plastic clip and remove the rod; let it hang freely from the door latch mechanism.
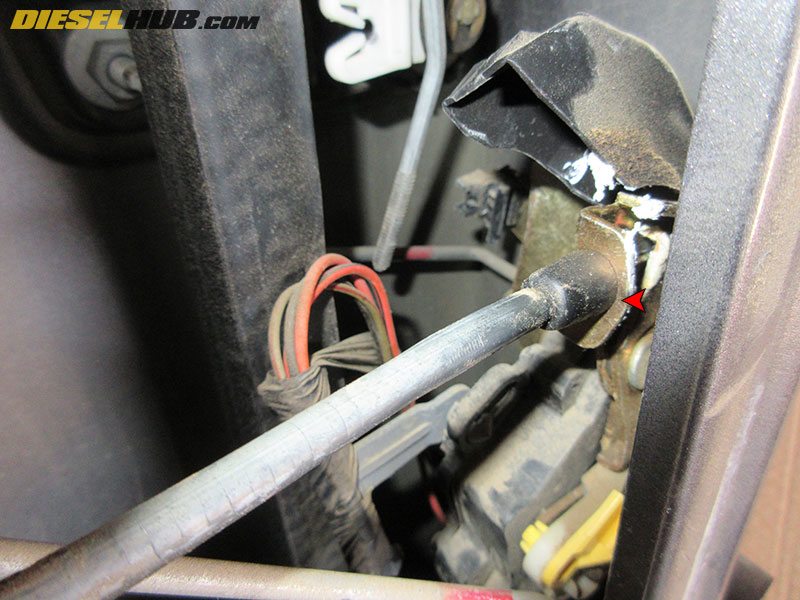
• Locate the exterior door handle rod (identified in fullsize image). Open the hinge on the plastic clip, then remove the rod from the clip.

• Using a T-27 Torx driver, remove the (3) bolts attaching the door latch mechanism to the door frame.

• Carefully maneuver the door lock mechanism to the opening in the door and disconnect the electrical connector for the door ajar switch and electric door lock actuator (if applicable).
• Maneuver the door lock mechanism out through the large opening in the door.
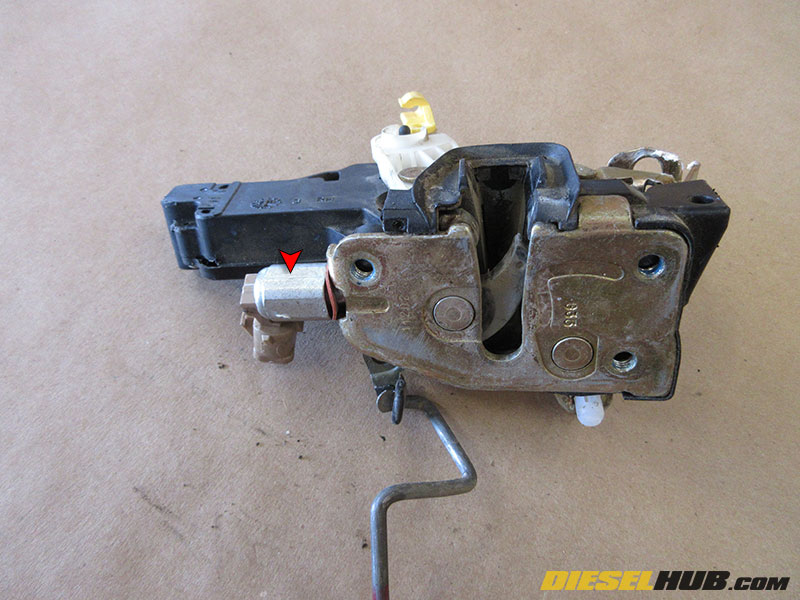
• Remove and replace the door ajar switch by rotating it 1/2 turn until it releases from the door latch assembly.
• Reinstall the door lock mechanism in reverse order. Verify proper operation before reinstalling the door panel.
