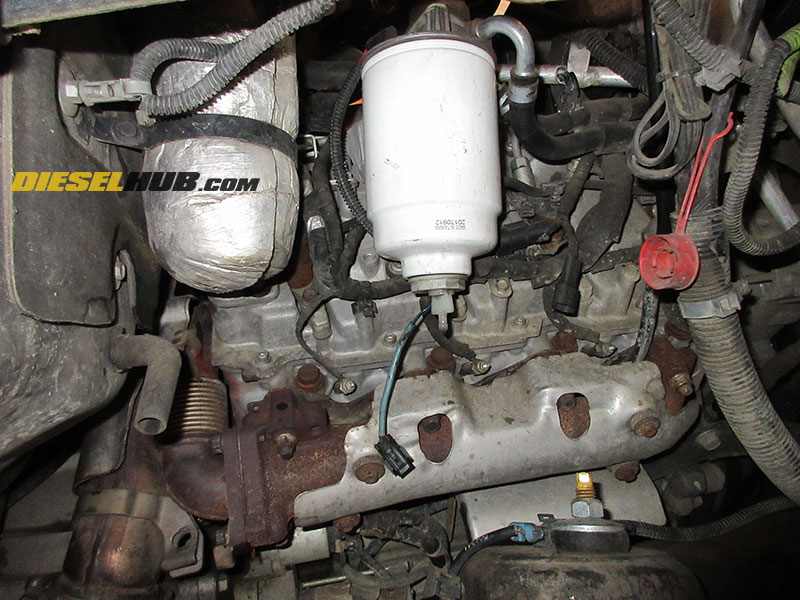
The fuel filter housing is located on the passenger side of the engine and features an integrated fuel plunger in order to prime the fuel system after replacing the fuel filter. Note that this plunger is required to bleed the fuel system of air after installing a new filter since the 2001 to 2016 Duramax diesels do not employ an electric lift pump. Failure to bleed air from the fuel system before starting the vehicle may place additional strain and excessive wear on the high pressure injection pump.
GM recommends replacing the fuel filter and draining the fuel water separator at 15,000 mile intervals on 2001 to 2010 model year vehicles, and every 22,500 miles (or as prompted through the instrument cluster display) for 2011 to 2016 model year vehicles. Removal of the passenger side inner fender is recommended and permits complete and easy access to the fuel filter housing assembly.
Duramax Fuel Filter Part Numbers
| Part Description | Part Number(s) | Remarks |
| Fuel filter | ACDelco TP3018 | [1] |
| Water-in-fuel sensor assembly | ACDelco 12639277 | [2] |
| Fuel filter hosing bleed screw | GM 97363195 | [3] |
| Inner fender clips | GM 21030249 | [4] |
[1] - Fuel filter compatible with 2001 to 2016 model year Duramax diesels.
[2] - Water in fuel sensor assembly compatible with 2001 to 2011 model year Duramax diesels.
[3] - Bleed screw includes o-ring seal.
[4] -Inner fender clips tend to break and are rarely reused; inexpensive and easy to replace.
How to Replace the Fuel Filter on a 2001 to 2016 Duramax Diesel
Click any thumbnail to view fullsize, detailed image
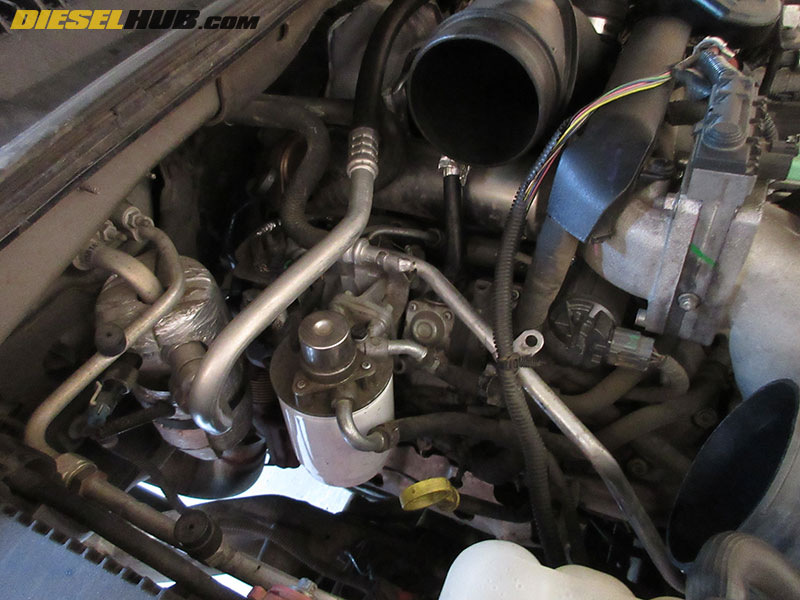
• The fuel filter is located on the passenger side of the engine below the air intake tube.
• Remove the center air intake tube (between air filter housing and turbocharger inlet mouthpiece).
• Remove the passenger side inner fender (secured by a series of plastic body clips).
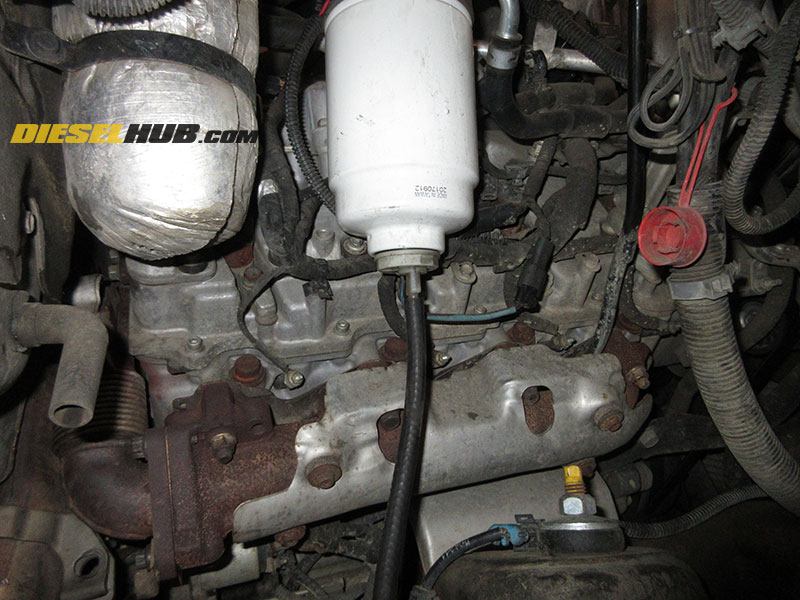
• Optional - Attach a small section of 1/4" fuel hose to the water-fuel separator drain valve located at the bottom of the fuel filter. Open the bleed screw at the top of the fuel filter housing, then drain the water separator into a suitable container and properly dispose of the fuel.
• Close the drain valve and remove the fuel hose.
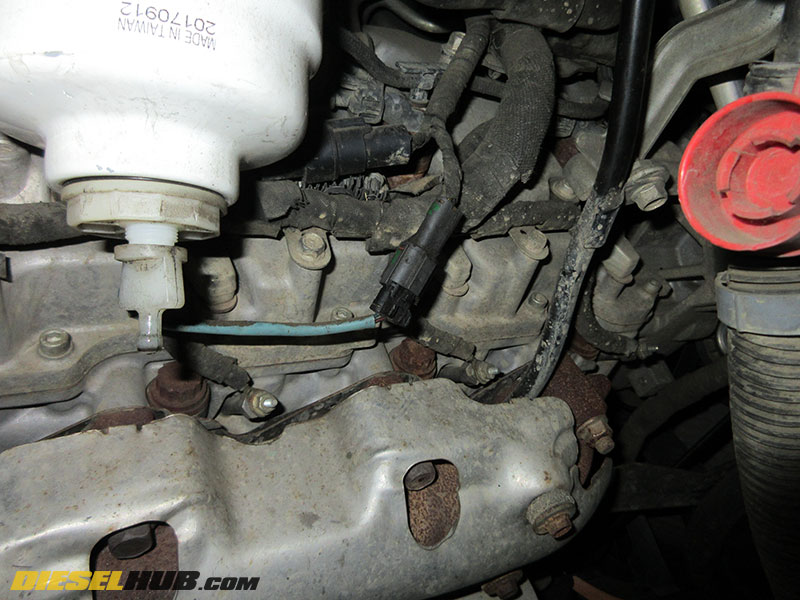
• Locate and disconnect the water-in-fuel sensor electrical connector.
• Remove the fuel filter by rotating counter-clockwise (as if you were looking from the bottom up). Be sure that the water-in-fuel sensor wire does not become entangled while unscrewing the filter. Keep the filter positioned upright until removed from vehicle to ensure fuel is not spilled.
• Drain the filter once removed and verify that the gasket did not stick to the fuel filter housing flange.

• Remove the water-in-fuel sensor assembly from the bottom of the fuel filter using an appropriate wrench, socket, or pliers.
• Replace the o-ring on the water-in-fuel sensor assembly (provided with new fuel filter). If the water-in-fuel sensor assembly is damaged, do not reuse.
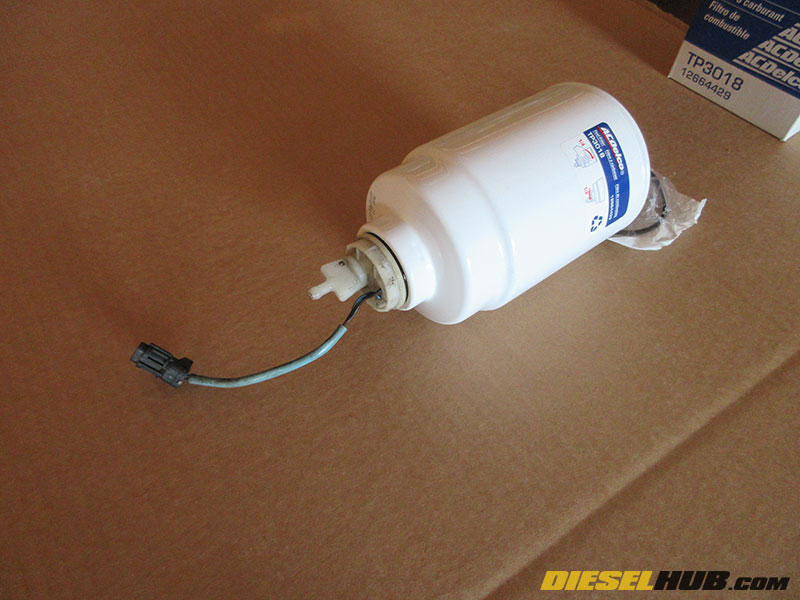
• Lubricate the water-in-fuel sensor o-ring with clean engine oil, then install snug onto the new fuel filter; do not overtighten.
• Lubricate the new fuel filter gasket with clean engine oil, then install at the top of the fuel filter assembly.
• Do not fill the filter with diesel fuel; the fuel filter housing has an integrated hand pump that will be used to pump diesel from the fuel tank into the filter.
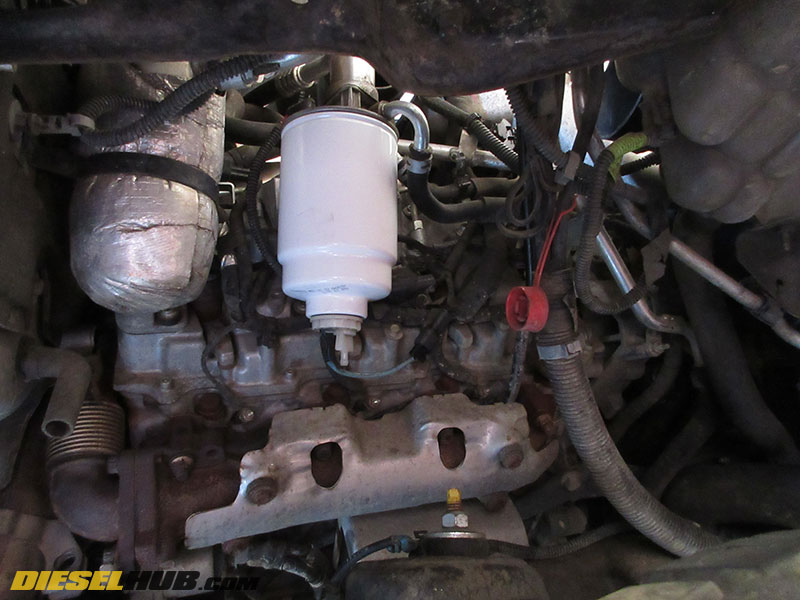
• Install the replacement fuel filter, once again ensuring that the water-in-fuel sensor connector does not become entangled with its surroundings. Install snug by hand only, do not tighten with tools.
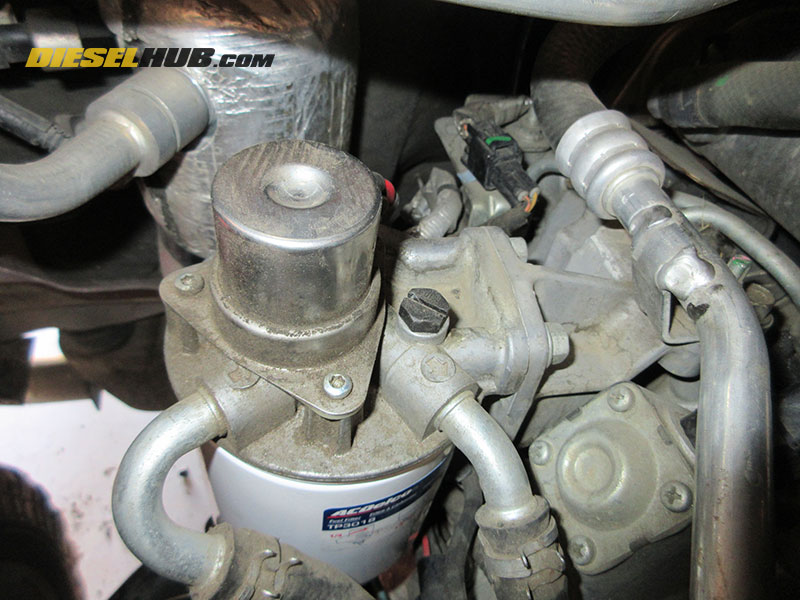
• Locate and open the bleed valve towards the driver side of the fuel priming pump. If desired, you can remove the bleed screw for inspection of the o-ring.
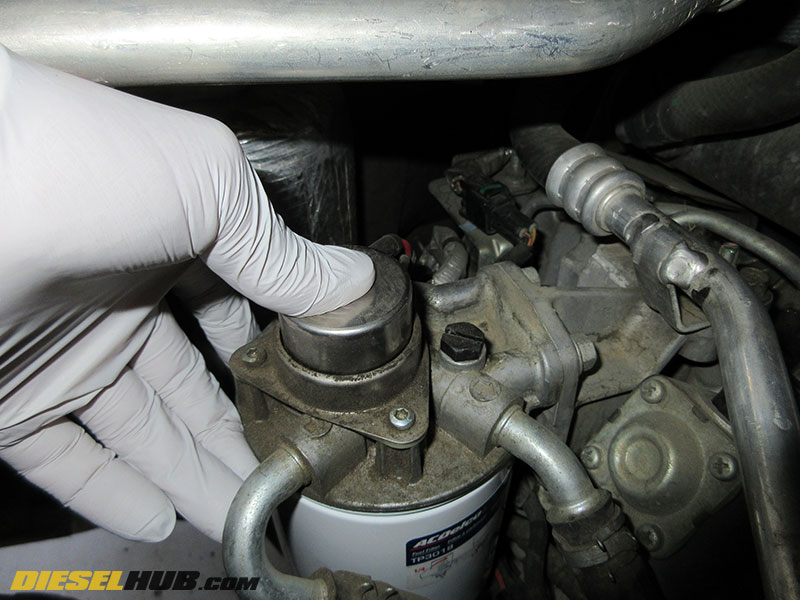
• Repeatedly pump the plunger on the top of the fuel filter housing until all air escapes and diesel fuel begins to flow out of the bleed screw orifice. Immediately close the bleed screw; do not overtighten, the screw is plastic. Clean up any spills so that leaks can be easily detected.
• Reinstall the inner fender and intake tube.
• Start the engine and check for leaks. If truck runs rough for an extended period of time (idle should smooth out within 30 seconds), turn engine off, re-bleed system at the fuel filter housing, and check for leaks (including the bleed screw o-ring).
