Some important notes about the hub installation process; you do not need to remove the entire rotor and spindle assembly to replace the four wheel drive hubs. In fact, you do not even need to remove the wheel and tire. However, we suggest replacing the wheel and spindle bearings under the pretense that a worn, improperly installed, or otherwise faulty wheel bearing can cause a locking hub to wear premature or become damaged. This operation is the perfect excuse to freshen up your bearings. If you already have OEM manual locking hubs, you do not need to purchase a spindle nut/washer kit as you can reuse the factory hardware. However, if you are converting from automatic to manual locking hubs, you will need to purchase Warn's spindle nut kit in order to complete the conversion.
Dana 50 TTB Manual Locking Hub Parts List
| Part Description | Part Number(s) | Remarks/Notes |
| Warn premium manual locking hub set | Warn 38826 | --- |
| Warn spindle nut/washer set | Warn 32721 | --- |
| Dana 50 TTB inner wheel bearing | Timken 387A | --- |
| Dana 50 TTB inner wheel bearing race | Timken 382A | --- |
| Dana 50 TTB inner wheel bearing seal | Timken 415960 | --- |
| Dana 50 TTB outer wheel bearing | Timken SET38 | [1] |
| Dana 50 TTB spindle bearing/seal set | Timken SBK3 | --- |
| Dana 50 spindle locknut socket | OTC 7158 | [2] |
[1] Includes bearing race.
[2] Spindle socket is required to remove the large spindle locknut.
A word on wheel bearing races - if they are in good condition, they can theoretically be reused. If they are scored, pitted, or otherwise untrue to the naked eye, they need to replaced. It is good practice, however, to replace bearing races anytime new bearings are installed.
How to Install Warn Locking Hubs on a Dana 50 Front Axle
Click any thumbnail image to view fullsize

• If you've decided not to replace bearings along with the 4 wheel drive hub assembly, you can skip steps requiring the rotor and spindle assembly to be removed.
• Jack up then support the front of the vehicle with jack stands and remove the tire.
• Remove the brake caliper and hang it safely out of the way without putting strain on the brake line.
• Remove the hex bolts securing the locking hub cap to the rotor using an Allen wrench (6 bolts for manual locking hubs, 3 for automatic locking hubs).
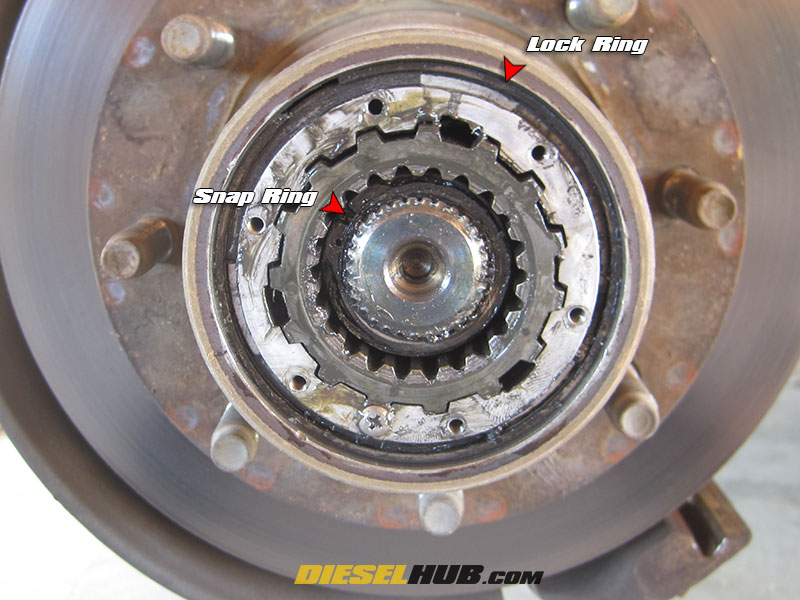
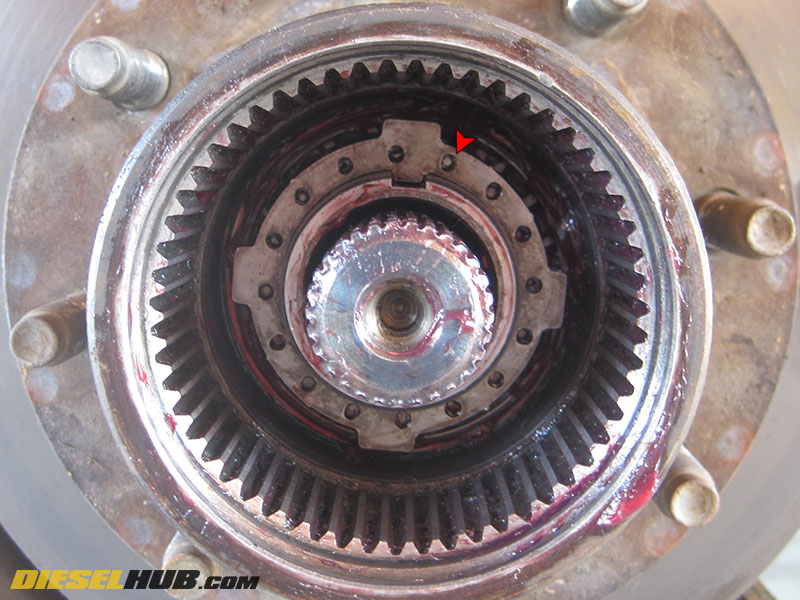
• For manual locking hubs (pictured), remove the snap ring on the axle shaft and the large outer lock ring.
• For automatic locking hubs, remove the entire automatic hub assembly (series of lock rings and thrust washers).

• Tip for removing the large outer lock ring - find the start of the ring and wedge it out of the groove, then work it out in a circular fashion with a small screwdriver. Do not attempt to use a hammer as excessive force may damage the groove.

• Manual locking hubs only - remove the outer spindle locknut using a 4 pronged locknut wrench. Note that locknut wrenches are not universal, there are several different sizes available. OTC tool 7158 is the correct socket for the Dana 50 spindle locknut.
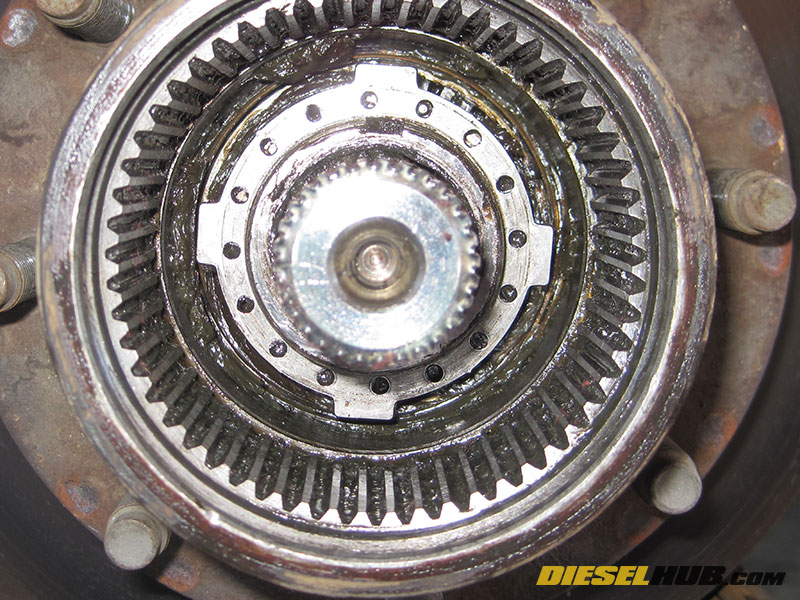
• Remove the lock washer, then the inner spindle nut (again using a spindle locknut wrench).
• Remove the entire rotor assembly by pulling outwards. The outer wheel bearing will likely fall out of place once the rotor is removed.
• Remove the (5) nuts from the studs securing the axle spindle assembly to the steering knuckle.

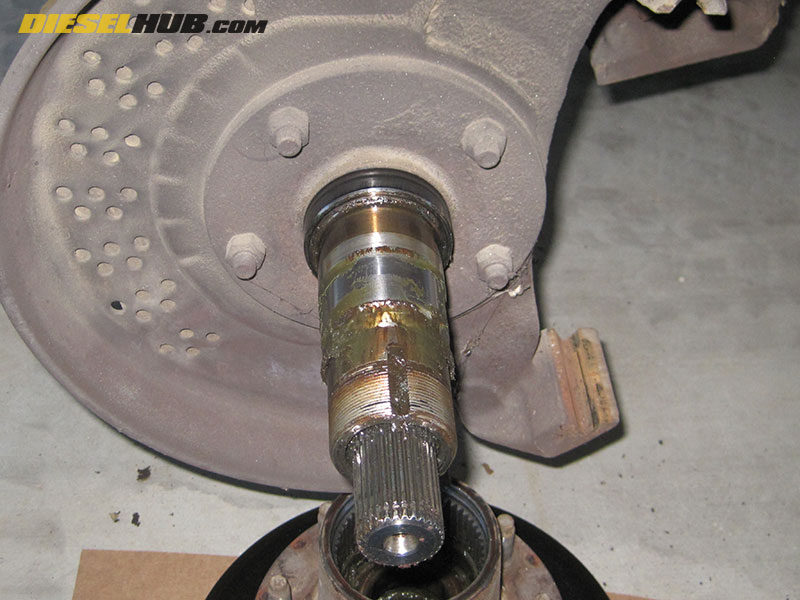
• Pull the spindle assembly outwards to remove - it will likely be much tighter than the rotor assembly when removing. You may need to work it out by prying around the edges of the flange with a screwdriver.
• Note - do not pull the axle shaft outwards once the spindle is removed, as this will remove the axle from the differential and you may lose fluid.
• Remove the bearing seals affixed to the axle shaft assembly (the seals may come off with the spindle or may stick to the axle shaft).

• Remove and discard the inner wheel bearing seal, inner wheel bearing, and outer wheel bearing.
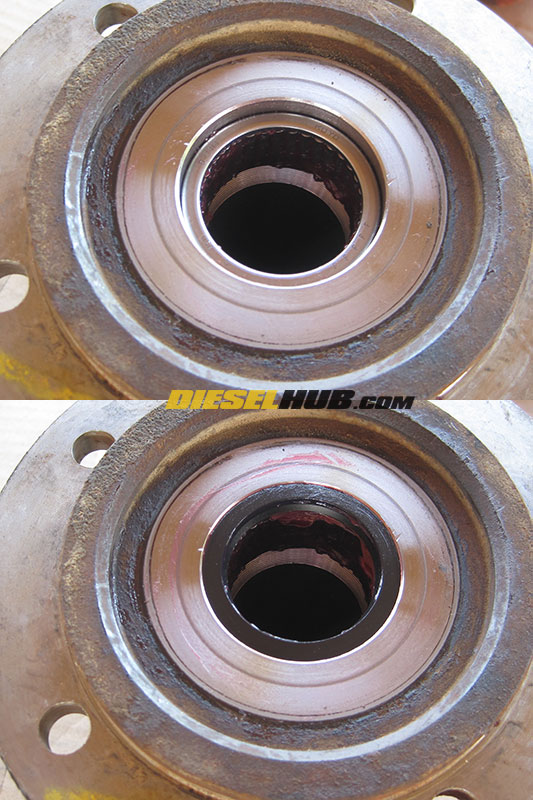
• Clean the rotor assembly thoroughly, removing all remnants of old grease. Inspect the bearing races for wear.
• If desired, replace inner and outer wheel bearing races. Thoroughly pack and install the inner and outer wheel bearings and inner wheel bearing seal; use a high temperature wheel bearing grease.
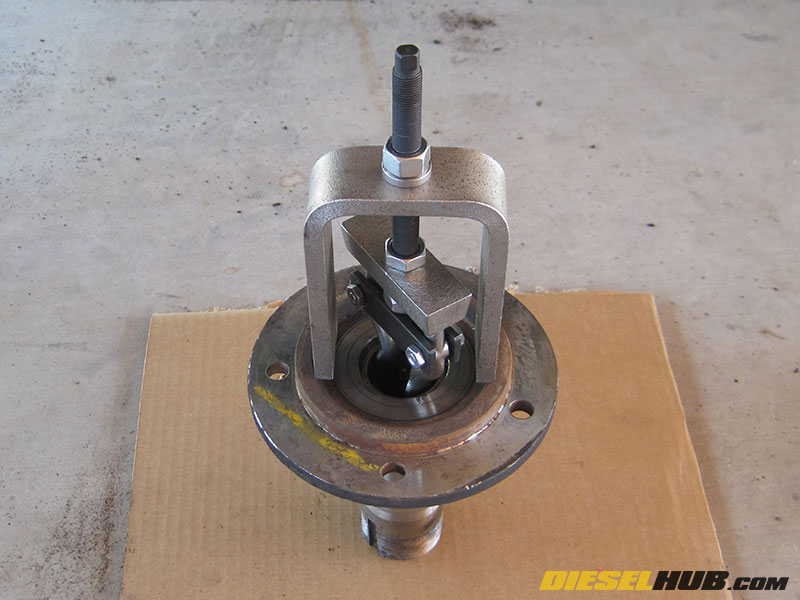
• Use a pilot bearing puller to remove the spindle bearing.
• Thoroughly clean the spindle assembly, removing all remnants of old grease.
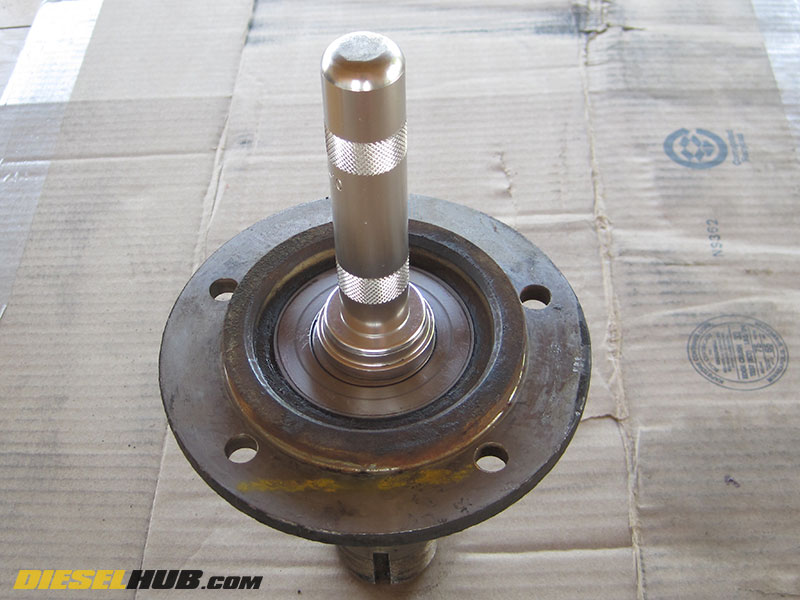
• Thoroughly grease and then install the axle spindle bearing. Use a bearing installation tool, do not attempt to tap the edges of the bearing with a hammer as damage to the bearing will occur.
• Ensure that the axle spindle bearing is fully seated, then install the small spindle bearing seal. A light coating of grease on the seal will help it stay in place during reassembly.

• Install the large spindle bearing seal on the axle shaft flange.
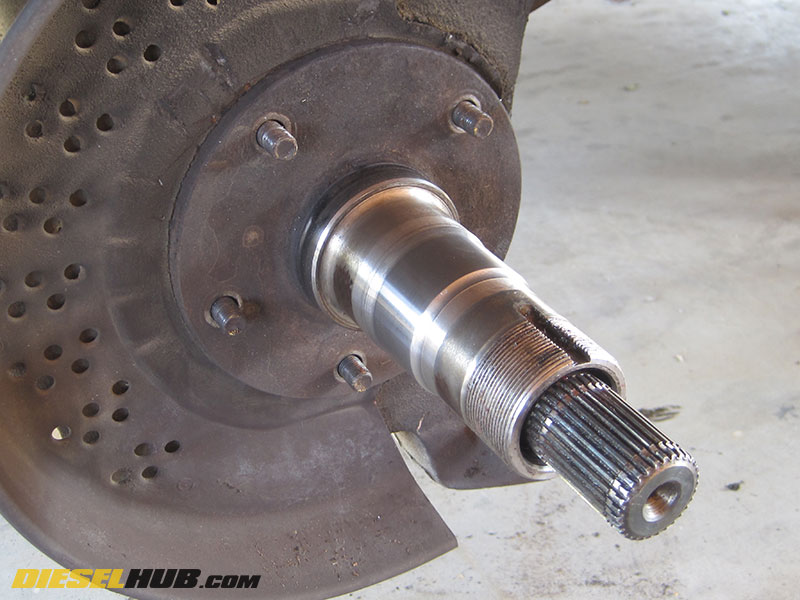
• Reinstall the axle spindle assembly, torque all nuts to 60 ft-lbs in a star pattern.
• Note - the spindle bolt pattern is not symmetrical.
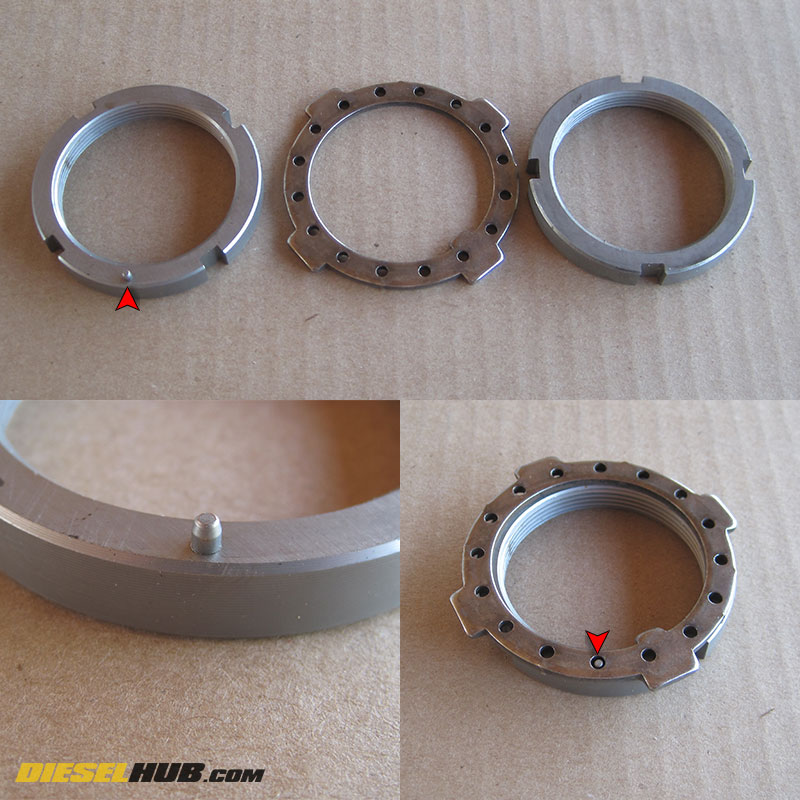
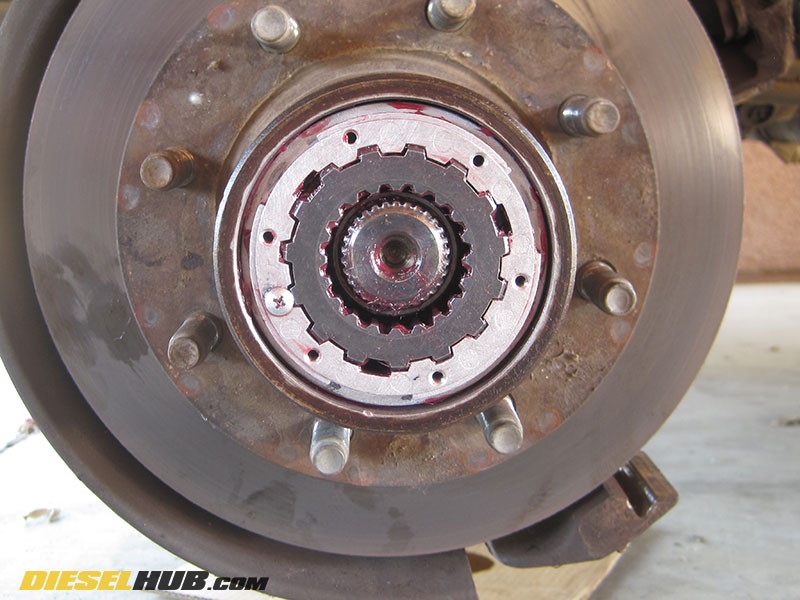
• Study the series of lock nuts used in the manual locking hub assembly. Notice that the innermost locknut has a small nipple in one location. This nipple must be installed outwards during reassembly, as it must be aligned through one of the holes in the lock washer. Following the correct procedures for installing the spindle nuts is crucial.
• Reinstall the rotor assembly, followed by the outer wheel bearing and inner bearing locknut (with the nipple pointed towards you) - torque locknut to 50 lb-ft while rotating the rotor back-and-forth, then back the locknut off 90 degrees.
• Install the lock washer (the lock washer has a protrusion that must slide into the keyway cut into the axle spindle). If the nipple of the inner locknut does not insert into one of the holes extruded in the lock washer, flip the lock washer 180 degrees (the hole patterns are offset and therefore flipping the lock washer changes the location of the holes). If the locknut nipple still does not fit into a hole on the lock washer, tighten the locknut slightly and re-attempt. Repeat as necessary. Do not loosen the locknut to align the pin. Do not continue until the lock washer is installed properly.
• Once the inner locknut and lock washer have been properly secured, install the outer spindle locknut and torque to 160 to 205 ft-lbs (per Warn spec).
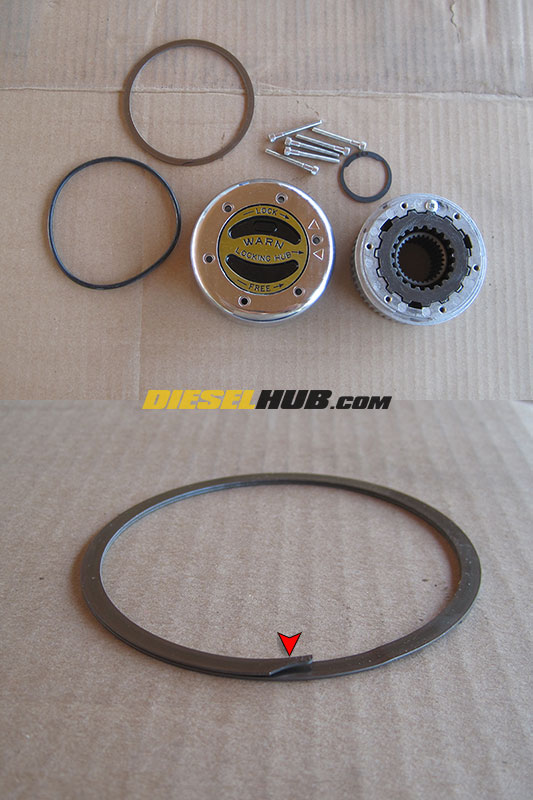
• The Warn Premium locking hub kit includes a new lock ring and snap ring, so do not attempt to reuse the old hardware.
• Warn recommends modifying the large lock ring by bending the tab at one end of the ring outwards 5 to 10 degrees. Doing so will simplify removal when it comes time to service the hubs (refer to fullsize image).
• Warn hubs are greased and come ready to install. The entire assembly simply slides into the hub.
• Install the snap ring in the axle shaft groove, followed by the lock ring in the groove of the hub assembly.
• Install the Warn hub cap (ensure that the dial is in the "FREE" position), lightly greasing the o-ring seal first. Torque cap hex screws to 45 to 55 in-lbs (inch pounds, not foot pounds).
• Reinstall the brake caliper and tire/wheel (if applicable), then check for proper hub engagement.
