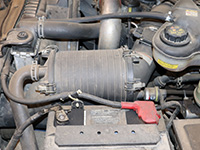
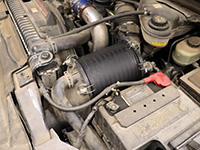
The 6.0 Power Stroke features an air filter that is both physically large and, due to its large surface area, has a relatively high capturing capacity; its honeycomb design can hold 1,600 grams of particulates. Replacing one of these massive filters for the first time can be somewhat intimidating, as the 6.0 liter's engine bay is a deeply cramped space and the air filter cannot be separated from its housing; they are replaced as one large, drop-in assembly. They're actually quite easy to replace but, as is typical when working on a 6 liter, removing or disconnecting a few nearby components can free up some additional space.
How to Remove & Install an Air Filter on a 6.0 Power Stroke
Click any thumbnail to view full-size, detailed image
- The air filter is located in the engine compartment on the driver side next to the battery.
- The front adapter is secured to the filter housing by (2) locking tabs and draws air from the front of the vehicle and the driver side fender area.
- The rear adapter is secured to the filter housing by (2) locking tabs and exits into the tube that connects to the turbocharger inlet.
- Maneuver the upper inlet tube (rubber hose) from beneath the driver side battery cables. This will prevent the hose from catching on the battery cables when the front adapter is positioned forward to clear the filter housing.
- Optional alternative - remove the rubber inlet tube. It is secured to the front air filter adapter by a single, reusable hose clamp.
- Disconnect both metal clips located at the top of the front air filter adapter.
- Optional - If maximum clearance is desired for getting the air filter housing out and in of the engine compartment, use a body clip tool (or flathead screwdriver) to remove the pictured clip, allowing the tube integrated into the front adapter to protrude deeper into the grille area.
- Maneuver the front adapter upwards to clear the lower alignment tabs, then forward until it is clear of the air filter assembly.
- Disconnect both clips securing the rear adapter to the air filter housing.
- Optional - Completely remove the metal clips from the rear adapter; the coolant degas bottle interferes with them when maneuvering the filter in and out of the engine compartment. Simply rock the clasp side-to-side to remove, but do not handle the actual fingers as they are more easily bent.
- Lift the rear adapter upwards to clear the lower alignment tabs, then towards the firewall to clear the air filter assembly completely. Double check that neither the front nor rear adapters are connected to the air filter.
- Pull the filter assembly straight upwards to release and remove from the engine compartment. Two barbed fittings at the bottom of the air filter secure it to its mounting flange. A slight side-to-slide rocking motion tends to help with the release.
- Take note of the rectangular indentation molded into the battery box/air filter base. When installing the new filter, the corresponding rectangular tab on the filter housing must line up with this indentation.
- Install the replacement air filter by lining up the barbs with the holes in the filter mount and pushing straight downwards. The front and rear adapters must be clear of the filter housing while it is being positioned downwards. Note that the filter is directional, and the direction of airflow is molded into the top of the casing.
- Reposition the rear adapter and align the (2) lower tabs into their corresponding slots in the filter housing, then push downwards and secure the metal clasps.
- Reposition the front adapter and align the (2) lower tabs into their corresponding slots in the air filter housing, then push downwards and secure the metal clasps.
- Note that the metal clasps will line up neatly if the lower tabs are properly installed in their slots; verify with a flashlight.
- Reconnect any additional removed components and reposition the rubber inlet hose below the battery cables.


