An alternator is a device that converts mechanical work into electrical energy. In your vehicle, it maintains the battery charge while the engine is running. Diesel engines typically utilize a pair of batteries to meet the high electrical demands required to crank the engine and operate the glow plug system. Without a properly functioning alternator to recharge the system, battery charge is depleted rapidly. Additionally, an alternator allows a vehicle to operate electrical equipment such as headlights, winches, cranes, and on-board hydraulics without depleting the battery charge. Note that this article focuses on the more common single alternator configuration; for dual alternator applications, repeat steps for second alternator.
Testing Alternator Output
If the operation of the vehicle's charging system is in question, the first step should be to check battery condition. Due to the high electrical demands on diesel engines, the source of which is derived from the current loads required to crank the high compression engine as well as operate the glow plug system, a pair of automotive batteries will typically last 3 to 5 years. While some industry experts suggest AGM and gel cell batteries offer a longer service life, our experience has been that the 3 to 5 year rule of thumb generally applies. Periodically checking and maintaining the electrolyte level in wet cell batteries will prove worthwhile in extending their service life, but only to certain limit.
Verifying Battery Condition
If the batteries are a serviceable wet cell type, check and adjust the electrolyte level with distilled water as necessary before troubleshooting. A low electrolyte level may prevent a battery from reaching a fully charged state. Measure the battery voltage across the negative and positive terminals of each battery separately with a voltmeter or digital multimeter after setting the instrument to test DC voltage within the appropriate range for a 12 volt system. A fully charged battery in perfect condition will measure 12.7 volts with only a small margin of error. A fully charged battery in good (acceptable) condition will read 12.5 to 12.7 volts. Voltage, like pressure, is a conserved property. Thus, the voltage readings at each battery should be very close to one another. At ~12.3 volts (no load), a battery is significantly discharged.
If battery voltage is low, disconnect the batteries from the vehicle (remove both negative battery cables, the batteries do not necessarily need to be removed from the vehicle) and fully charge them with an appropriate charger. Once fully charged test and record battery voltage. Allow the batteries to sit disconnected overnight, then recheck voltage. If either battery would not charge to 12.5 - 12.7 volts or lost a significant amount of charge while sitting, it should be replaced. Reconnect both batteries to the vehicle and check battery voltage once more. If voltage drops significantly, the vehicle likely has an electrical drain that needs to be addressed.
How to Test Alternator Output
Assuming that battery condition is not an issue, measure the voltage across the negative and positive terminals of one of the vehicle's batteries with the engine idling, then repeat for the second battery. Ideally, alternator output should be in the 13.5 to 14.5 volt range, or at least reasonably close. If alternator output is below 13 or higher than 15 volts, the charging system is not functioning properly and the alternator is the likely culprit. Note that alternator output may be low after initial startup of a cold engine, but should rise steadily as the engine warms up. If in doubt, allow engine to reach operating temperature before checking alternator output voltage.
Associated Part Numbers
| Part Description | Part Number(s) | Remarks/Notes |
| Alternator, 1992 - 1993 models | ACDelco 3351015 (GM 88877225) |
[1] |
| Alternator, 1994 - 1995 models | ACDelco 3351023 (GM 88877233) |
[2] |
| Alternator, 1994 - 1995 models | ACDelco 3351015 (GM 88877225) |
[3] |
| Alternator, 1996 - 2000 models | ACDelco 3351068 (GM 88877278) |
[1] |
| Alternator, 2001 - 2002 C3500HD | ACDelco 3351068 (GM 88877278) |
[4] |
| Alternator, 2001 - 2002 C3500HD | ACDelco 3351092 (GM 88877302) |
[5] |
[1] Brand new replacement, not remanufactured.
[2] With alternator connector at 7 o' clock position looking from front of engine; new, not remanufactured.
[3] With alternator connector at 11 o' clock position looking from front of engine; new, not remanufactured.
[4] With dual alternator configuration OR single alternator with 5.375 inch case diameter; new, not remanufactured.
[5] With single alternator configuraton AND 5.6875 inch case diameter; new, not remanufactured.
How to Replace the Alternator on a 6.5L GM Diesel
Click any thumbnail to view fullsize, detailed image
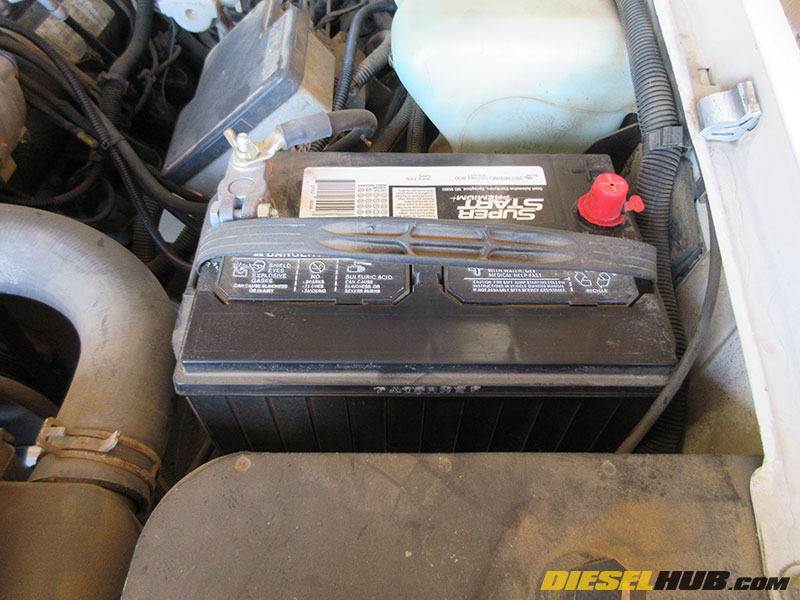
• Disconnect both negative battery cables so nothing on the vehicle is powered and the engine cannot be started.

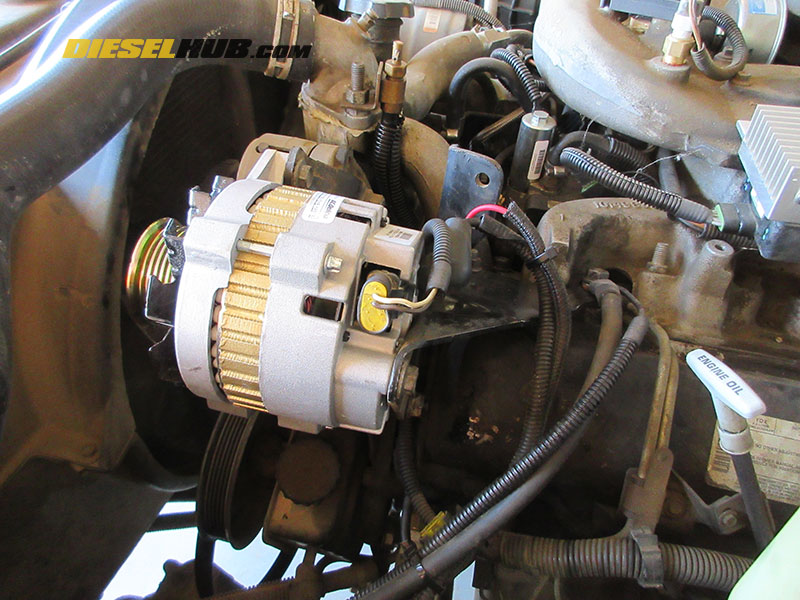
• Locate the belt tensioner to the passenger side of the alternator.
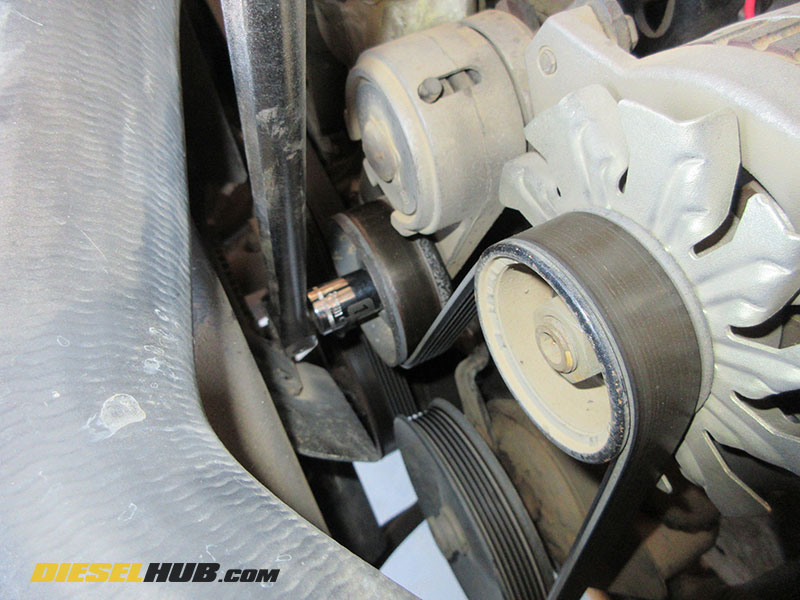
• Relieve belt tension by rotating the tensioner clockwise about the pivot point with a 18 mm socket attached to a serpentine belt tool, breaker bar, or extended reach ratchet.
• Slide the belt off of the alternator pulley while tension is being released. It is not necessary to remove the serpentine belt entirely.
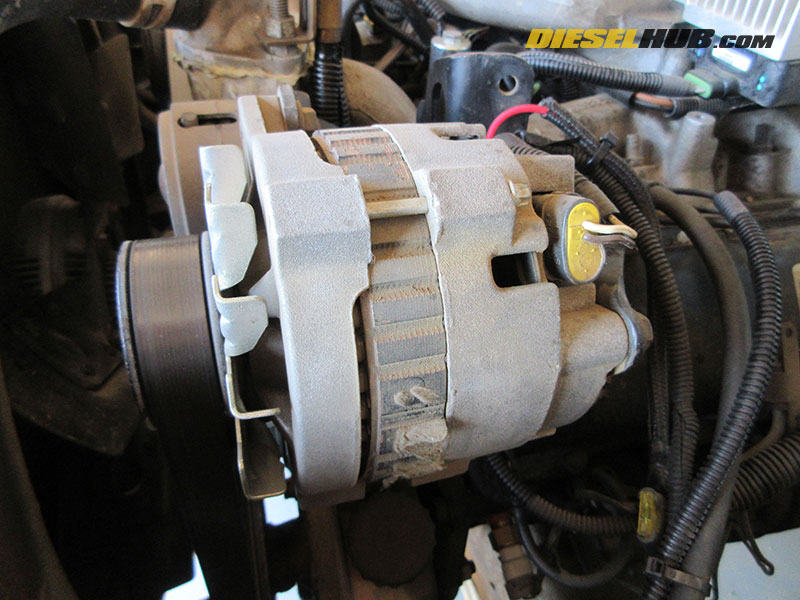
• Disconnect the electrical connector from the alternator, being cautious not to break the retaining clip. Note that the orientation of the connector may vary by model year (1995 model shown).
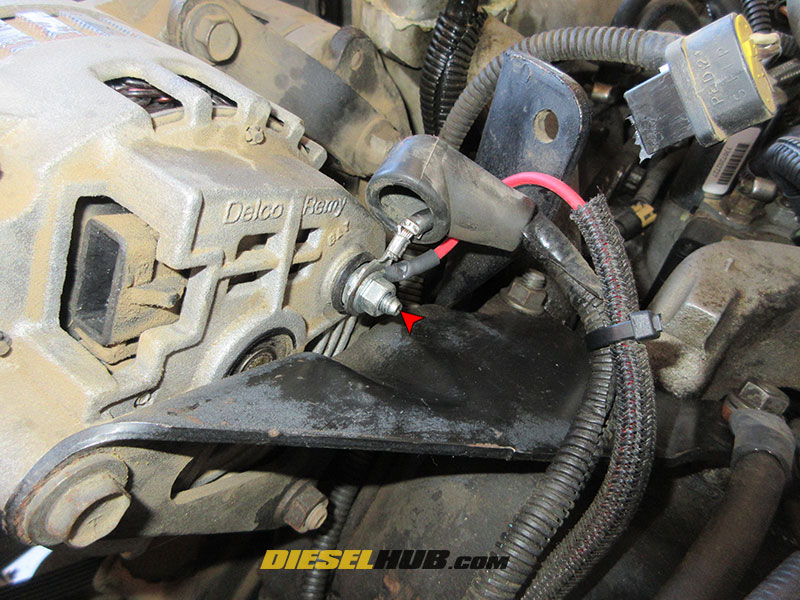
• Remove the positive/power wire from the terminal stud at the rear of the alternator with a 10 mm socket/wrench.

• Remove the driver side retaining bolt at the rear of the alternator using a 13 mm socket/wrench.
• Remove the lower retaining nut with a 15 mm socket and wrench; do not remove the bolt just yet.
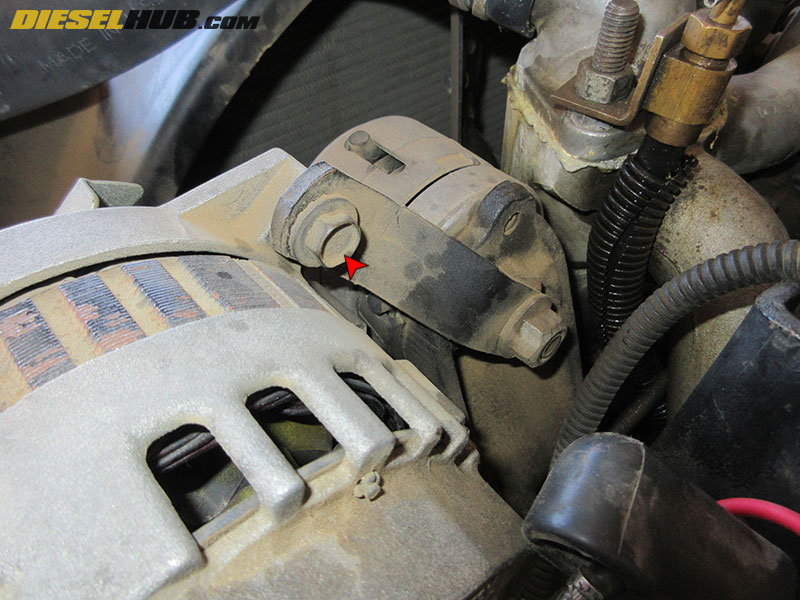
• Remove the 3rd retaining bolt at the passenger side rear of the alternator with a 13 mm socket/wrench. Note that the alternator will now pivot on the long lower bolt that has been left in place.
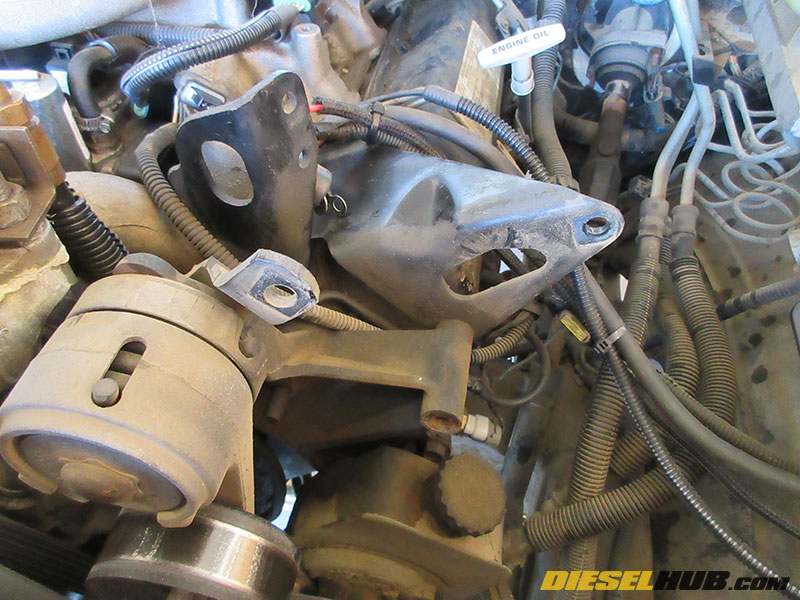
• While supporting its weight, remove the lower bolt and alternator.
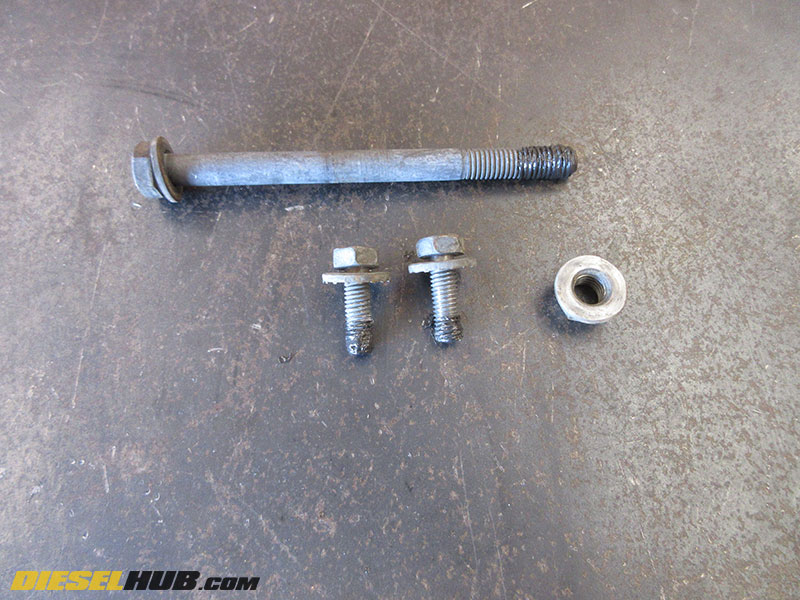
• We recommend cleaning the hardware and applying a small amount of anti-seize lubricant to the threads to prevent galling before installing the replacement alternator.
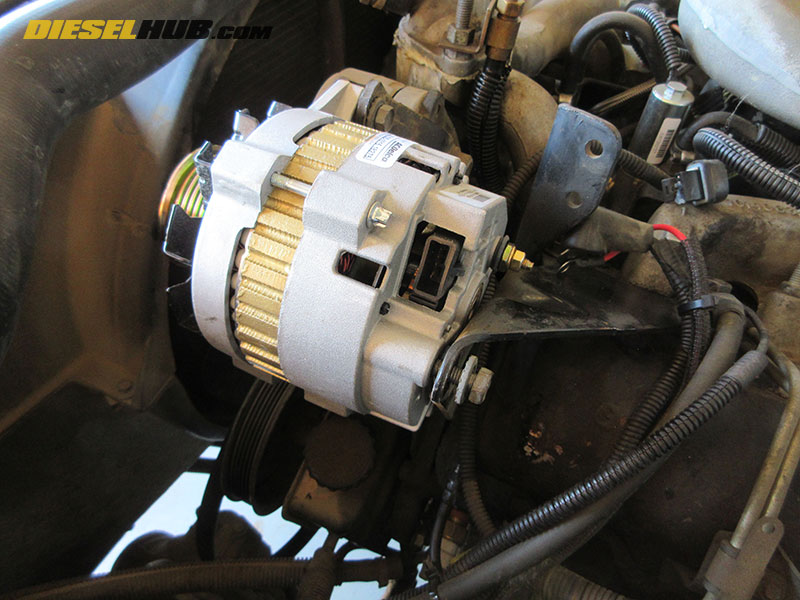
• Set the replacement alternator in the engine bracket, then reinstall the hardware in reverse order. Tighten snug once all bolts have been installed hand tight.
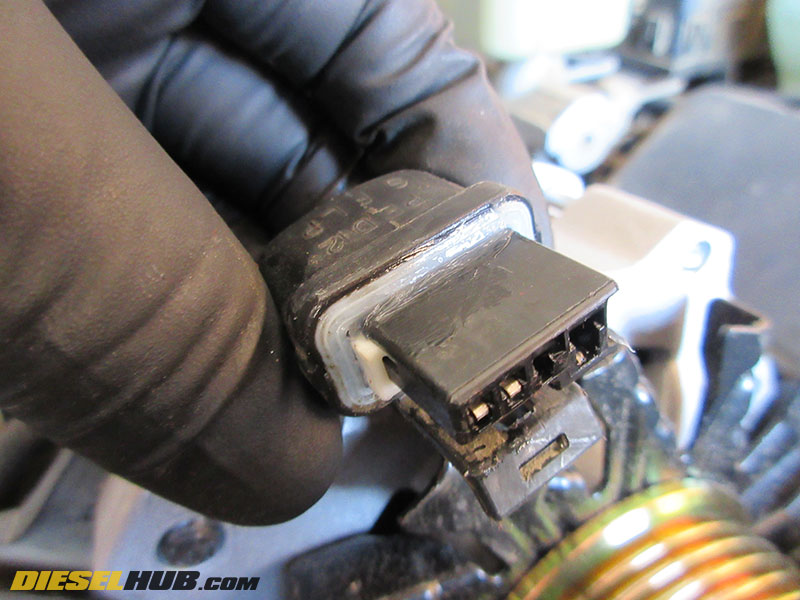
• Apply a small amount of dielectric grease to the seal on the alternator electrical connector.
• Install the connector to the alternator, ensuring the connector fully seats.
• Install the positive/power wire to the appropriate stud on the rear of the alternator.

• Reinstall the serpentine belt on the alternator pulley. Verify that the belt is installed correctly and did not fall off any of its pulleys.
• Reconnect the negative battery cables, start engine, and verify alternator output.
