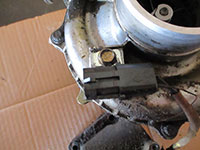
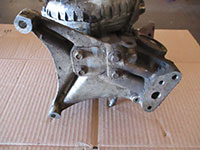
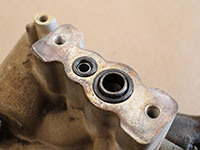
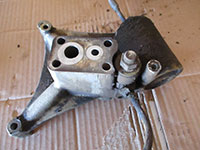
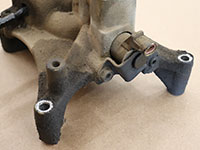
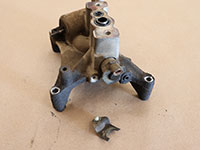
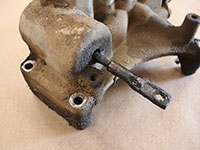
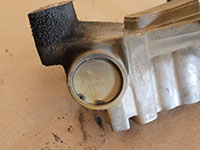
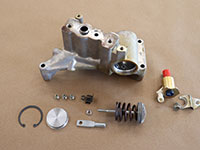
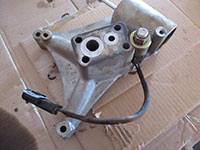
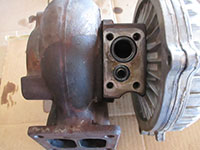
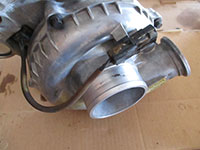
The EBPV is mounted at the turbine outlet of the turbocharger, while the EBPV actuator and solenoid/regulator are contained in the turbocharger pedestal. When the system begins to leak oil, an overhaul of the pedestal is necessary. The turbocharger must be removed in order to separate the pedestal from the turbo and rebuild the EBPV system.
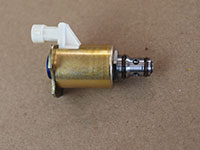
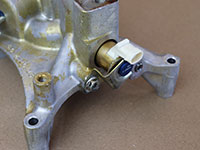
The exhaust backpressure valve is a simple butterfly type valve assembly mounted to the outlet of the turbine housing. Its function is to simulate an engine load following a cold start so that the engine will reach operating temperature quicker. The position of the valve is controlled by the EBPV actuator; a cylinder and piston assembly cast into the turbocharger pedestal. The position of the actuator is controlled by engine oil pressure. The flow of engine oil to the actuator is managed by the EBPV solenoid (also referred to as EBPV regulator), which is threaded into the turbocharger pedestal directly behind the compressor housing and just in front of the EBPV actuator cylinder.
Rebuilding the EBPV pedestal refers to disassembling and cleaning the pedestal in addition to replacing the actuator piston and various related seals. The primary reason for rebuilding the system is that a leak has been detected, although we highly advise rebuilding this component if/when the turbocharger is removed for an overhaul. Turbocharger removal on the "OBS" F-Series trucks is relatively difficult and burdensome (comparatively), thus it is time and cost effective to address this system preemptively. Likewise, it is convenient to rebuild/overhaul the turbocharger if it is being removed to address a leaking EBPV actuator/solenoid. Kill two birds with one stone and rebuild everything at once. For more information on rebuilding a turbocharger, see: 7.3L Power Stroke TP38 turbocharger rebuild guide
Turbo Pedestal Parts List
| Description | Part Number(s) | Remarks | |
| EBPV pedestal rebuild kit | 1994.5 - early 1999 | Ford 2C3Z-9P466-BA Garrett 729519-0004 |
[1] |
| Late 1999 - 2003 | Ford 2C3Z-9P466-AB Garrett 729519-0003 |
||
| EBPV solenoid (regulator) | 1994.5 - early 1999 | Ford F5TZ-6C673-A | [2] |
| Late 1999 - 2003 | Ford F81Z-6C673-BA | ||
| EBPV pedestal | 1994.5 - early 1999 | --- | [3] |
| Late 1999 - 2003 | Garrett 701803-0006 | ||
| High temperature anti-seize | Motorcraft XL-2 | [4] | |
[1] - Includes new actuator, hardware, and seals
[2] - Recommend replacing, but can be reused if it is known to be in good working order
[3] - Pedestal replacement required if pedestal is found to be damaged
[4] - Recommend high temp anti-seize on EBPV valve linkage threads
7.3 Power Stroke EBPV Turbo Pedestal Rebuild Procedures
Click any thumbnail to view fullsize, detailed image
• Disconnect both negative battery cables.
• Remove the turbocharger from the engine; see 1994 to early 1999 turbo removal or late 1999 to 2003 turbo removal for detailed procedures.
• On 1994 to early 1999 model engines, the turbocharger and pedestal will be removed as one unit. On late 1999 to 2003 model engines, the turbocharger and pedestal are typically removed from the engine separately.
1994 - early 1999 only
• Remove the retaining bolt securing the EBPV solenoid connector to the compressor housing with a 10 mm socket.
• Separate the turbocharger from the pedestal by removing the (4) retaining bolts with a 10 mm socket, then separating the two assemblies.
• Set the turbocharger aside.
1994 - early 1999 only
• Remove the nut on the top of the EBPV solenoid with a 16 mm wrench/socket, then remove the outer part of the solenoid assembly by sliding it up the shaft.
• Remove the inner part of the EBPV solenoid by pulling straight upwards while rotating back-and-forth. The o-rings on the nose of the cylindrical solenoid component have a propensity to harden and swell, so it make take some maneuvering to remove it from the pedestal.
Late 1999 - 2003 only
• Remove the EBPV solenoid by rotating it back-and-forth while pulling the solenoid away from the pedestal.
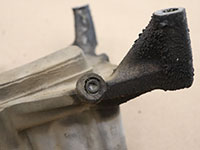
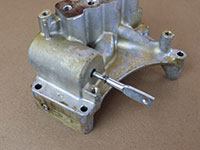
• Unthread and remove the rod end and jam nut from the EBPV actuator rod. Note that 1994 to early 1999 and late 1999 to 2003 pedestals use different fittings to connect to the EBPV valve linkage (latter shown). If necessary, hold the rod with vise grips while unthreading the end piece; this rod is replaced in the Garrett rebuild kit.
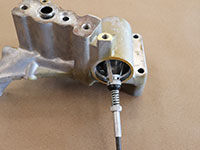
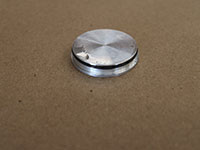
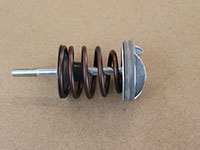
• Force the actuator and piston rod assembly out of the bore by gently pushing and/or tapping the actuator rod through the cylinder; this will also force the cap off.
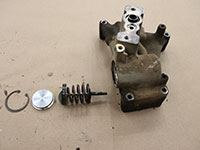
• Discard the piston, snap ring, and end cap as these components are all serviced in the Garrett rebuild kit.
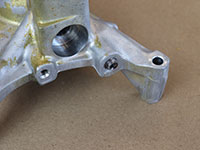
• As applicable, locate the (3) small oil gallery plugs mounted at various locations in the turbocharger pedestal. Remove the plugs with a 3/16 hex (Allen) head socket/wrench.
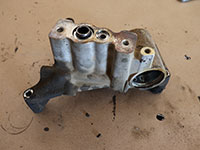
• Thoroughly clean the EBPV pedestal with your preferred products and techniques. Do NOT clean the EBPV solenoid nor EBPV piston bore with any abrasive product or technique. There are no longer any plastic components or seals attached to the pedestal, so solvents and aluminum-safe degreasers can be used at will.
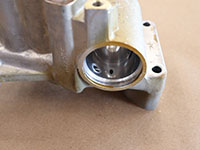
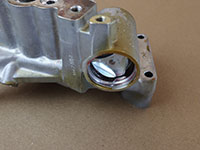
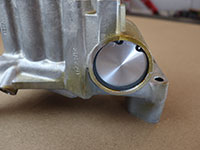
• Inspect the EBPV actuator piston bore with a clean finger, paying close attention to any marked areas. If the bore is smooth and there are no ridges, the new piston assembly can be installed as-is. If the bore has any ridges, imperfections, or areas of concern, it will require honing.
• If the EBPV piston bore requires honing, hone the cylinder bore with a brake cylinder hone. The pressure on the hone should be set to LIGHT to limit pressure; there is no need to remove large amounts of material. Using liberal amounts of clean motor or honing oil, hone the cylinder bore until it is perfectly smooth and free of any imperfections (stop honing immediately once all imperfections are removed).
• Once the cylinder has been honed thoroughly clean it once more, leaving no trace of oil or contaminants; all metallic and/or abrasive particles must be removed.
• Ensure that the turbocharger pedestal has been thoroughly cleaned and familiarize yourself with the contents of the Garrett rebuild kit. The kit should come with a new EBPV piston rod assembly, piston cylinder cap, snap ring, and seal, piston rod fitting/jam nut, and turbocharger pedestal o-rings.
• The pedestal rebuild kit does NOT include a new EBPV solenoid. We highly encourage replacing the EBPV solenoid at this time unless it is known to be in good working order.
• Apply oil resistant thread sealant to the pedestal oil gallery plugs, then reinstall snug. Do not overtighten as it is easy to damage the cast aluminum threads in the pedestal. We highly recommend Loctite 545 thread sealant.
• Thoroughly lubricate the EBPV piston cylinder cap seal with clean motor oil, then install the o-ring onto the cap.
• Thoroughly lubricate the EBPV solenoid o-rings (they often come pre-lubricated).
• If reusing an EBPV solenoid, replace the o-rings (not serviced in rebuild kit).
1994 - early 1999 models only
• Reinstall the EBPV solenoid, ensuring that it is fully seated. Do not over-torque the top nut as it will unseat the solenoid valvebody.
Late 1999 - 2003 models only
• Reinstall the EBPV solenoid, ensuring that it is fully seated before installing the retaining bracket and bolt; do NOT rely on the retaining bracket to seat the EBPV solenoid.
• Thoroughly coat the turbo-to-pedestal o-rings in clean motor oil and set them into the appropriate lands at the bottom of the turbocharger.
• Carefully secure the pedestal to the turbocharger, paying close attention to the ensure that the o-rings seat properly and do not become pinched between the mating surfaces.
• Note that on 1994 to early 1999 engines (2) of the (4) pedestal bolts are longer; they correspond with the taller portion of the pedestal casting. On late 1999 to 2003 engines, the (4) pedestal bolts are identical.
1994 - late 1999 models only
• Reinstall the EBPV connector bracket to the compressor housing; do not overtighten.
• Attach the EBPV actuator rod to the EBPV lever arm.
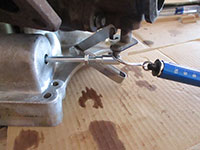
• Install a 0.01 inch feeler gauge between the EBPV linkage and bump stop (refer to image).
• Attach a small pull-type force gauge above the actuator lever arm (refer to image) and pull straight outwards while holding the turbocharger. When the feeler gauge falls (EBPV butterfly valve begins to open), read the scale.
• The preload spec is 10 lbf; make appropriate adjustments by lengthening or shortening the actuator rod. Thread the latch inwards (shorten) for more preload and outwards (lengthen) for less preload. Once the preload has been set to 10 lbf, tighten the jam nut against the actuator latch.
• Reinstall the turbocharger and test for proper operation.
