Heat and age tend to cause the radiator hoses to mold to the inlet and outlet necks of the radiator. If hoses are not damaged during the removal process, they can be reused. If the hoses are cracked, appear soft (spongy), or become in any way compromised, they should be replaced. You might just find that this is an ideal time to flush and service the cooling system.
Additionally, don't miss the opportunity to thoroughly clean the radiator while it is removed from the vehicle. A heavy application of dish soap, light brushing, and a good rinse can break down tens of thousands of miles of road grime accumulation, which will maximize the efficiency of the cooling system. Commercial cleaners and degreaser (i.e. Simple Green) can also held dissolve heavy deposits. Don't get heavy handed with the radiator fans - harsh brushing, stiff bristles, and even excessive water pressure can bend the fins, blocking airflow.
Cleaning the inside of the radiator is equally advisable due to the convenience. Rinsing out the radiator can remove rust, deposits, residue, and other contaminants. If the household water source is known to carry sediment (i.e. fine sand, mineral particulates) use a water filter to avoid introducing these contaminants. An inexpensive irrigation filter used inline on a garden hose provides sufficient protection from such intrusions.
How to Remove the Radiator (F-Series & Super Duty)
Click any thumbnail to view fullsize, detailed image
- Disconnect both negative battery terminals.
- Remove the driver and passenger side intercooler tubes (if applicable)
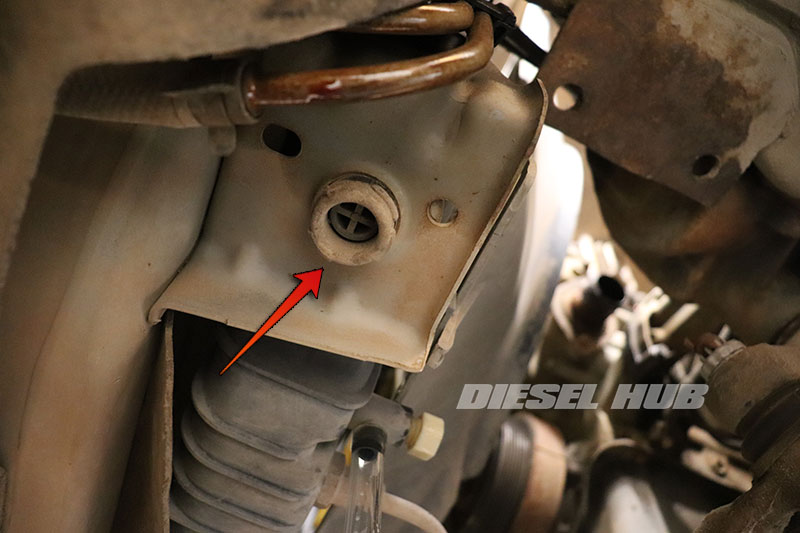
- Place a suitable container beneath the radiator drain valve (petcock) on the driver side. A hose can also be attached to the valve so that coolant can be drained into clean containers to be reused. In total, approximately 3 to 4 gallons of coolant should be drained.
- Open the drain valve and completely drain the radiator. Some drain valves require a wrench, while others have a handle.

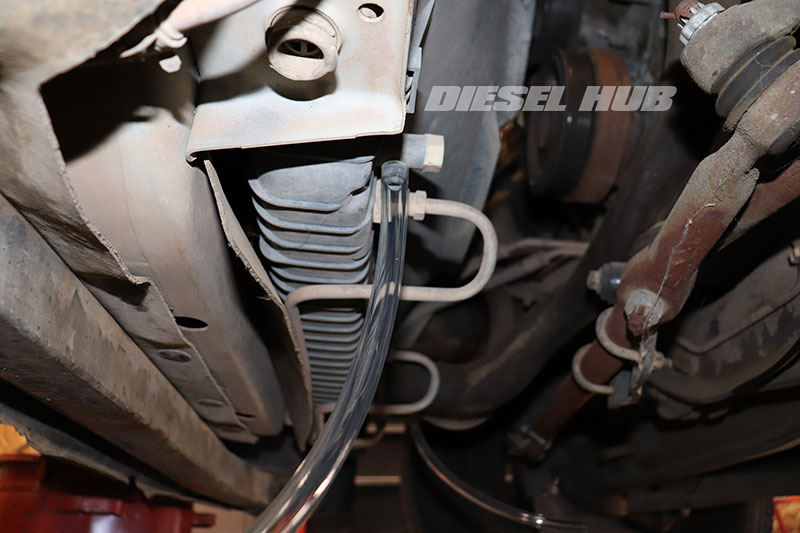
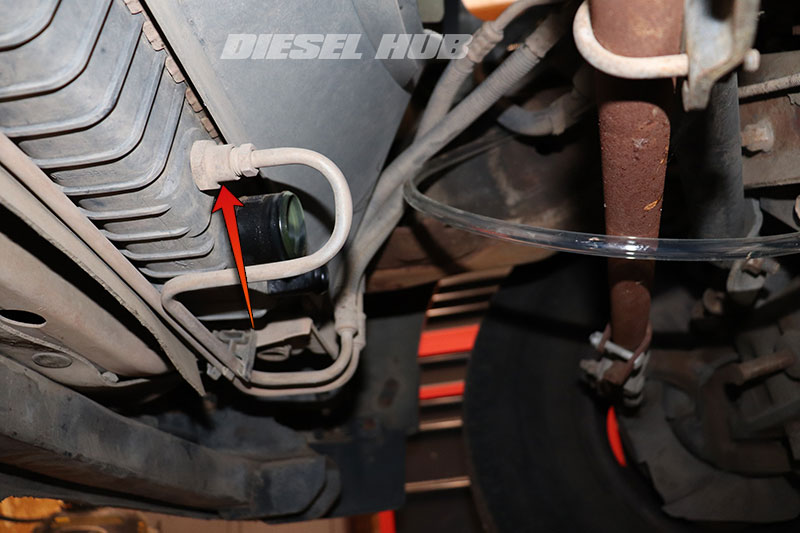
- Position the drain pan beneath the lower radiator hose.
- Disconnect the lower radiator hose from the radiator (be prepared for additional coolant to drain).
- Disconnect the lower degas tank hose from the radiator (next to lower radiator hose, Super Duty trucks only).
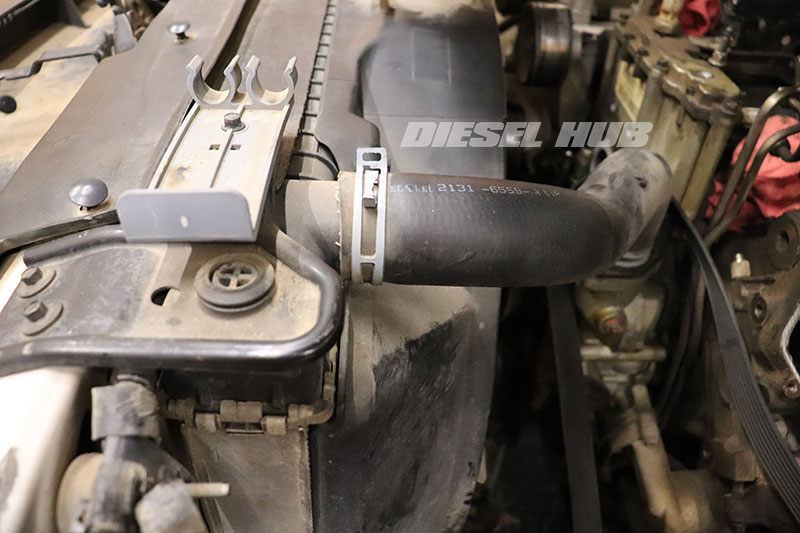
- Disconnect the upper radiator hose from the radiator.
- Note - it is convenient to also disconnect the upper radiator hose at the water pump outlet and remove it from the vehicle entirely.
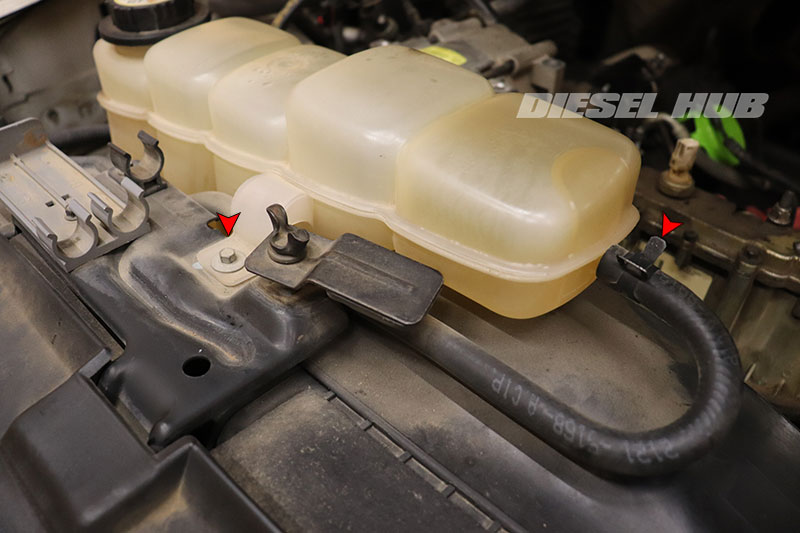
- Disconnect the upper degas tank hose.
- Remove the upper degas tank mounting bolt with an 8 mm socket.
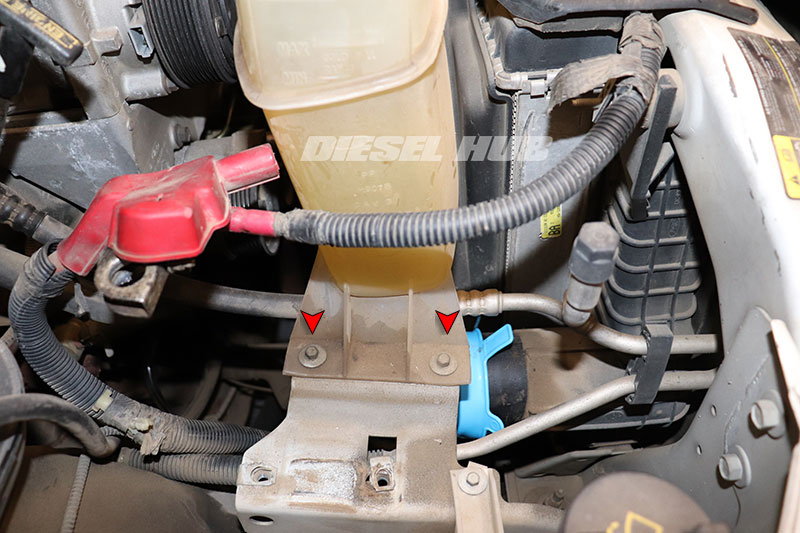
- Remove the (2) lower degas tank mounting bolts with an 8 mm socket.
- Remove the degas tank by maneuvering upwards and out of the engine bay with the lower hose still attached.
- If the radiator has an integral transmission oil cooler, place a suitable container beneath the transmission cooler lines at the radiator.
- Remove the transmission cooler lines with an appropriate flare nut wrench (sizes may vary by transmission model). A small amount of transmission fluid is going to drain from the lines. They can be plugged with vacuum caps to prevent seeping while they are disconnected.
- If applicable, unclip both transmission cooler lines from the plastic bracket at the bottom of the radiator.
- If applicable, remove the tire iron and jack from the upper core support.
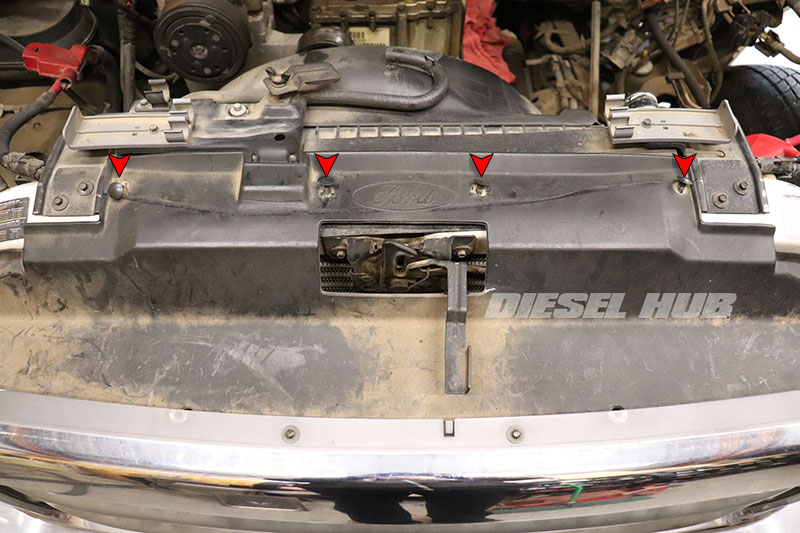
- Unclip the series of plastic body fasteners that secure the rubber cover between the grille and radiator. A body clip removal tool is ideal, but a flathead screwdriver can suffice if one is unavailable. Take care not to damage the clips so that they can be reused.
- Remove the tire iron/jack brackets on the passenger side radiator bracket with an 8 mm socket.
- Remove the tire iron bracket on the driver side radiator mount with an 8 mm socket.
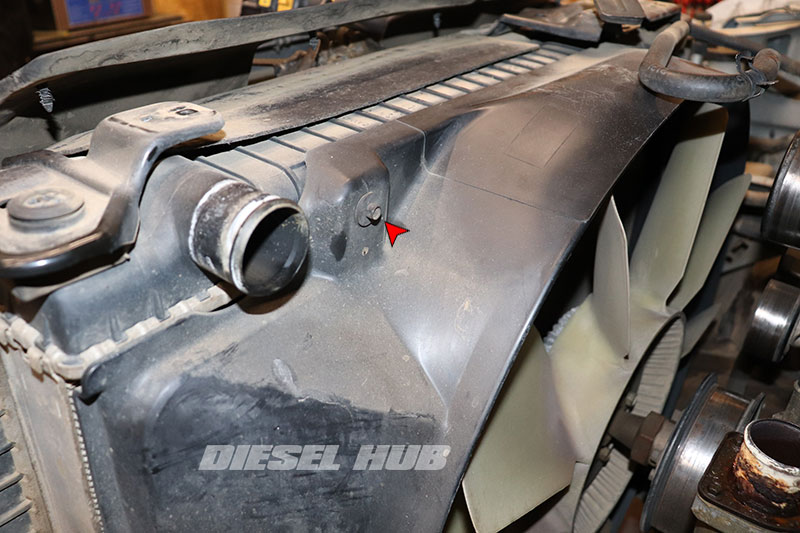
- Remove the driver side fan shroud mounting bolt located near the upper radiator hose fitting.
- Super Duty trucks require an 8 mm socket.
- OBS trucks require a 10 mm socket.
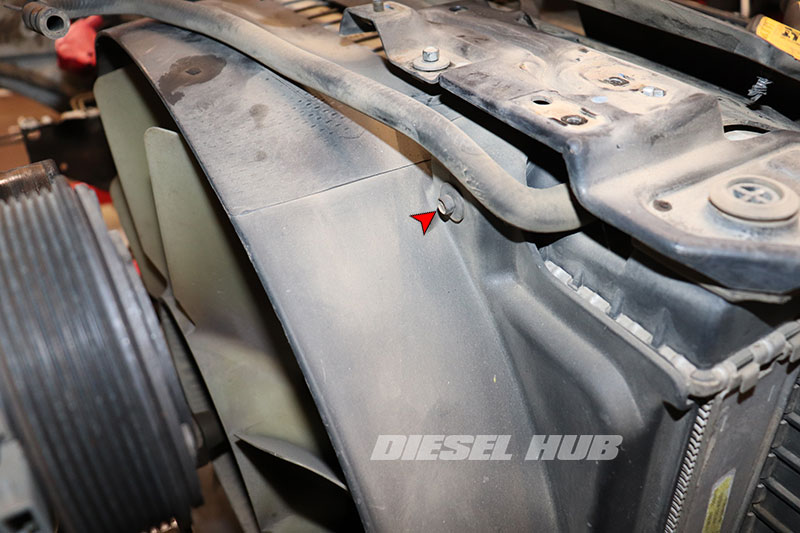
- Remove the passenger side fan shroud mounting bolt.
- Super Duty trucks require an 8 mm socket.
- OBS trucks require a 10 mm socket.
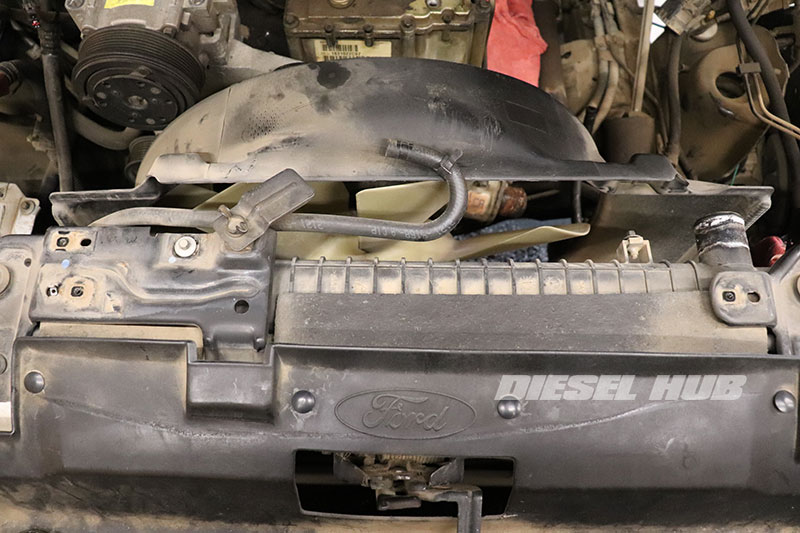
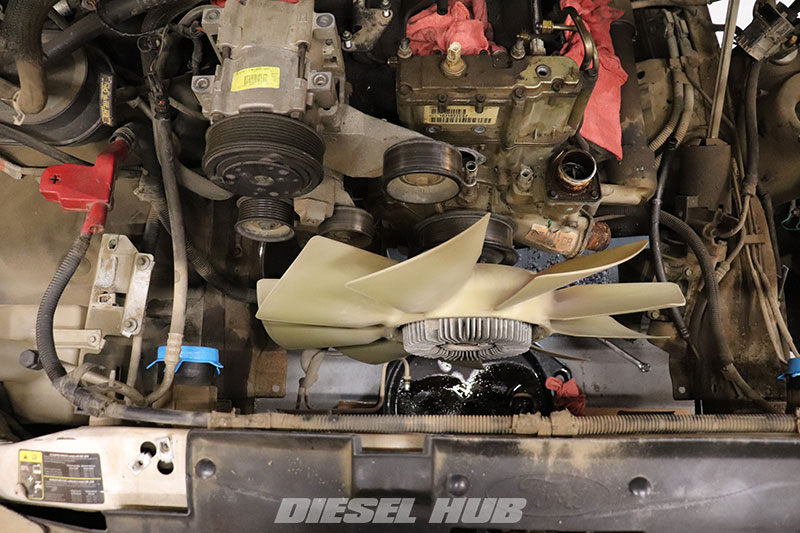
- The fan shroud secures to the bottom of the radiator via a tab-and-groove connection.
- Pull the shroud upwards approximately 1-1/2 inches so that the tabs on the shroud clear the grooves on the radiator, then position it towards the engine and let it rest on the fan clutch assembly.
- Verify that the fan shroud has been properly separated at from the bottom of the radiator.
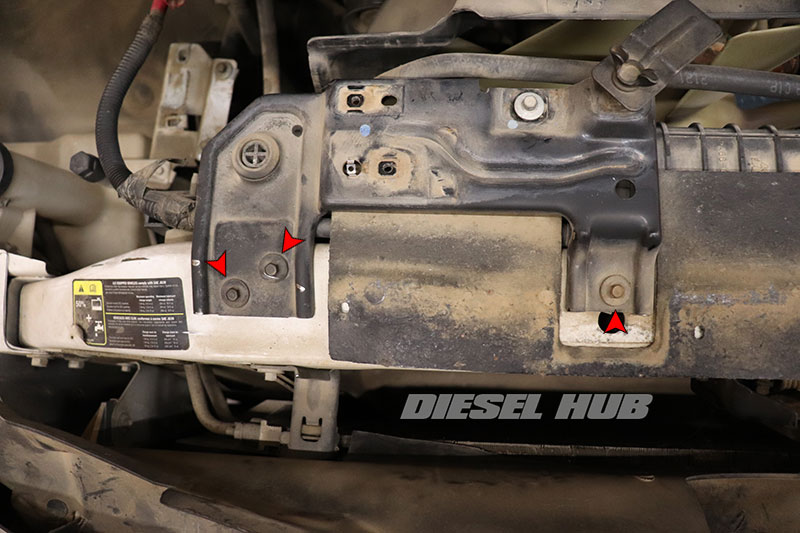
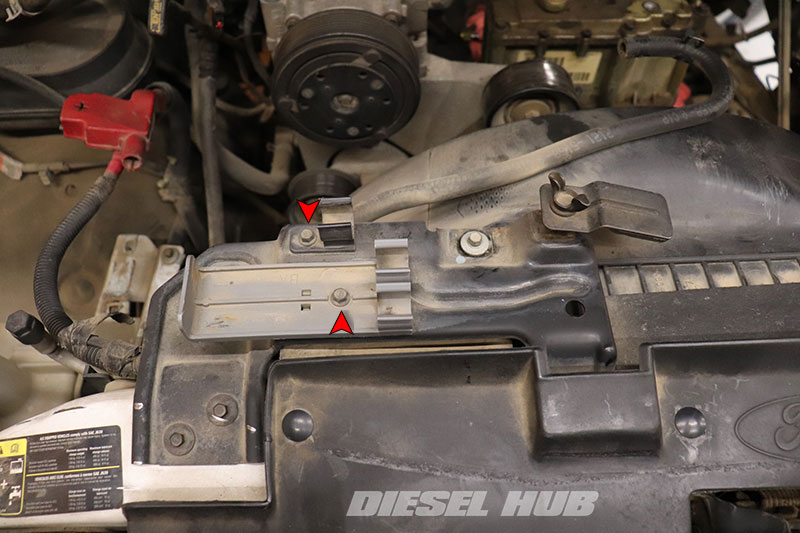
- Disconnect the passenger side radiator mounting bracket by removing the pair of bolts with an 8 mm socket.
- Remove the bracket from the core support /radiator and set aside.
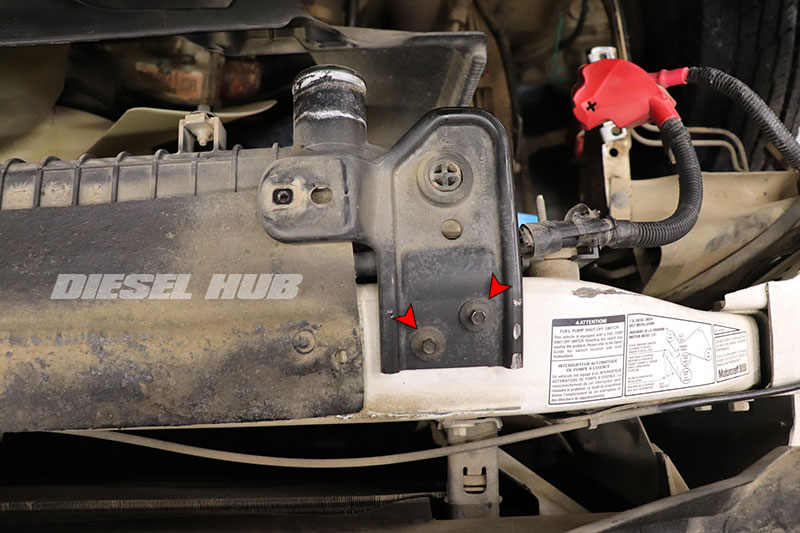
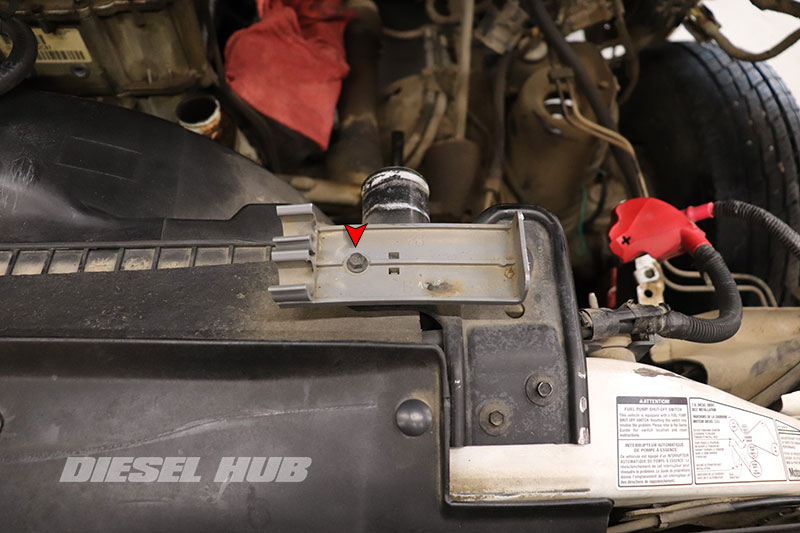
- Disconnect the driver side radiator mounting bracket by removing the pair of bolts with an 8 mm socket.
- Remove the bracket from the core support/radiator and set aside.
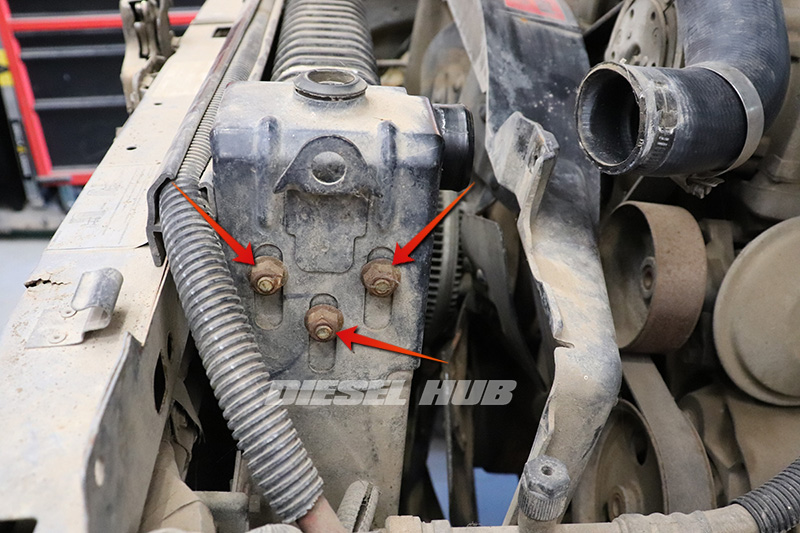
- Remove the passenger and driver side radiator mounting brackets. Each bracket is secured with (3) nuts requiring a 13 mm socket.
- The passenger and driver side brackets are a mirror image of one another in terms of removal.
- Note the pegs on the bottom of the radiator (one on driver side, one on passenger side) that nest into rubber bushings - these are what are securing the radiator to the core support at this stage.
- Pull the radiator upwards and maneuver it out of the vehicle. Note that the radiator can be awkward to handle and the bottom pegs may be tight in the rubber bushings.
- Installation is exactly reverse - don't forget to refill the cooling system and replace any compromised parts.

