Applicable Models:
1994.5 - 1997 Ford F-250, F-350, F-Super Duty
1999 - 2003 Ford F-250, F-350, F-450, F-550 Super Duty
2000 - 2003 Ford Excursion
1995 - 1999 Ford Econoline E-350
2000 - 2003 Ford F-650, F-750
2000 - 2003 Econoline E-350, E-450, E-550
Applicable Engine(s):
7.3 liter Power Stroke V-8 (7.3 DIT)
The 7.3 Power Stroke engine utilizes a gerotor type oil pump for the low pressure system. Since the 7.3 Power Stroke uses an HEUI injection system, it has both a low pressure and high pressure oil pump. The low pressure oil pump (LPOP) is entirely responsible for engine lubrication and supplying oil to the high pressure system while the high pressure oil pump (HPOP) supplies highly pressurized oil to each of the fuel injectors through a network of rails and channels in the cylinder heads.
Gerotor type oil pumps are extremely common in automotive applications. Although limited in maximum pressure output, gerotors are simple with few moving parts, capable of high speed operation, function quietly, and are highly reliable. The pump is comprised of two rotors (inner and outer) and a housing. The inner rotor is keyed to the crankshaft and therefore always rotates at engine speed. It is meshed with the outer rotor (figure 1 below), which revolves inside the housing.
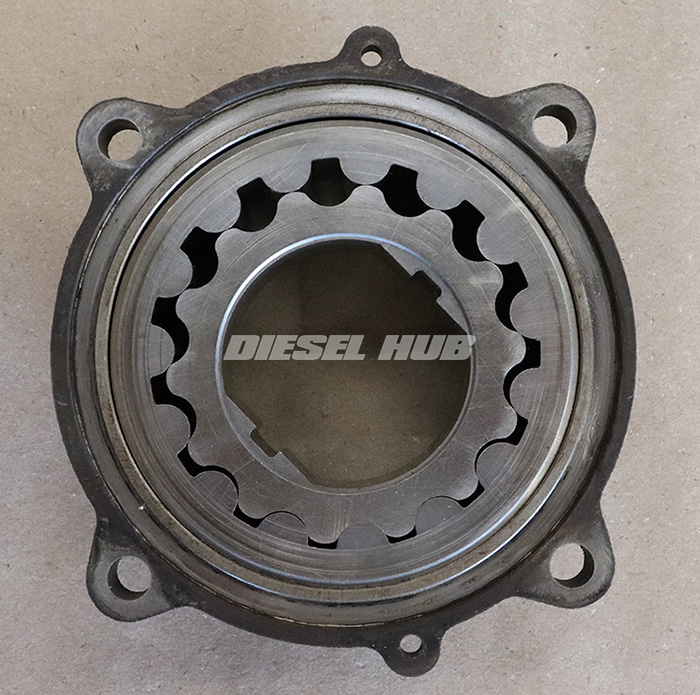
The housing is offset relative the crankshaft centerline, thus the inner and outer rotors rotate on separate axes - this is what enables the pumping action. As the gears separate, suction is created that draws oil in from the sump. As the gear teeth come together, the oil is pressurized. Passages machined into the front cover of the engine provide the inlet and outlet pathways.
Oil Pump Diagnostics
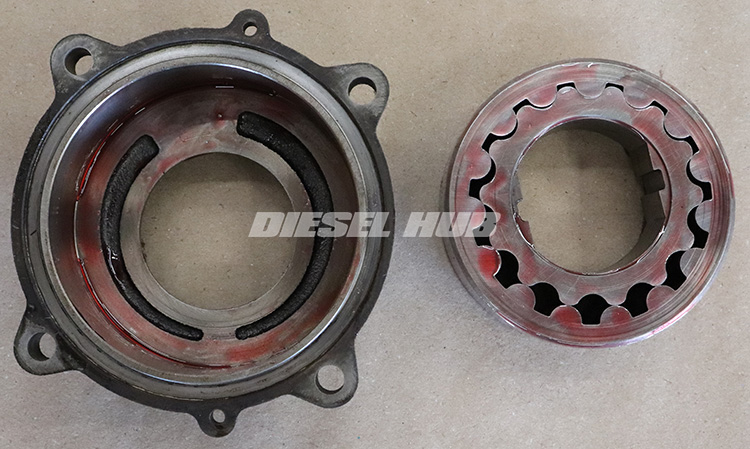
Lube oil pumps failures are not common. As previously mentioned, this style pump is highly reliable with few moving parts and significant wear would be required to degrade performance. This is the reason that gerotor oil pumps are found in nearly every internal combustion engine created within the last century. That being said, a LPOP failure would be categorized by excessive clearances between the gerotor gears and/or the outer gear and the housing.
Low oil pressure and/or the inability to maintain the oil level in the HPOP reservoir could be symptoms associated with a LPOP problem. The oil pressure specification for a 7.3 Power Stroke engine is 10 psi minimum at idle speed and 40 to 70 psi at 3,300 rpm. If there is a no start condition, the HPOP reservoir is empty, and the LPOP is suspected, fill the HPOP reservoir to within 1 inch of the inspection plug hole with new engine oil and start the engine to verify pressure. If the engine still fails to start, even momentarily, broaden the diagnosis to find the source of the no start condition.
If the engine starts and stalls, an oil supply issue is probable. However, there is an anti-drainback valve incorporated into the HPOP supply circuit that could be the culprit. A more detailed account of this oil circuit is available here: HPOP reservoir and flow information.
Oil Pump Replacement Parts
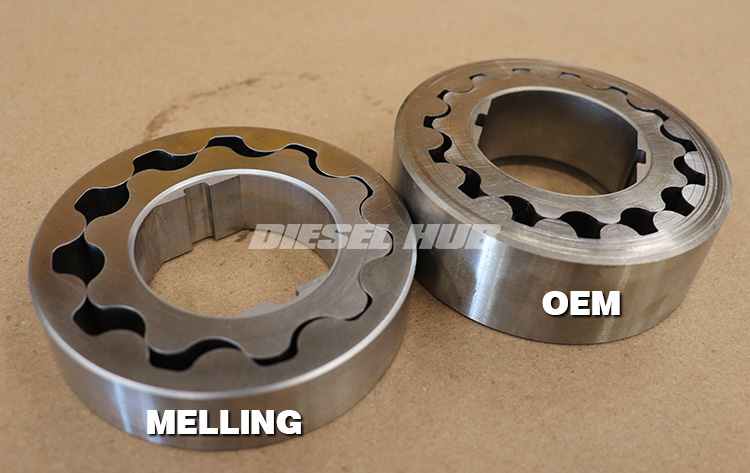
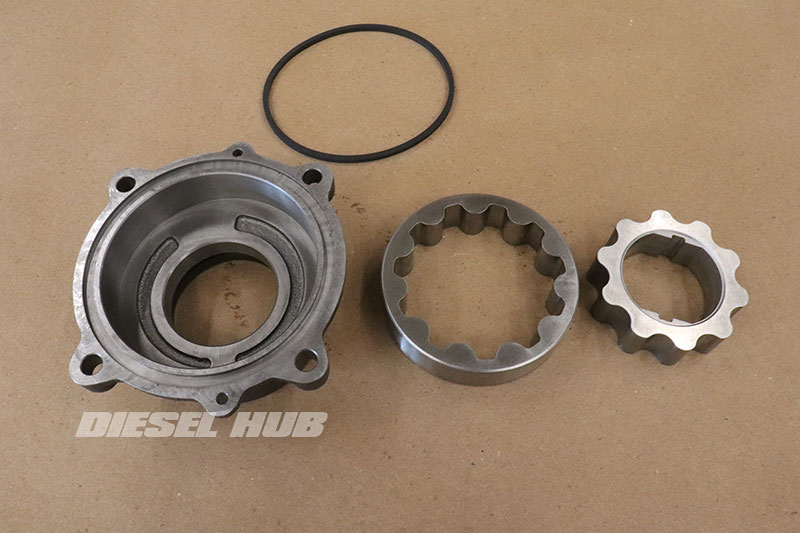
The International/Ford oil pump for the 7.3 Power Stroke is not readily available and may be becoming obsolete. Additionally, Ford does not package the replacement pump as one complete unit and instead offers the rotors and housing separately. The Melling M208 oil pump is a popular, USA made alternative that circumvents dealer pricing and lead times. Some sellers of this product suggest that it is a high flow upgrade. Melling advertises that the pump operates at "standard" volume and pressure, but that it provides an "improved supply of oil to the engine". Don't expect quicker starts or any general improvements - it does what it's supposed to do.
It's worth noting that the Melling design is indeed quite different. The OEM oil pump has a 14 tooth inner rotor compared to the 10 tooth rotor utilized by the Melling pump (figure 2 below). Additionally, the rotors on the OEM pump are significantly thicker than they are on the Melling pump. It's earned a reasonably good reputation and is a tried-and-true replacement.
| Component | Part Number | Remarks |
|---|---|---|
| Oil pump assembly | Melling M208 | [1] |
| Crankshaft seal, damper wear ring | National 5066 | [2] |
| Damper bolt | Ford F4TZ-6A340-A | [3] |
| RTV sealant | Motorcraft TA-31 | [4] |
| Wear ring sealant | Loctite 271 | [5] |
| Assembly lubricant | Lucas 10153, Amsoil EALTB | [6] |
| Crankshaft damper puller | Recommend OTC 4531 | [7] |
| Crankshaft seal installer | Recommend CTA 3877 | [8] |
[1] - Includes housing, mounting gasket, crankshaft seal (pre-installed), and gerotors; does not include damper wear ring
[2] - Crankshaft seal/wear ring kit
[3] - Recommend replacing bolt when damper is removed
[4] - RTV sealant is required for crankshaft damper installation
[5] - Loctite 271 or equivalent required if wear ring is replaced
[6] - Engine assembly lubricant is extremely sticky and adheres to parts better than motor oil
[7] - Not all universal damper puller/installer sets contain the appropriate threaded adapters for the 7.3 Power Stroke engine
[8] - Only required if oil pump is being reused; new housing includes pre-installed seal
The crankshaft damper wear ring (rear of damper) should be inspected and replaced as necessary anytime the damper is removed. It is highly probable that a worn wear ring will not seal properly against a new front crankshaft seal and therefore replacement is encouraged. Additional information on replacing the crankshaft damper wear ring is available at: crankshaft damper wear ring removal & installation.
Lubricating Gerotors for Initial Startup
A new oil pump will be subjected to a brief period of accelerated wear if it is installed dry. While it is acceptable to coat the gears and housing contact surfaces in clean motor oil, engine assembly lubricant is a superior option. Assembly lubes are highly viscous and extremely sticky, thus they adhere to parts much better. Additionally, they are packed with anti-wear additives and designed to dissolve quickly in the presence of motor oil.
Anyone that wrenches on an engine should have a bottle (or two) of assembly lube on the shelf. Lucas Oil assembly lube is extremely sticky and does not drip from parts. It is a particularly excellent choice on those tasks that will take some time and installed parts will be sitting for a while. Amsoil assembly lube is equally tacky but is slightly less viscous and has some "flow" to it. It works exceptionally well for pre-lubing turbocharger bearings. For the best protection possible, coat the new oil pump parts and wear surfaces in assembly lube.
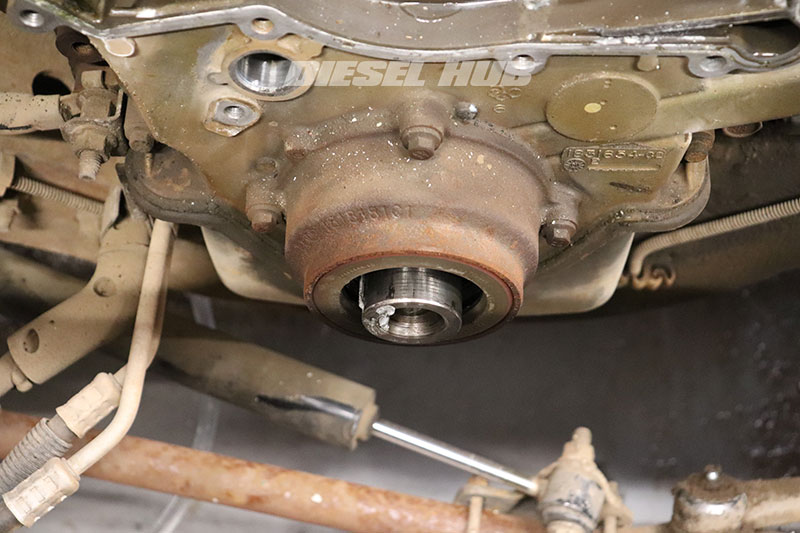
How to Remove the Oil Pump on a 7.3 Power Stroke Engine
Click any thumbnail to view fullsize, detailed image
- Disconnect both negative battery cables.
- Remove the fan clutch and shroud; see 7.3 Power Stroke fan clutch removal for additional guidance.
- Drain the cooling system and remove the radiator; see 7.3 Power Stroke radiator removal for additional guidance.
- Remove the camshaft position sensor bracket retaining bolt with a 10 mm socket, then remove the camshaft position sensor.
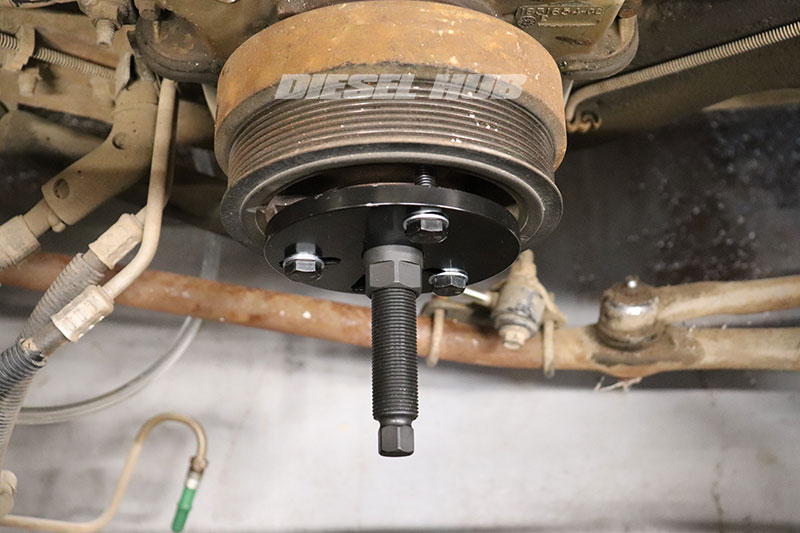
- Remove the crankshaft damper; refer to 7.3 Power Stroke crankshaft damper removal for additional guidance.
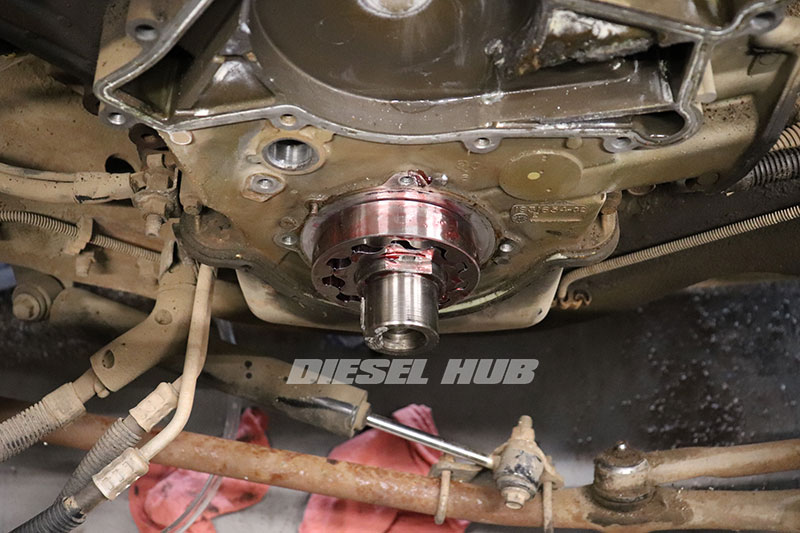
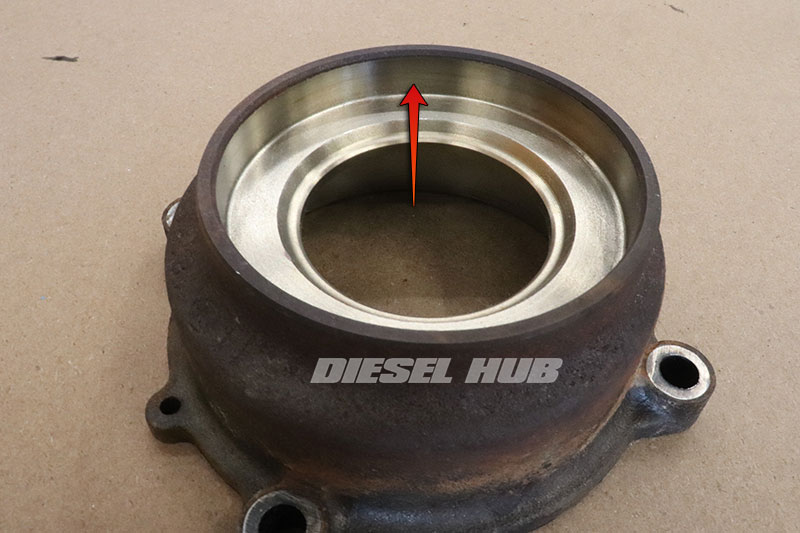
- The low pressure oil pump is located directly behind the crankshaft damper. With the damper removed, the front crankshaft seal and all (4) mounting bolts are accessible.
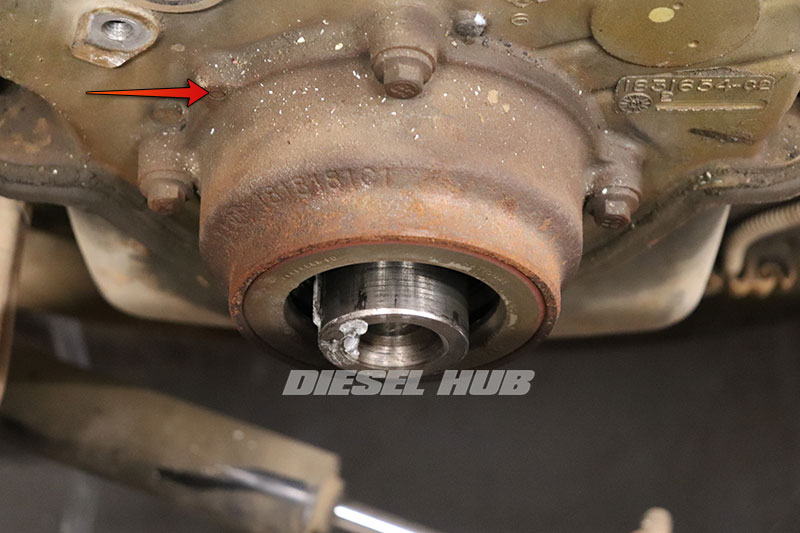
- Remove the (4) oil pump housing mounting bolts with a 10 mm socket/wrench.
- Note that there are (2) dowel pins protruding through the front engine cover at approximately the 10 o'clock and 5 o'clock positions - do not attempt to rotate the housing when removing.
- Gently tap the circumference of the LPOP housing while pulling the pump away from the front cover to remove the oil pump housing.
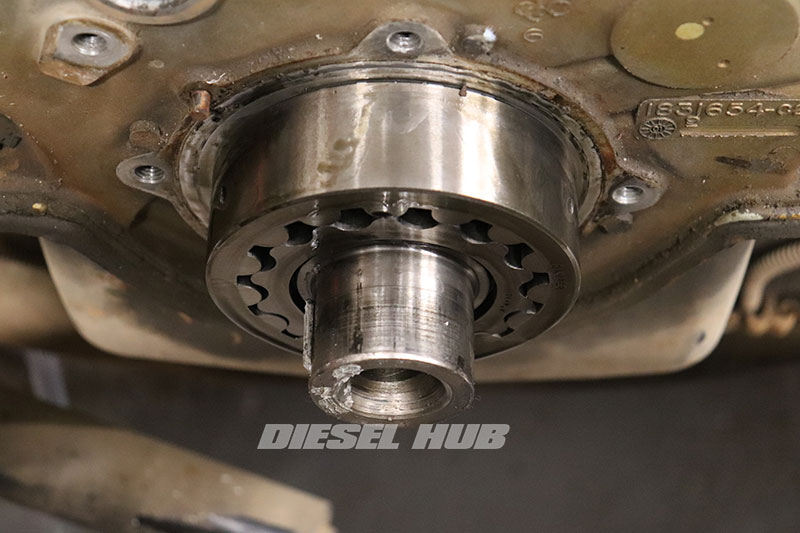
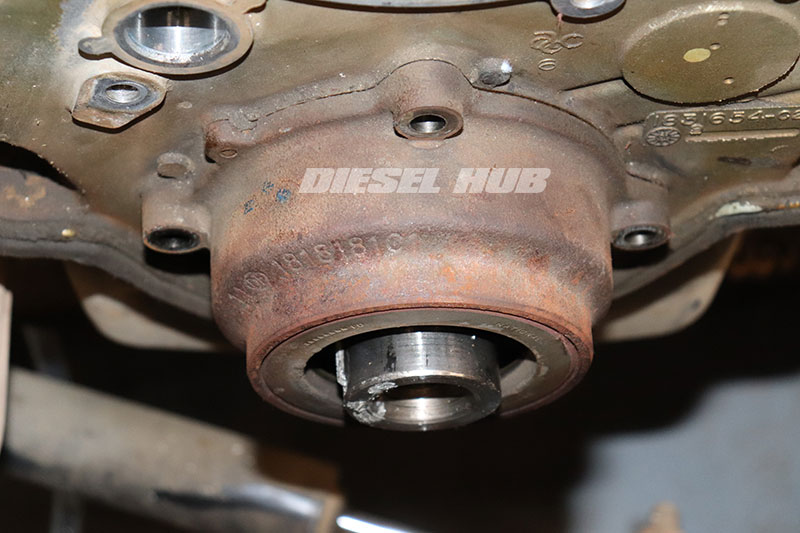
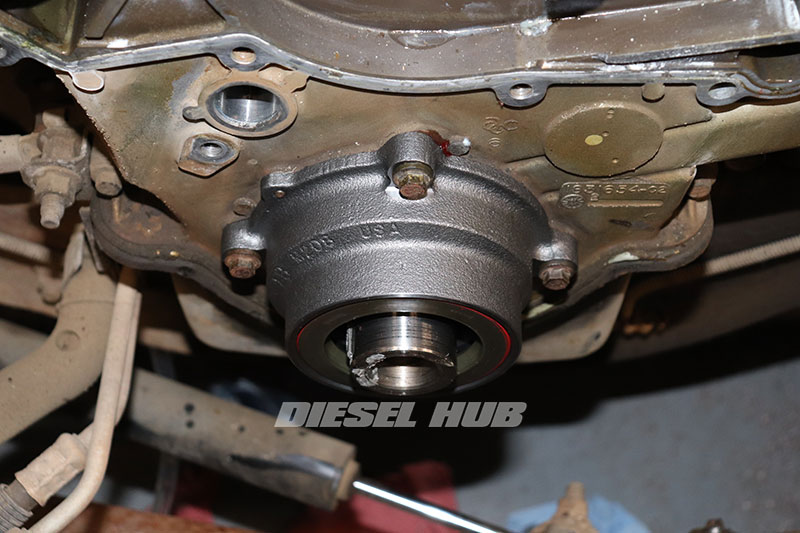
- Remove the gerotor gears, which just slide off the crankshaft hub. They may need to be rotated slightly to clear the crankshaft damper keyway.
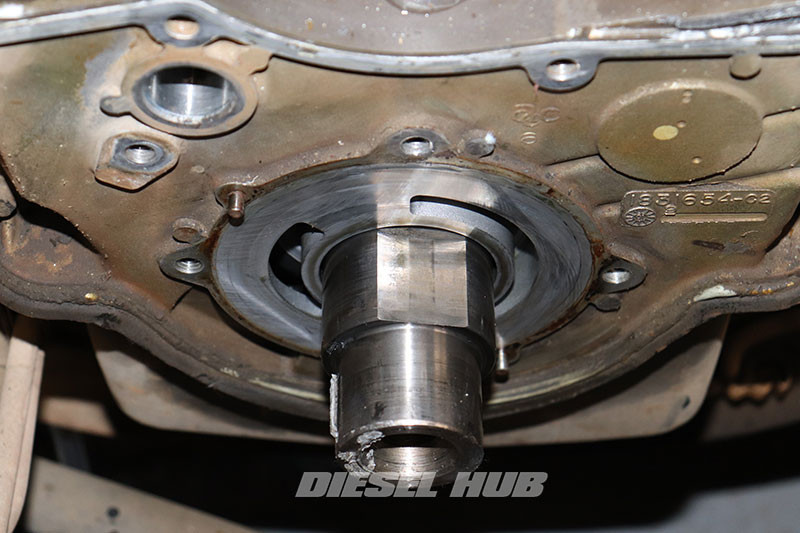
- Note that there are (2) flat landings machined into the crankshaft hub for the gerotor gears; these correspond to the flat surfaces machined into the inside rotor.
- Thoroughly clean the gasket mating surface on the front engine cover.
How to Install the Oil Pump on a 7.3 Power Stroke Engine
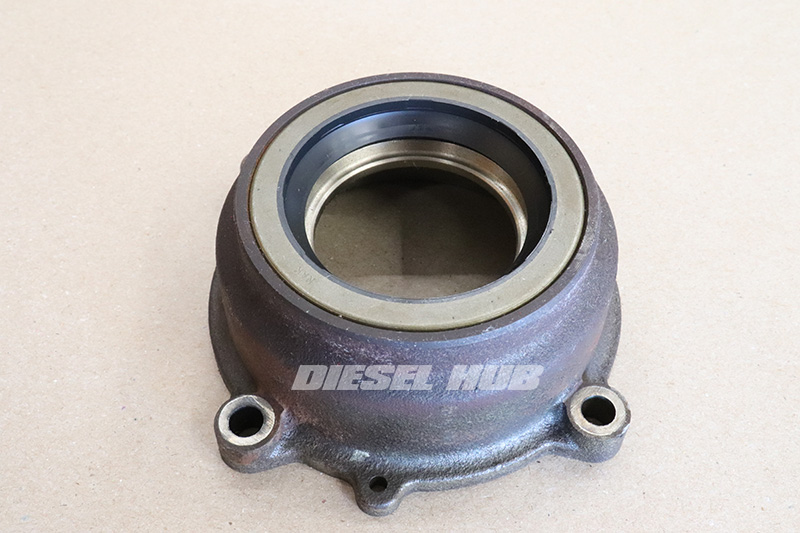
- If the low pressure oil pump is being reused and resealed, degrease and clean all components thoroughly and install a new front seal (refer to procedures below).
- Disassembly the oil pump by removing the inner and outer gerotor gears.

- Thoroughly lubricate the o-ring seal and internal surfaces of the oil pump housing with clean engine oil or assembly lubricant (preferred).
- Install the o-ring seal into the appropriate groove in the housing, ensuring that it seats evenly and will not become pinched during the installation process.
- Thoroughly coat the gerotor gears with clean engine oil or assembly lubricant (preferred).
- This coating of lubricant is critical in preventing wear of the gerotor gears during initial startup, so apply liberally.
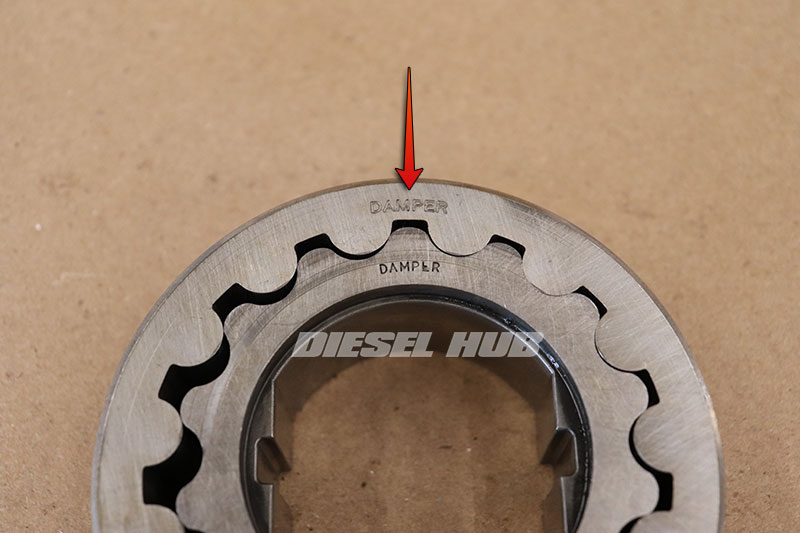
- Note that on a factory Ford oil pump the gerotor gears are labeled "DAMPER" on one side, indicating that this side must be installed into the housing such that it faces the crankshaft damper, not the front engine cover.
- If there is no label on the face of the gerotor gears, it can be assumed that the gears can be installed in any position.
- Install the gerotor gears onto the crankshaft hub. Additional lubricant can be applied if desired/needed before installing the housing.
- Orient and install the oil pump housing over the crankshaft hub and gerotor gears. Recall that the housing must align with the dowel pins in the front engine cover.
- Fully seat the housing against the front engine cover, then install the fasteners hand tight.
- Snug the (4) housing bolts in a cross-cross, alternating fashion then torque to 20 ft-lbs in the same pattern.
- Clean any oil or assembly lube that may have leaked around the front cover during installation.
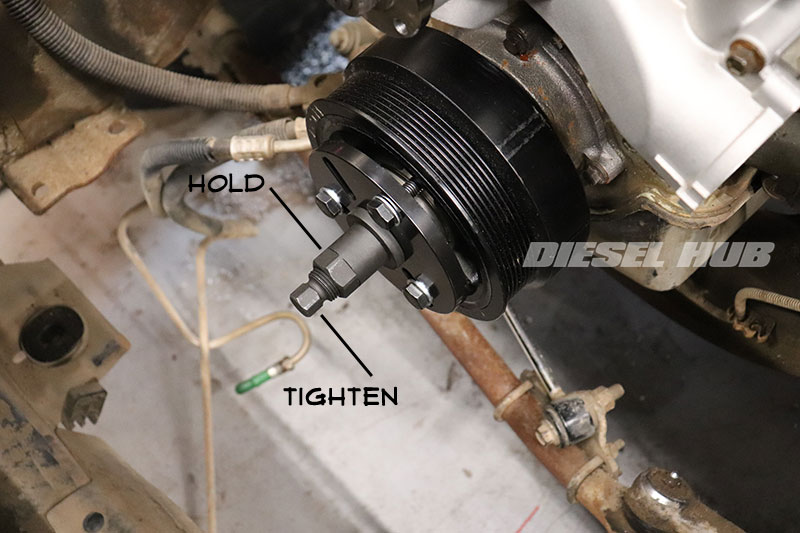
- Reinstall and properly torque down the crankshaft damper.
- Reinstall the camshaft position sensor.
- Reinstall the radiator and refill the cooling system.
- Reinstall the fan assembly, fan clutch, and shroud.
- Change the engine oil and oil filter.
- Check for leaks around the oil pump housing before and after running the engine.
Crankshaft Seal Replacement
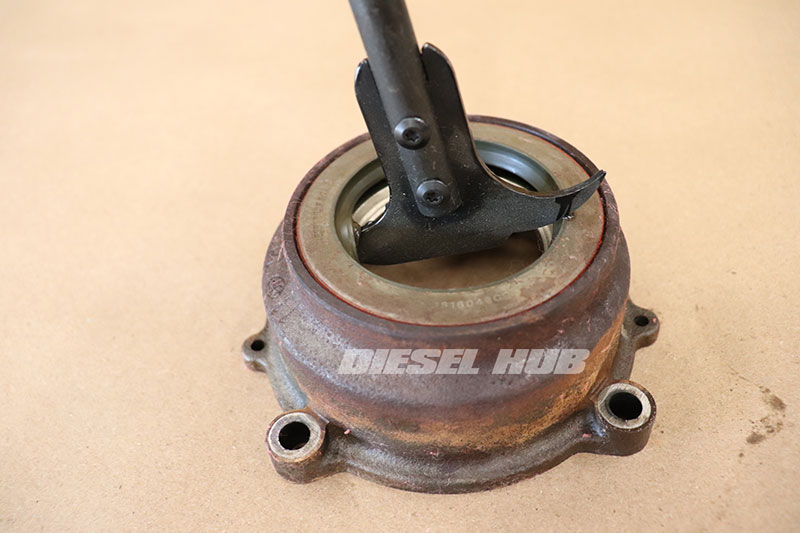
- Place the oil pump housing flat on a work bench. It may be useful to clamp the housing down as the crankshaft seal can take some effort to remove.
- Using a seal puller, work around the circumference of the seal and keep working it loose until it is removed. Avoid scratching the machined surface of the housing where the seal rests.
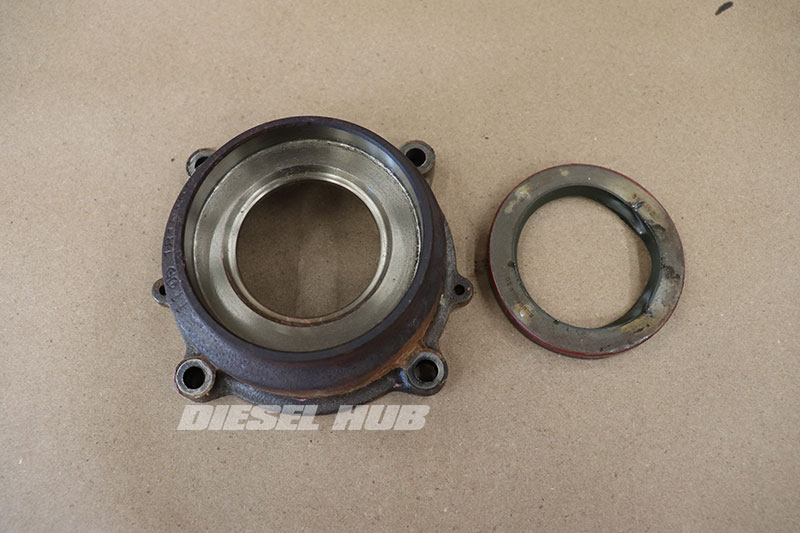
- For exceptionally stubborn seals, use a center punch to deform the seal in several areas until it separates from the housing and can be readily removed with a seal puller.
- If it is becomes necessary to chuck the housing in a vice to secure it, don't allow any of the critical surfaces to become scratched or marred.
- Clean the mounting surfaces of the housing with a shop rag and a shot of brake cleaner/carb and choke cleaner.
- Inspect the surface and ensure there are no defects that could impede the seal.
- The crankshaft seal is installed dry, thus ensure that the surfaces are oil free.
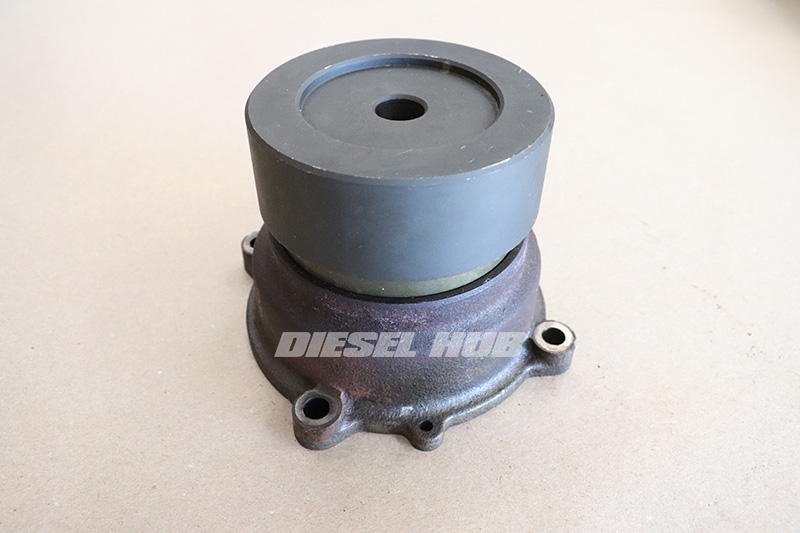
- Align and rest the replacement seal into place.
- Position the seal installer die atop the crankshaft seal, keeping everything aligned as square as possible.
- Fully seat the crankshaft seal by tapping the die with a hammer or using an arbor press (preferred). If using a hammer, keep the die square at all times to prevent damaging the seal.
- The die will contact the housing when the crankshaft seal is set to the appropriate depth and prevent the seal from being set too deeply into the housing.

