The problem with the fuel tank sock on a 6.5L diesel is that it easily clogs. Dirt, debris, and even algae that accumulates in fuel tanks will eventually clog the strainer. Even though the fuel tank sock has a bypass valve to prevent an engine from fuel starvation in the event it clogs, it's often found to be insufficient in providing adequate fuel flow. Unfortunately, the symptoms of a clogged fuel tank sock can often be identical to those related to a failed or weak lift pump. Furthermore, a clogged fuel tank sock can cause a lift pump to fail prematurely. As a result, we highly recommend replacing the lift pump and eliminating it from the equation while troubleshooting low/no fuel pressure conditions. Symptoms include low power, stalling, hard start condition, no start condition, misfire under load/acceleration, and similar problems with engine performance.
Replacing the fuel tank sock requires removing the pickup bed or dropping the fuel tank to access the sending unit assembly at the top of the fuel tank. Since both methods are somewhat cumbersome tasks, we recommend evaluating the following diagnostic procedures prior to determining that the fuel tank sock is the culprit: 6.5L GM diesel fuel system diagnostics.
Unfortunately, the fuel tank sock is often the last item to be replaced while chasing down problems related to low/no fuel pressure and performance issues. We recommend dropping the fuel tank instead of pulling the bed. In reality, pulling the bed is fairly easy and negates the need to drain the tank. However, the fuel tank strainer clogged for a reason and it is ideal to thoroughly clean the fuel tank when the strainer is replaced. Always check the condition of the fuel tank straps and all associated hardware. Replace any parts that are corroded or otherwise compromised - losing a fuel tank on the highway is somewhat of a safety hazard!
6.5L Diesel Fuel Tank Strainer/Sock Parts List
| Part Description | Part Number(s) | Remarks/Notes |
| Fuel tank sock/strainer | ACDelco TS1012 GM 25055272 |
[1] |
| Fuel tank sending unit gasket | ACDelco G10 | [2] |
| Fuel tank sending unit lock ring | ACDelco TR11 | [3] |
| Fuel filter | ACDelco TP1256F | [4] |
| Fuel filter housing retainer ring | ACDelco 12511963 | [5] |
| Fuel filter strainer | Stanadyne/Clarcor 29244 | [6] |
| Fuel pump cable | RT-290101 | [7] |
[1] Note that this part number is specific to the 6.5L diesel; gas engines require an alternative part that is not adequate for diesel applications.
[2] Do not reuse, gasket is likely to leak if not replaced.
[3] Replace if damaged/seal is compromised.
[4] Fuel filter should be replaced anytime the fuel system is repaired.
[5] Secures fuel filter inside fuel filter housing (fuel filter manager).
[6] Positioned below fuel filter in fuel filter housing.
[7] Eases fuel system bleeding by powering the fuel pump without cranking the engine.
6.5L Diesel Fuel Tank Strainer Replacement Procedures
The following procedures are based on dropping the fuel tank but the process is still applicable if you decide to pull the bed instead. You'll also see that we've decided to disconnect the lift pump and blow out the fuel lines for good measure.
Click any thumbnail to view fullsize, detailed image
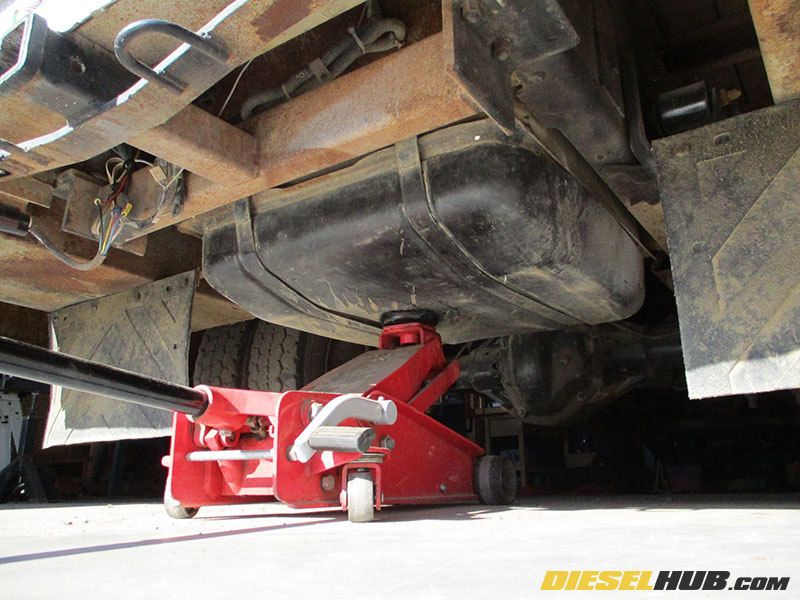
• Drain the fuel tank as much as possible - the less fuel in the tank, the lighter and less awkward it will be to maneuver when lowering it from the vehicle. Additionally, if the tank is heavy you will need to distribute the weight across it with a long board. If it's completely empty, the round pad on most floor jacks will suffice.
• Remove the fuel tank. You may need to drop it slightly before being able to reach the fuel lines. Do NOT put any pressure on any of the tank lines. Once you can access the lines, disconnect them and drop the tank completely.
There are two fuel lines - a fuel supply line and a return line - in addition to the filler neck and vent tube. You will also need to disconnect the electrical connector for the fuel level gauge sensor (chase the wire until you find the connector on the chassis).
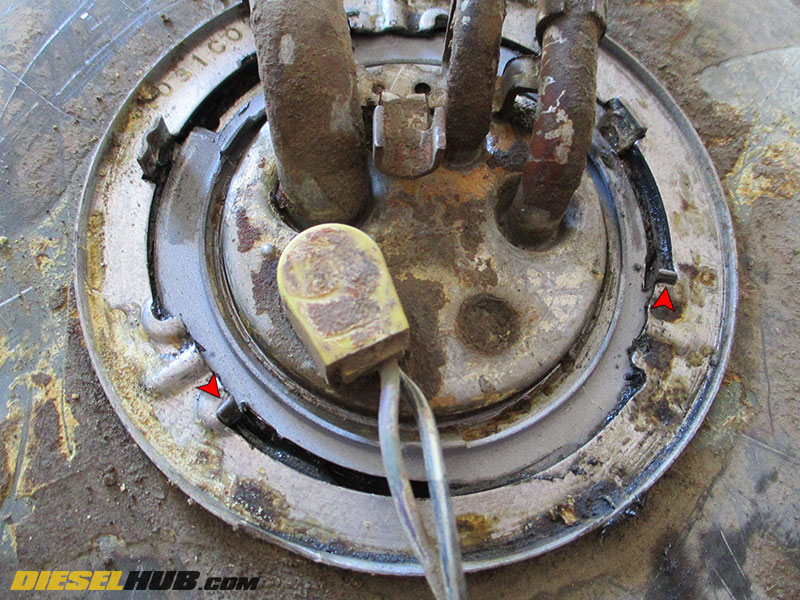
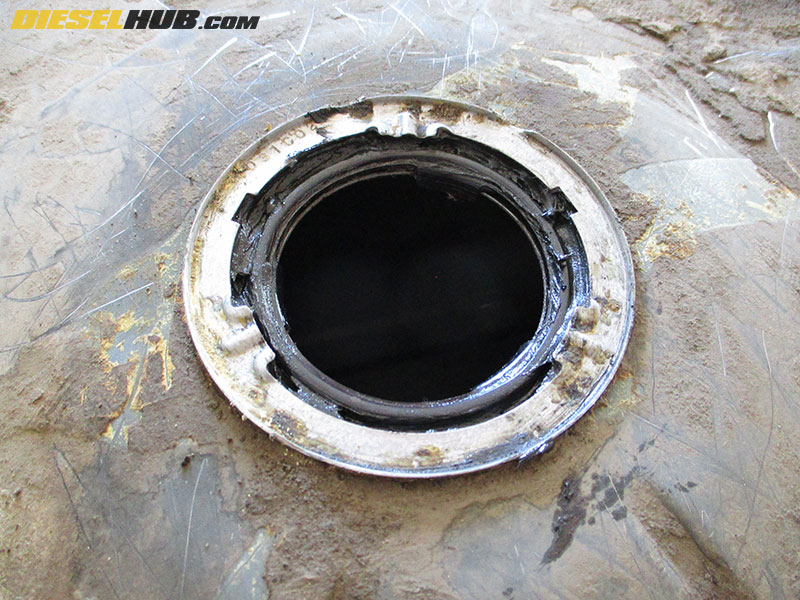
• Remove the sending unit by releasing the locking ring. The ring has 3 small tabs that you can gently tap with a punch in order to rotate the lock ring. Rotate the ring counterclockwise, as indicated in the image at left.
• Once the ring is removed, pull the sending unit upwards until the fuel level sensor is visible.

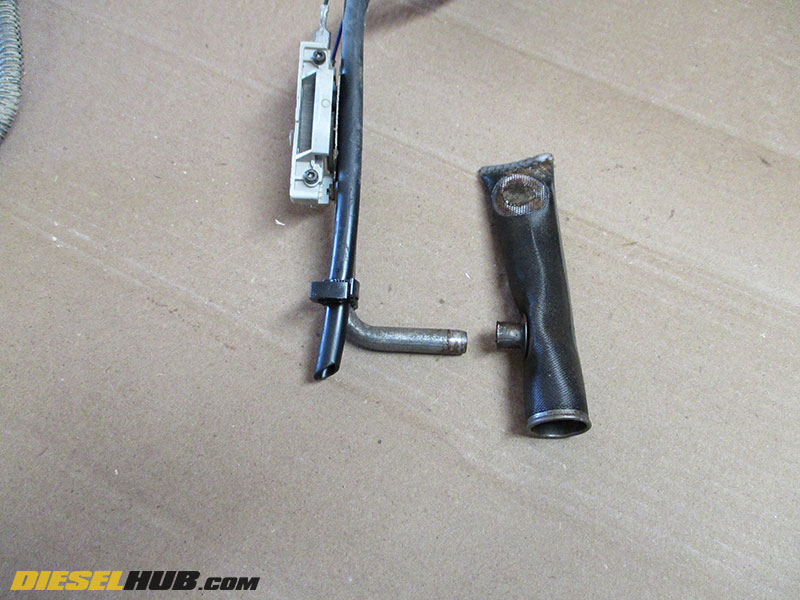
• Remove the fuel tank level float by unsnapping it from the sensor (see image at left for details). Once it is unsnapped, the rod will slide out of the sensor and the float can be pulled out.
• Once the float has been removed, maneuver the sending unit out of the tank.
• If the inside of the tank has visible debris or dirt, clean it out thoroughly.
• With the sending unit on a bench, remove the sock by grasping the metal fitting with a pair of pliers/Channel Locks. Rotate the strainer while pulling away from the fuel supply line to remove.
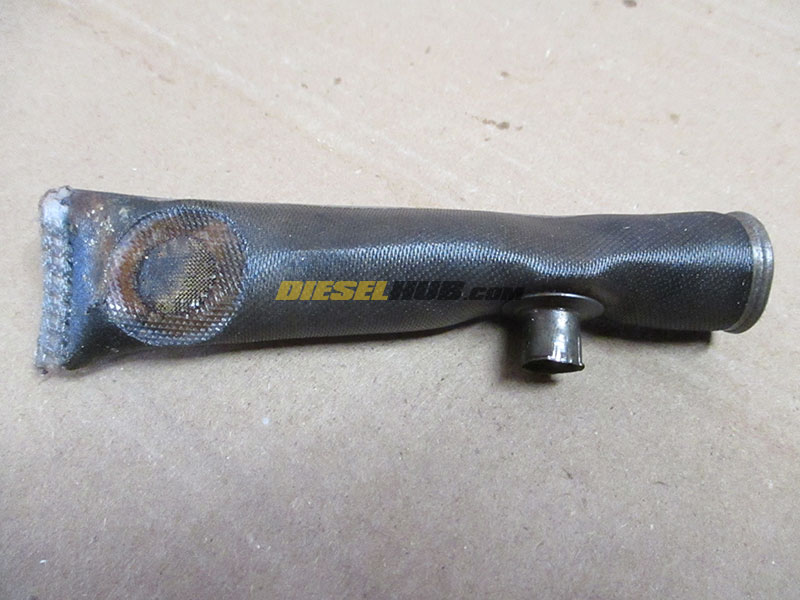
• While this straining sock looks dirty, it's difficult to say whether or not it's the primary problem with this truck's fuel system. There were considerable "flakes" of debris in the tank in addition to some dirt. We flushed the tank using dish soap and water, then dried it using shop rags and finally vacuumed it out to ensure the rags did not leave any lint.

• If there are o-rings on the fuel supply and return line fittings replace them with chemical resistant (Viton) o-rings. The supply line on this sending unit used a 011 o-ring while the return line used a 010 o-ring. Coat the o-rings in clean motor oil before reconnecting the fuel lines when the tank is reinstalled.

• Install the new fuel supply line sock. We used a small arbor press to ensure that it fully seated, as it is somewhat of a tight interfere fit and you do not want the strainer to fall off in the tank.
Note that the sock needs to be installed horizontally (parallel to bottom of tank) so that it pulls fuel from the lowest point. Do not install the long side of the strainer vertically.
• Discard the old sending unit gasket and clean up the area where the sending unit mounts if you have not already. Liberally grease the gasket then set it into place.

• Reinstall the sending unit in reverse order - drop the sending unit into the tank, then the fuel level float. Reinstall the fuel level float into the sensor, then set the hole unit completely in the tank. Note that sending unit has 2 large tabs that align it properly on the tank.
• Set the lock ring in place then tap it clockwise until the 3 small tabs hit the stoppers on the sending unit flange.
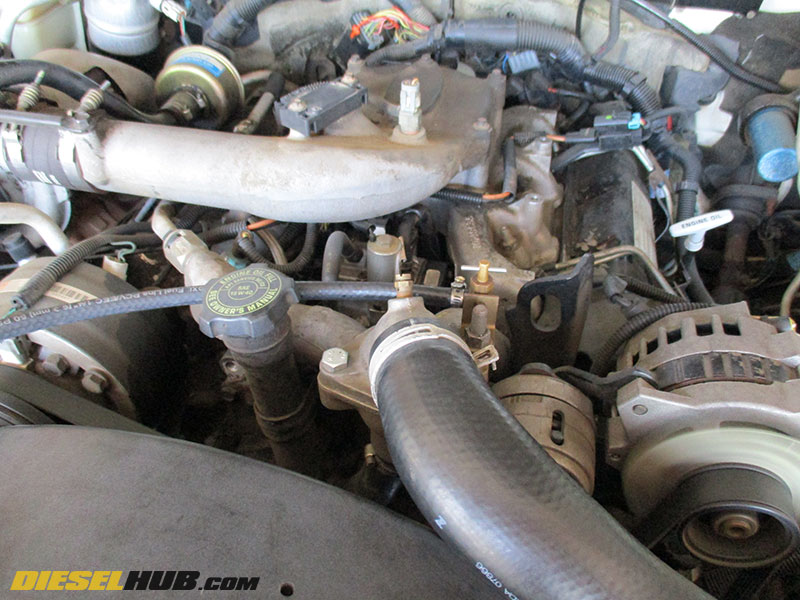
Blowing Out Fuel Lines on a 6.5L Diesel
• Remove the fuel pump and allow any fuel in the supply lines to drain into a suitable container.
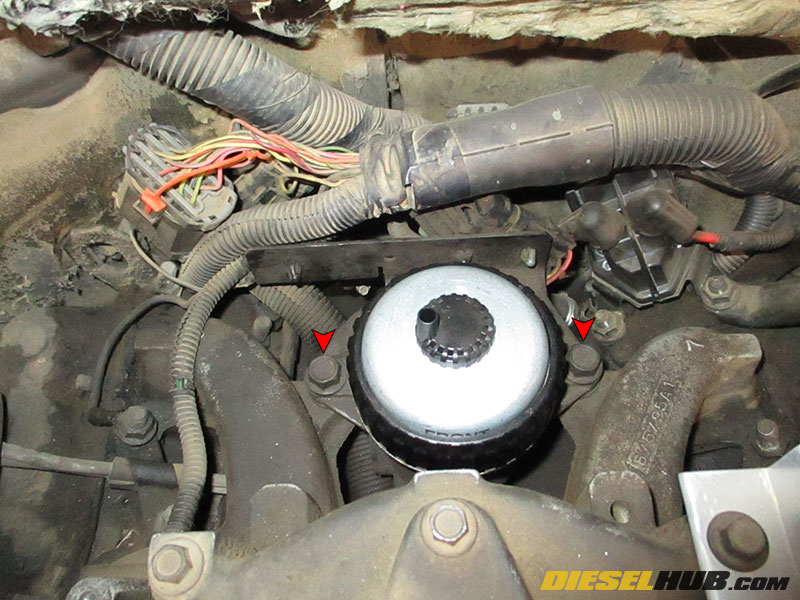
• Remove (unfasten) the series of electrical connectors from the bracket behind the fuel filter housing (FFM).
• Remove the two bolts holding the fuel filter housing to the intake manifold with a 15 mm socket.
• Remove the aforementioned bracket and set aside.
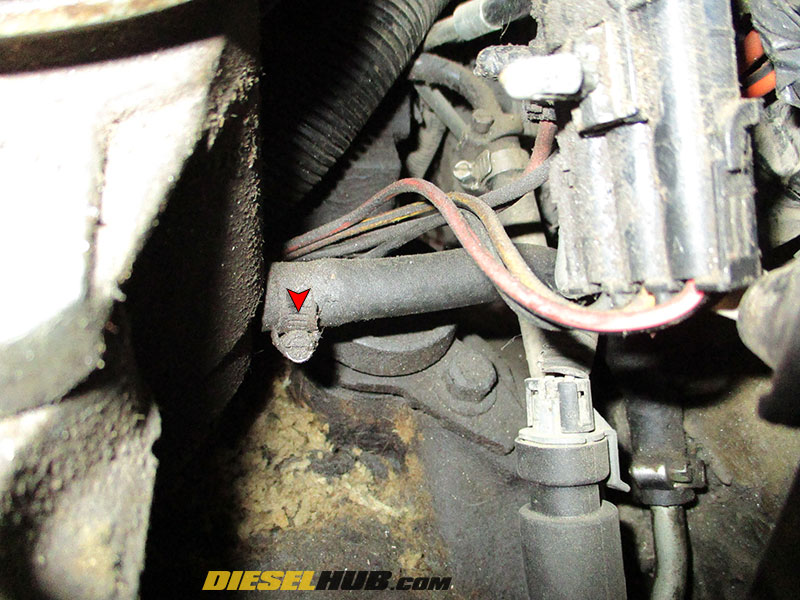
• Locate the fuel supply line on the back of the fuel filter housing, loosen the hose clamp, then remove it from the housing. Blow the line out using compressed air (~100 psi is appropriate) then reconnect the line to the fuel filter housing and tighten down the hose clamp. Reinstall the electrical connector bracket and tighten down the fuel filter housing bolts.
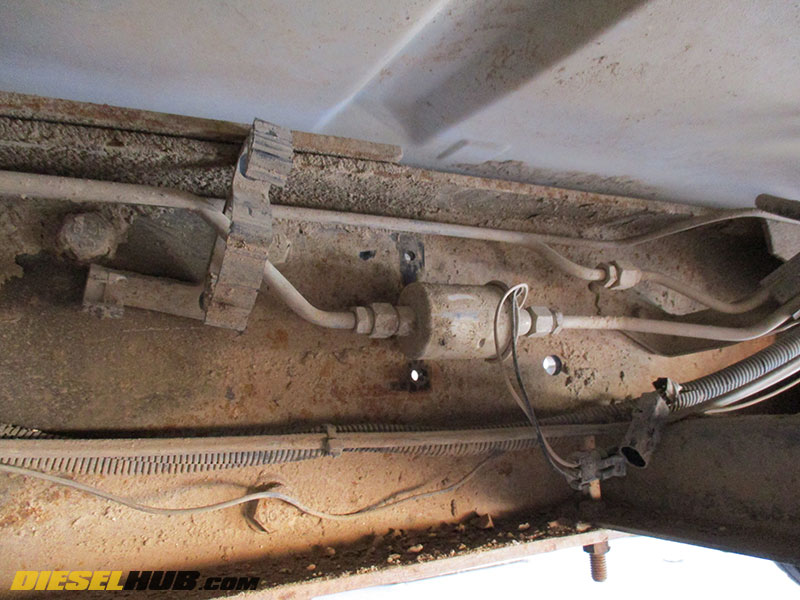
• From underneath the truck, blow out the fuel supply line towards the fuel tank (section of fuel line that connects the fuel pump to the fuel tank sending unit, do NOT blow air in the line towards the engine) then reinstall the fuel pump.
• Reinstall the fuel tank. Use new hardware/straps if any components appear compromised or corroded.
• Fill the fuel tank with diesel.
• Bleed all air from the fuel system then start and run the engine. See 6.5L GM diesel fuel system bleeding procedures for more information.
If you'd like to simply the process of bleeding air from the fuel system on any 6.5L GM diesel, please see: 6.5L GM Diesel Fuel Pump Cable. This tool will eliminate the need to crank the engine or cycle the key in order to run the fuel pump with the vehicle off. We highly recommend this convenient tool to any 6.5L diesel owner; simply plug it in and power the pump using the vehicle battery.
• Re-tighten fuel tank straps after driving.
